Openfire is a real time collaboration server. It uses XMPP protocol for instant messaging. This tutorial will help you to install and configure your won instant messaging server using Openfire and Spark. You can configure it to use in your LAN as well as over internet also.
Step 1 – Prerequisites
Before installing Openfire make sure you have java installed on your system. If you do not have Java installed use following tutorials to install Java on your system.
- How to Install Oracle JAVA 8 on Debian
- How to Install Oracle JAVA 8 on Ubuntu & LinuxMint
- How to Install Oracle JAVA 8 on CentOS/RHEL & Fedora
You also need to install Mysql server on the system (if using an external database). If you don’t MySQL installed, use the following to install it.
$ sudo apt install mysql-server# Debian systems $ sudo rpm install mysql-server# RPM based systems $ sudo dnf install mysql-server# Fedora 22+ systems
Step 2 – Download and Install Openfire
Use following command to download openfire or download the latest Openfire version from its official website.
RPM Based Systems:
$ wget http://download.igniterealtime.org/openfire/openfire-4.1.4-1.x86_64.rpm
$ sudo rpm -ivh openfire-3.8.2-1.i386.rpm
Debian Systems:
$ wget http://download.igniterealtime.org/openfire/openfire_4.1.4_all.deb
$ sudo dpkg -i openfire_4.1.4_all.deb
Start Openfire Service
# service openfire start
Step 3 – Create MySQL Database and User
Openfire provides an embedded database HSQLDB, If you want to go with that, you don’t to create MySQL account and database here. But if want to use MySQL, use the following commands to create MySQL database and user.
$ mysql -u root -pmysql> CREATE DATABASE openfire;mysql> GRANT ALL on openfire.* to 'openfire'@'localhost' IDENTIFIED BY 'pa$$w0rd';mysql> FLUSH PRIVILEGES;
Step 4 – Configure Openfire
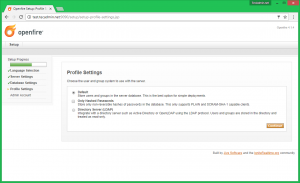
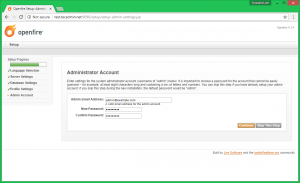
Openfire by default works on port 9090, Connect your server on port 9090 using the browser. It will open a configuration wizard, Follow the wizard and complete configuration. During wizard using above created MySQL credentials.
http://test.tecadmin.net:9090/
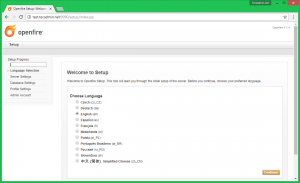
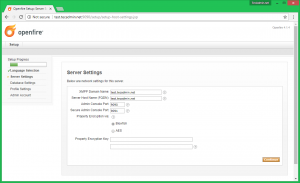
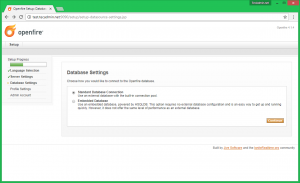
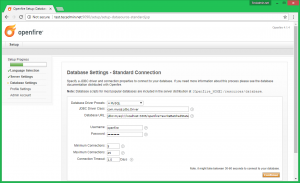

Step 5 – Create User in Openfire
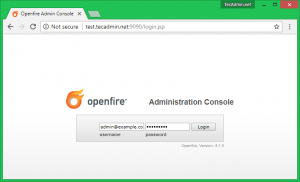
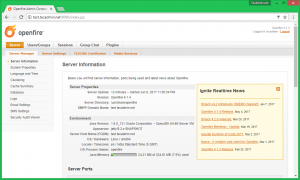
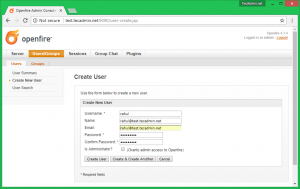
Login to Openfire admin dashboard using the admin account. Now go under Users/Groups sections then select Users section. Now click on Create New User link and enter the required details and create the user. Create the multiple users as you wants
Step 6 – Connect to Openfire
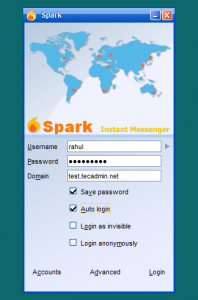
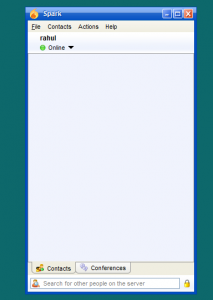
To connect to Openfire you need to download “spark” client software and install on your system. Download latest version of Spark for your operating system from its official website. Install spark client and log in to your account, or register new accounts.



9 Comments
Informative Article 🙂
what do i write in Database URL [SID] part (openfire setup). How do i get SID , i m using oracle database.
Very good article Rahul.
I’m have openfire and spark runing in a machine that performs as a server. Here I can connect with the user with no problem. But in another laptop in the same LAN, I downloaded the Spark but I am not able to connect to the domain. What could it be I am not doing properly to access from this second machine?
Skips a lot of steps
Hi Fernando,
I have updated the tutorial with latest packages, Please try now.
Hi, I installed Openfire and Spak successfully. I can create users and login to Spark but Spark keeps reconnecting, it’s never been online for a while.
Please help– issue–Spark keeps reconnecting.
Please help me create spark server, and how to create spark server
when i am typing mysql -uroot -p it is asking for password…i am giving root password
Rahul,
This is a great article with nice detailed steps, thank you.
Do you have an article how to add voip and video to OpenFire (assume the above tutorial has been completed)?