Remote Desktop Protocol allows users to access remote systems desktops. The XRDP service provides you a graphical login to the remote machines using Microsoft RDP (Remote Desktop Protocol). The XRDP also supports two-way clipboard transfer (text, bitmap, file), audio redirection, and drive redirection (mount local client drives on the remote machines).
XRDP is an easy-to-install and configurable service for Ubuntu systems. But you can also use a VNC server to access the remote desktop of the Ubuntu systems. Find a tutorial to install a VNC server on Ubuntu 20.04 systems.
This tutorial helps you to Install Remote Desktop (XRDP) on Ubuntu 20.04 Linux system. Also provides the instructions to install a Desktop environment on your system.
Step 1 – Install Desktop Environment
By default, Ubuntu Server does not have an installed Desktop Environment. XRDP server is designed to control only desktop systems. So you will need to add a desktop environment to your system.
Open a terminal and upgrade all installed packages with the following command:
sudo apt update && sudo apt upgrade
Once your system is updated, install the Tasksel utility to install a desktop environment:
apt install tasksel -y
After installing Tasksel, launch the Tasksel utility with the following command:
tasksel
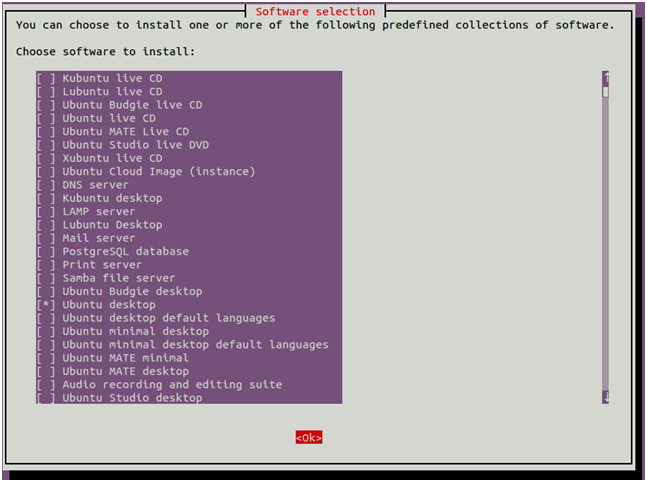
You should see the following interface:
Use the arrow key to scroll down the list and find Ubuntu desktop. Next, press the Space key to select it then press the Tab key to select OK then hit Enter to install the Ubuntu desktop.
Once all the packages are installed, you will need to set your system boots into the graphical target. You can set it with the following command:
systemctl set-default graphical.target
Next, restart your system to apply the changes.
Step 2 – Installing XRDP on Ubuntu
The Xrdp packages are available under the default system repositories. You can install a remote desktop on your Ubuntu system by executing the following command.
sudo apt install xrdp -y
Once the xrdp installation finished successfully, its service will be started automatically. To verify the service status run the command:
sudo systemctl status xrdp
The above output shows the Xrdp service is up and running.
Step 3 – Configuring Xrdp
During the installation, xrdp added a user in your system named “xrdp”. The xrdp session uses a certificate key file “/etc/ssl/private/ssl-cert-snakeoil.key”, which plays an important role with remote desktop.
In order to work it properly, add the xrdp user to the “ssl-cert” group with the following command.
sudo usermod -a -G ssl-cert xrdp
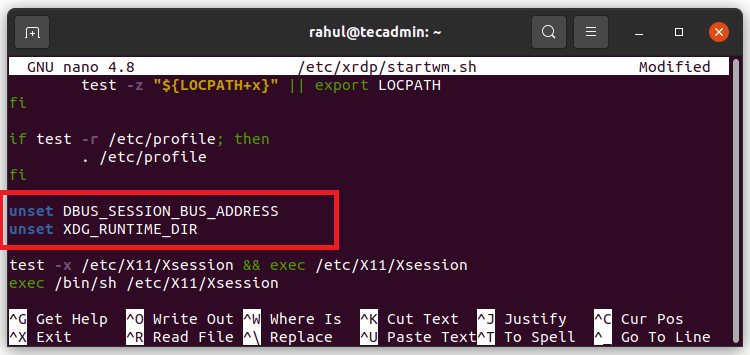
Sometimes user faces issue with black screen appears in background. So, that I ahave included steps to resolve black screen issue in background. Edit the xrdp file /etc/xrdp/startwm.sh in a text editor:
sudo nano /etc/xrdp/startwm.sh
Add these commands before the commands that test & execute Xsession as shown below:
unset DBUS_SESSION_BUS_ADDRESS
unset XDG_RUNTIME_DIR
Press CTRL+O to write out and then CTRL+X to exit from the editor.
Restart the Xrdp service by running the command given below:
sudo systemctl restart xrdp
Step 4 – Adjust Firewall
The Xrdp listens on port 3389, which is the default port for the RDP protocol. You need to adjust the firewall to allow access to port 3389 for remote systems.
Systems running with UFW firewall, use the following command to open port 3389 for the LAN network.
sudo ufw allow from 192.168.1.0/24 to any port 3389
Reload the UFW to apply the new rules.
sudo ufw reload
All right, Your system is ready to access over RDP protocol.
Step 5 – Connect to Remote Desktop
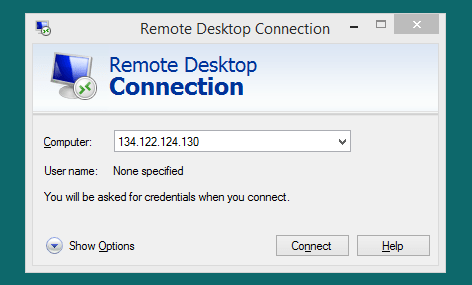
The Xrdp service is successfully installed and ready to connect. On your Windows client, open the RDP client and enter the IP address of the Ubuntu system.
You can launch the RDP client by typing "mstsc" in the run window or command line.
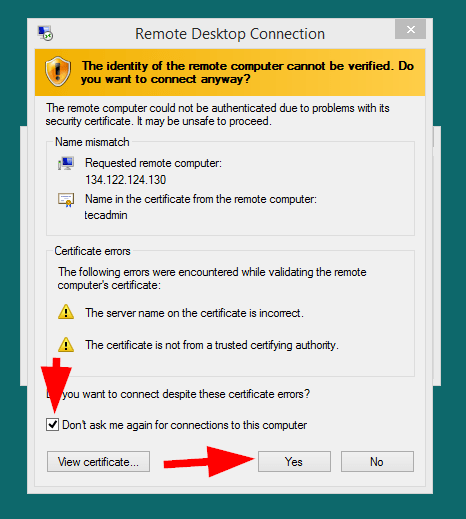
The first time, it will prompt a warning message due to the remote system being unknown to your system. Check the box in front of “Don’t ask me again for connection to this computer” and click Yes to continue.
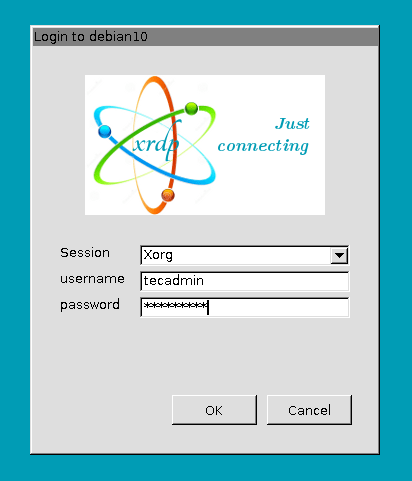
Once connected successfully, the remote system prompt for authentication. Enter the login credentials of the remote Ubuntu system to get remote desktop access.
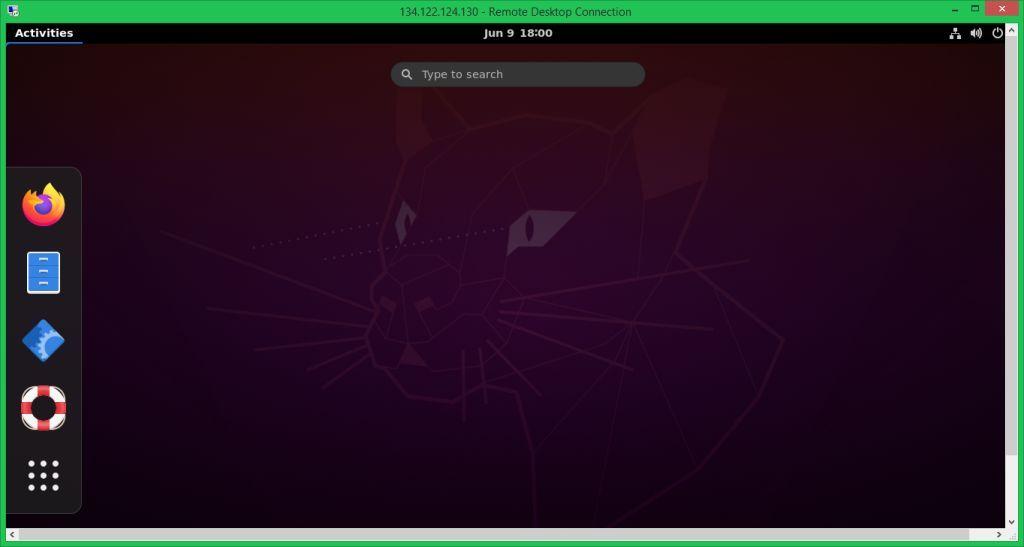
On successful authentication, you’ll get remote desktop access.
Now, you can manage your remote Ubuntu system graphically.
Conclusion
This tutorial helped you to set up a remote desktop service on Ubuntu 20.04 system with Xrdp. The tutorial also includes steps to install Desktop Environment on a Ubuntu system.


13 Comments
Remember to do “sudo apt install dbus-x11” if you do not already have it installed to support RDP.
After going through this, my remote linux system gets disconnected from the server after 5 or 10 minutes. After that, I cannot access the remote server even using ssh command until I go into the server room and restarts them.
I get the message
Your Remote Desktop Services session has ended.
The connection to the remote computer was lost, possibly due to network connectivity problems. Try connecting to the remote computer again. If the problem continues, contact your network administrator or technical support.
After going through this, my remote linux system gets disconnected from the server after 5 or 10 minutes. After that, I cannot access the remote server even using ssh command until I go into the server room and restarts them.
I can get the X11 remote desktop to run …. but very very slow
perhaps there are settings I dont have properly configured?
i am running Ubuntu 20.04 on server, win 10 on client
both are new-ish and network is fast
thank you so much.
Thank you very much. It worked
Much thanks for this tutorial. It’s completely full and simple to understand.
Nice tutorial.
But when password is entered inside the remote connection xrdp dialog the connection closes.
Hi
After I finish the first step 1, I can’t log in to my machine via SSH. How can I solve this~
Hello,
Did you solve this? I had exactly the same thing happen to me….
sudo ufw allow 22
Thanks for the awesome tutorial.
Heads up for anyone who wants to remote log in over the Internet, you can skip the firewall config part and leave access only through the local host, then port forward your connection through an ssh session.
I am getting prompted to Click or press a key to unlock so this isn’t working.