GitHub Actions provides a powerful toolset for automating, customizing, and executing your software development workflows right in your repository. It allows you to build, test, and deploy your code directly from GitHub. But what if you’re working with a monorepo, or your workflow lives within a subdirectory of your repository? In this article, we will guide you through the process of running GitHub Actions within subdirectories, ensuring you maximize the potential of your development workflow.
What You Will Need
To follow this guide, you will need:
- A GitHub account with access to the repository you wish to work on.
- A basic understanding of GitHub Actions and YAML syntax.
- A project repository with a subdirectory where the workflow should be executed.
Step-by-Step Instructions
Step 1: Access Your Repository
Navigate to your GitHub account, and access the repository in which you would like to set up a GitHub Action.
Step 2: Create Your Workflow File
Create a new file in the .github/workflows directory at the root of your repository. This file should have a .yml or .yaml extension, e.g., main.yml.
Step 3: Define the Workflow
Now, it’s time to define your workflow within the YAML file. A typical workflow begins with a name and the events that trigger it. For instance:
1 2 3 | name: Run Tests in Subdirectory on: [push, pull_request] |
This YAML file defines a workflow that runs whenever a commit is pushed, or a pull request is made to the repository.
Step 4: Define Jobs
After defining when the workflow should be triggered, the next step is to define what it should do. GitHub Actions performs these activities via jobs. Each job runs on a runner machine. You can specify the type of runner machine that the job should run on, using the runs-on keyword. For instance, to run on the latest Ubuntu version, you can use runs-on: ubuntu-latest.
Here’s how you define a job:
1 2 3 4 | jobs: build: name: Run tests runs-on: ubuntu-latest |
Step 5: Define Steps
Jobs are made of a series of steps. Each step can run commands or actions.
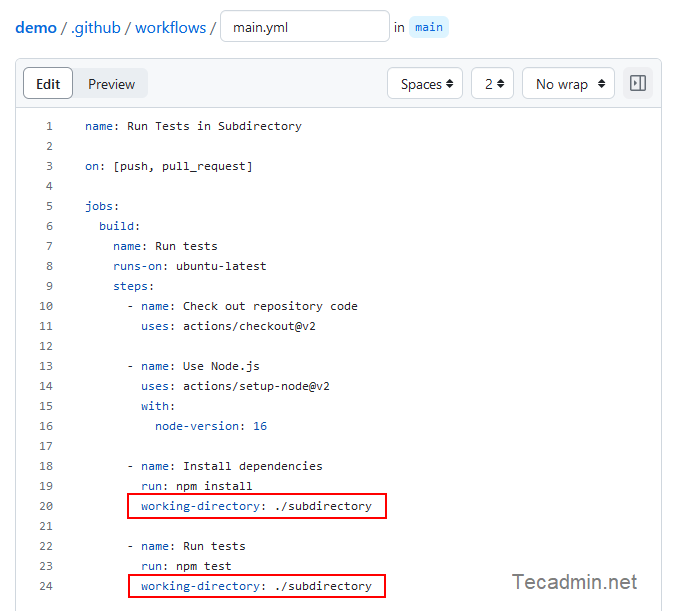
When it comes to running tasks within a subdirectory, you will need to make use of the `working-directory` keyword. This keyword allows you to specify the working directory of where the step’s command is executed.
Here is an example of running npm install and npm test in a subdirectory:
1 2 3 4 5 6 7 8 9 10 11 12 13 14 15 16 | steps: - name: Check out repository code uses: actions/checkout@v2 - name: Use Node.js uses: actions/setup-node@v2 with: node-version: 16 - name: Install dependencies run: npm ci working-directory: ./subdirectory - name: Run tests run: npm test working-directory: ./subdirectory |
In this example, we first check out the repository’s code using the actions/checkout@v2 action. Then, we set up Node.js using the actions/setup-node@v2 action. The remaining steps — installing dependencies and running tests — are performed within the specified subdirectory.

Step 6: Save and Push Your Workflow
After setting up your workflow, save your .yaml file and push your changes to the repository. GitHub Actions will automatically pick up this file and start executing the workflow based on the triggers you’ve defined.
Conclusion
And there you have it! You can now run GitHub Actions within a subdirectory of your repository. As we’ve seen, it’s as straightforward as setting the working-directory option in your workflow file. Keep in mind that running actions in subdirectories is not limited to Node.js or npm commands, you can execute nearly any action in a subdirectory by setting the appropriate working-directory. Happy coding!
