

The Zabbix server has many templates ready to use, making it easy to add them to your hosts. If you’re reading this, you probably have Zabbix server on your main server and Zabbix clients on the remote systems you want to monitor. For help installing Zabbix Server and Client on different operating systems, check these guides:
- Installation on Ubuntu, Debian – Zabbix Server and Zabbix Agent
- Installation on CentOS, RedHat – Zabbix Server and Zabbix Agent
- Installation on Windows – Zabbix Agent
There are two main ways to add remote hosts to your Zabbix server. The first way is an automatic network scan by Zabbix, which adds all found hosts to your server. The second way is manually adding each host.
This guide will show you how to add hosts manually. Here are the steps to add your first Linux-based host:
Adding a New Host to Zabbix
- First, log into your Zabbix web admin panel with an admin account.
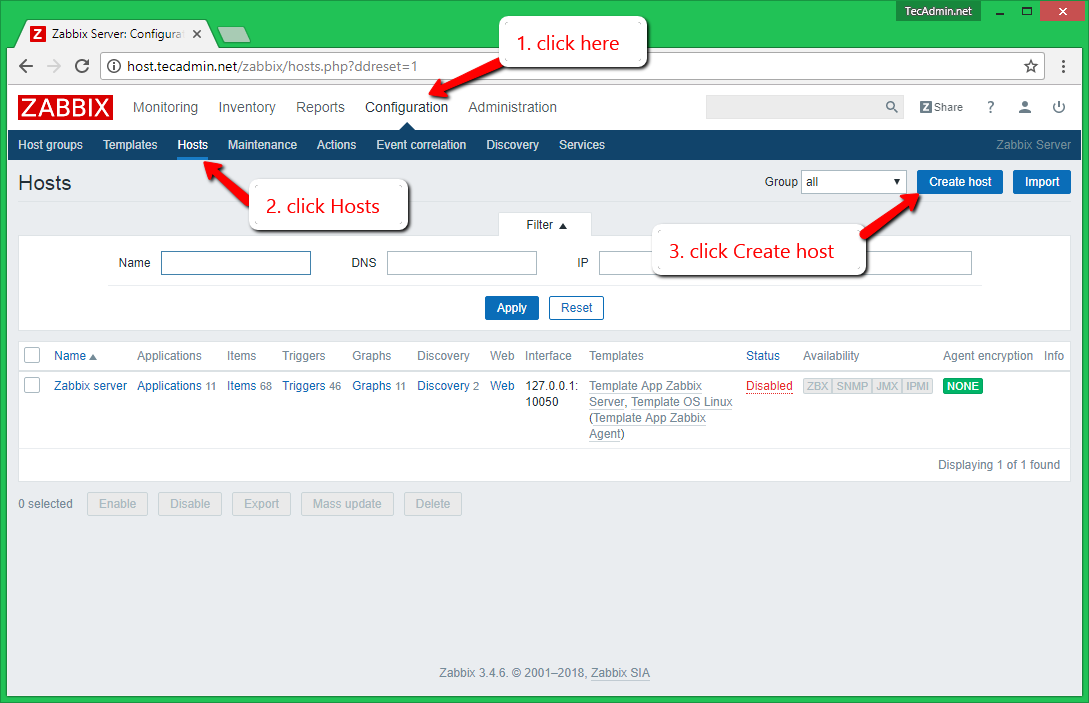
- Follow these steps (also shown in the screenshot):
- Go to the ‘Configuration’ menu.
- Click on the ‘Hosts’ submenu.
- Click on ‘Create Host’ on the right-hand side.
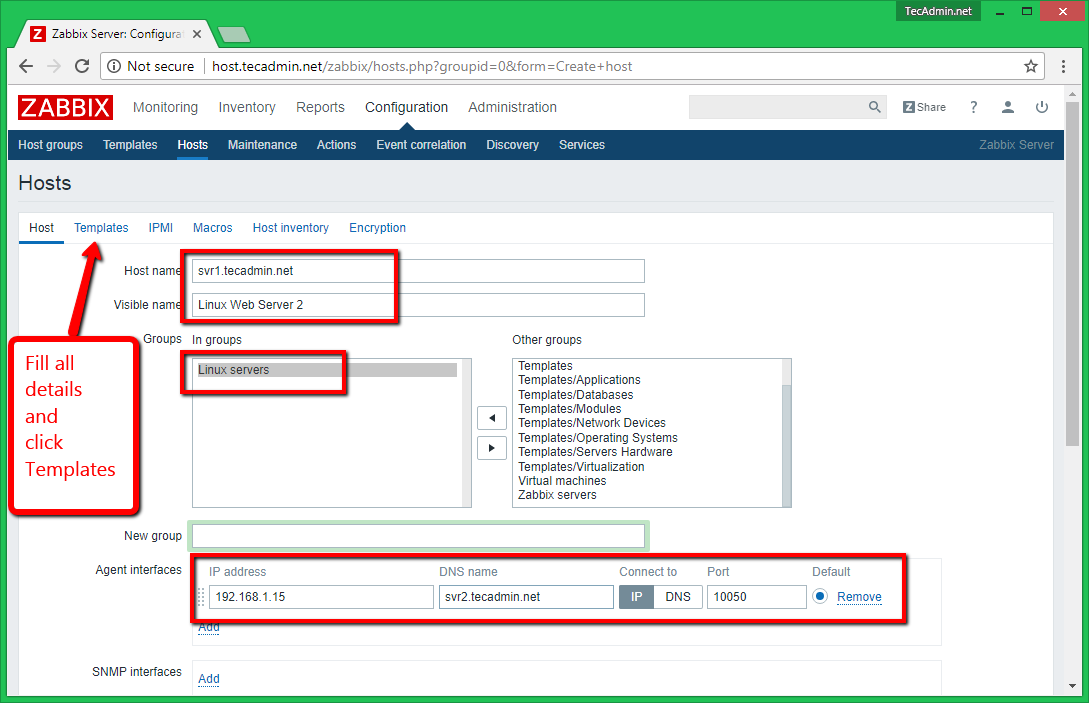
- Enter the details of your remote host and go to the ‘Templates’ tab:
- Hostname: Type the hostname of the remote system.
- Visible Name: Give a display name in Zabbix.
- Group: Choose a group for your host.
- Agent Interface: Enter details of the Zabbix agent on the host.
- Enabled: Make sure this is checked to activate.
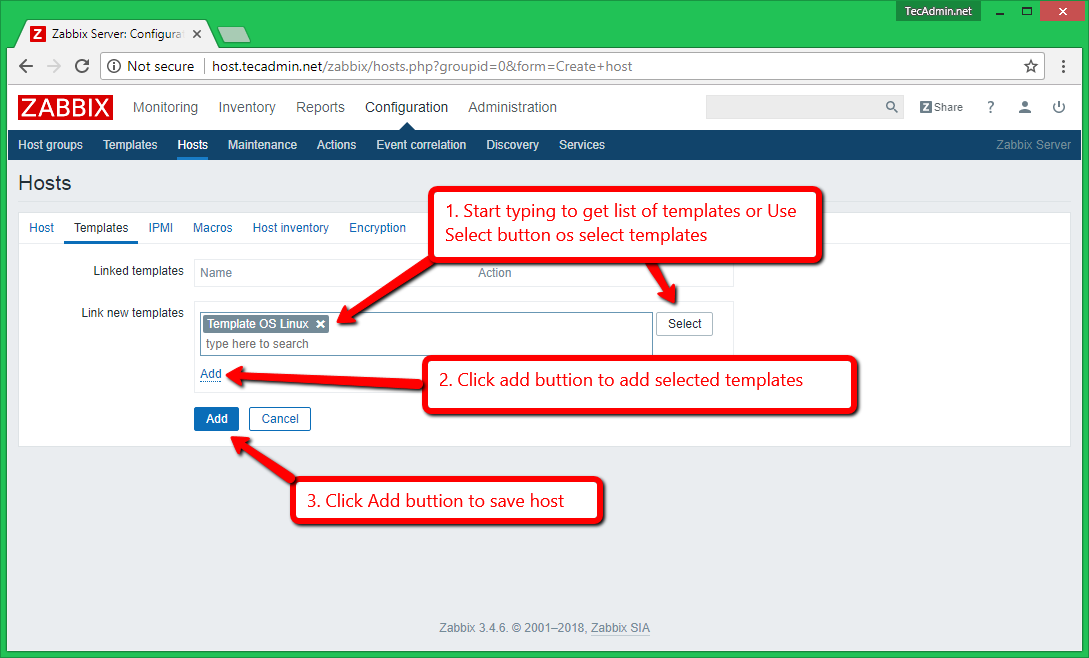
- Pick a Template. This will decide the checks for the host.
- Click the ‘add’ link.
- Then click the ‘save’ button.
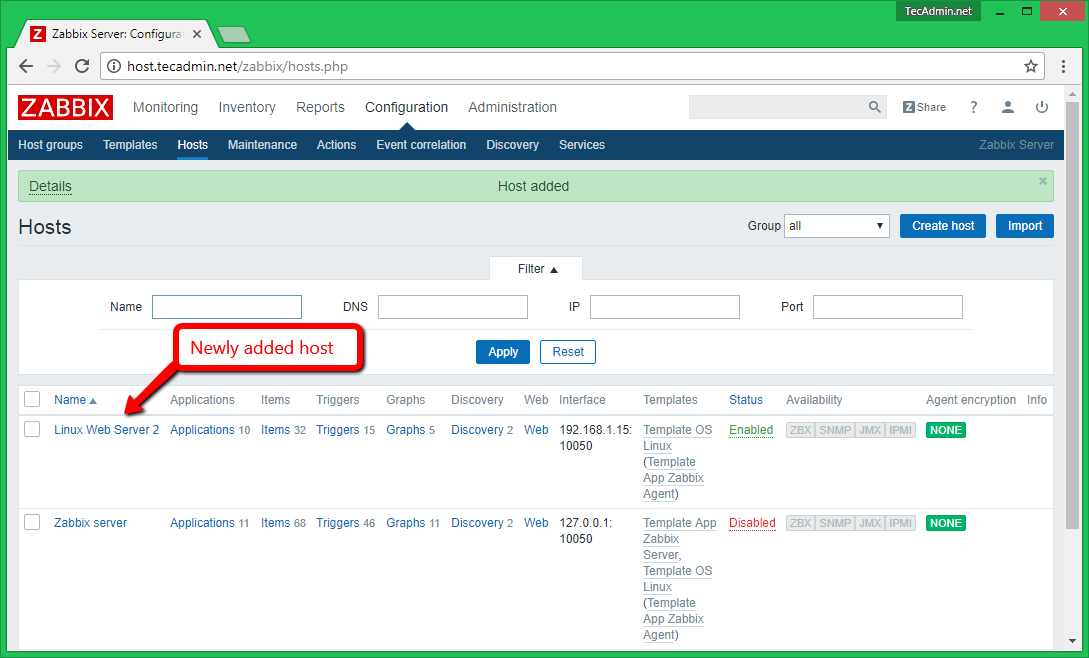
- The new host will now be listed under hosts.
Congratulations! You have added a new host to your Zabbix server. To add more hosts, repeat these steps.
How to Access Graphs in Zabbix
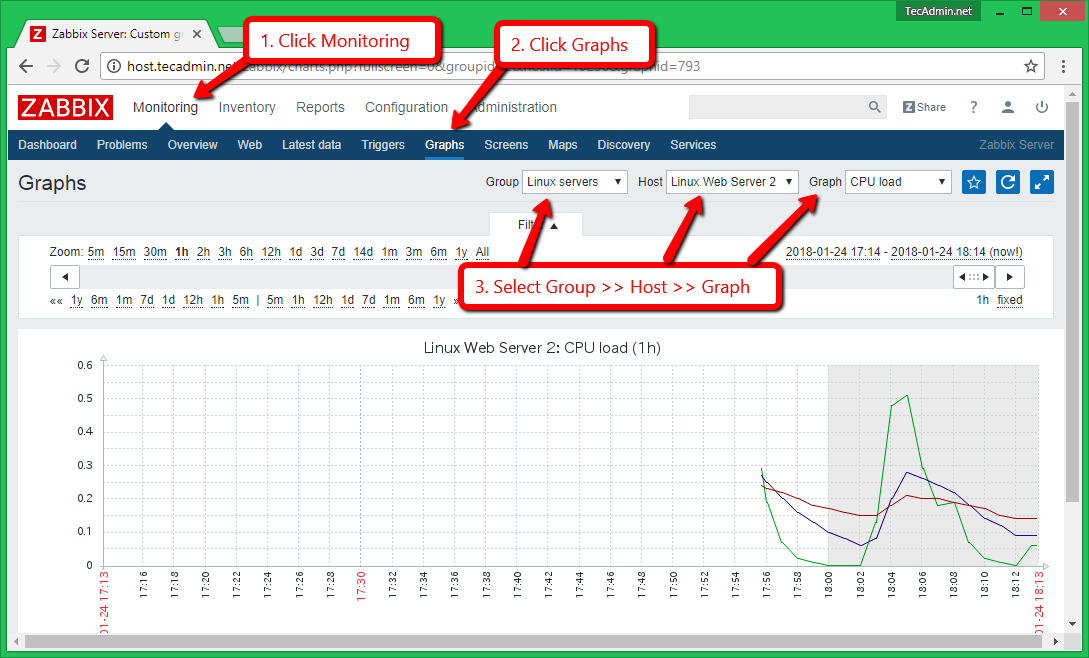
Graphs are very useful for new users. The screenshot below shows how to view graphs in Zabbix. After adding a host, wait a while for Zabbix to collect data from the remote host, which will then appear in the graph.
Conclusion
This guide explained how to add new Linux hosts to your Zabbix server manually. This is important for good network monitoring. The steps are easy to follow and help you connect your remote systems to Zabbix for monitoring. By following these steps, you can keep track of your network’s performance and health. It is important to pick the right templates for each host to get accurate data. The guide also briefly explained how to view graphs in Zabbix, which is essential for checking the performance and status of your hosts. This guide is useful for both beginners and experienced users to improve their network monitoring with Zabbix.
Thank you for using this guide. If you found it helpful, please share it with your colleagues and friends.
How did it make you feel?

Hello guys.
The avainilbity still grey
When i add a host i get this error:
Get value from agent failed: cannot connect to [[10.89.0.19]:10050]: [4] Interrupted system call
Hi
I followed the instruction and I get this error message on my zabbix log file:
[Z3001] connection to database ‘zabbix’ failed: [1044] Access denied for user ‘zabbix’@’localhost’ to database ‘zabbix’
It’s helpful article. And as you wish I’ll forget to share it with anyone.
here a nice lab for Zabbix begginers and IT professionals…
Thanks for writing this article. It helped a lot in setting up an Asterisk Agent. Your pictures are very easy to understand. Would be nice to know more about active and passive agents.
iam configuring zabbix server how to get email alerts to my mail
Good article. Very helpfull for people learning zabbix