As an avid user of Windows programs, you might have found that at times you need to use a particular program on your Ubuntu system. Though there are other options (like virtual machines or programs like Wine, which helps with running Windows programs on Linux), they involve a bit of work and aren’t exactly the most seamless ways of running these programs. Fortunately, WineHQ is an excellent solution for running Windows programs on your Ubuntu computer.
In this article, you will learn how to install WineHQ on Ubuntu so you can easily run those pesky Windows programs whenever you need them. This tutorial consists:
- What is Wine?
- Download wine source code
- Compile and install wine from source
- Run Windows programs on Linux using wine
- Conclusion
Let’s begin the installation:
What is Wine?
Wine, which stands for Wine Is Not an Emulator, is a way of running Windows programs on other operating systems. It allows Windows programs to run on Linux and macOS without requiring a Windows license or virtual machines. The program has been in development since the early 90s and has evolved throughout the years to become a very reliable way to run Windows programs on other operating systems. That being said, there are some caveats to running Windows programs on other operating systems with Wine.
For example, it may not always be possible to run all of the programs on your computer. Additionally, the programs might not always run as quickly as they would if they were running on Windows. That said, Wine is a great, free solution for running Windows programs on your Ubuntu computer when necessary.
Step 1: System Preparation
To build Wine from source code needs build essentials tools, gcc compiler and large number of development packages.
Open a terminal with sudo privileged account and first update the apt cache:
sudo apt update
Then install the required packages on your system.
sudo apt install build-essential gcc-multilib gcc-mingw-w64 libasound2-dev libpulse-dev libdbus-1-dev libfontconfig-dev libfreetype-dev libgnutls28-dev libgl-dev libunwind-dev libx11-dev libxcomposite-dev libxcursor-dev libxfixes-dev libxi-dev libxrandr-dev libxrender-dev libxext-dev bison flex
Step 2: Download Wine Source Code
After installing all the required packages, download the latest Wine source code from its official websites. As of writing this tutorial, Wine 8.0 is the latest version.
Use the following commands to download Wine source code and extract it:
wget https://dl.winehq.org/wine/source/8.0/wine-8.0.tar.xztar -Jxf wine-8.0.tar.xz -C /tmp
All the files will be extracted under /tmp/wine-8.0 directory.
Step 3: Compiling Wine Source Code
Use the ./configure script to prepare the source for the installation based on the system hardware. This will create the Makefile for the compilation and set the installation environment for Wine according to your system.
Switch to wine source code directory with cd command:
cd /tmp/wine-8.0
Then configure the source code with ./configure script. On 64 bit systems, make sure to use –enable-win64 command line parameters as given below:
## For 32-Bit Systems: ./configure## For 64-Bit Systems: ./configure --enable-win64
Finally, run the make and make install command to compile the wine source and install it on your system.
makemake install
The source code compilation takes some time to complete based on the resources available in system hardware. Wait for the installation to complete successfully.
Step 4: Verify Installation
Use the following command to check the version of wine installed on your system
## On 32-Bit Systems: wine --version## On 64-Bit Systems: wine64 --version
You should see the wine-80 in output.
Step 5: Configuring Wine
The next step is to configure the WineHQ package. To do this, run the following command:
On your Debian systems, you can configure Wine for the “32-bit” and “64-bit” Windows applications. In our case, we are setting the Wine environment for the “32-bit” system:
winecfg
The Wine configuration will start updating in your “home” directory:

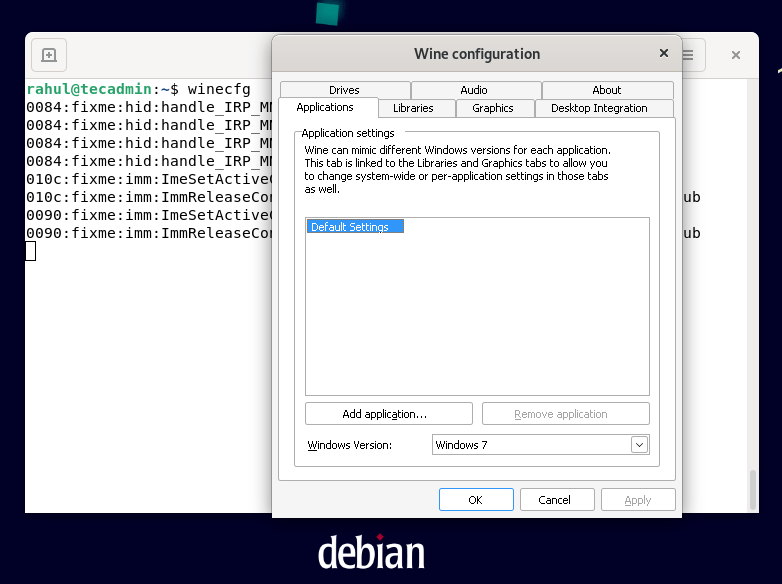
After completing the update process, the following Wine configuration dialog box will appear on your screen. You can utilize it for tweaking different options.
For instance, we will move open the “Applications” tab and set the Windows Version as “Windows 7”:
To change the appearance-related settings, switch to the “Graphics” tab and set the options according to your requirements.
That was the basic method related to the installation and configuration of Wine on Ubuntu 22.04.
Run Windows Programs on Linux with WineHQ
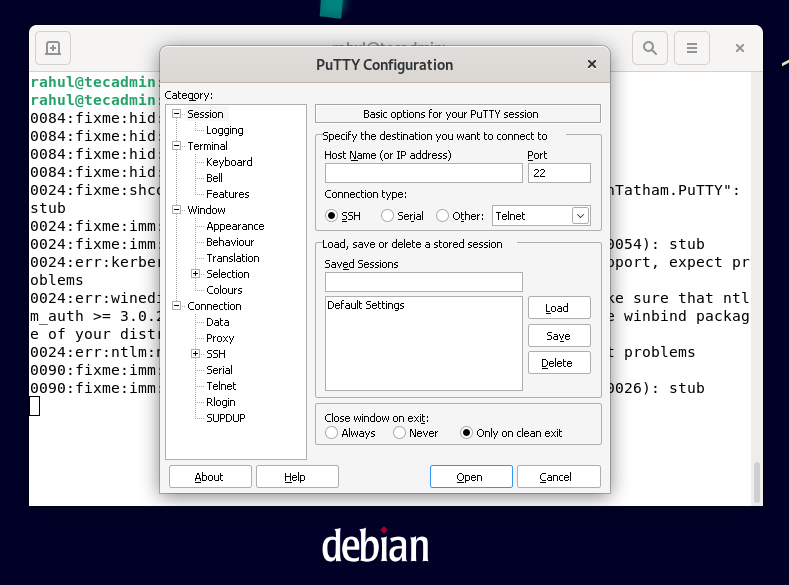
Now that you’ve installed WineHQ on your Debian-based system and configured it. it’s time to start running those pesky Windows programs. For the testing purposes, I have downloaded a small windows execution file putty.exe and launched it with Wine application.

Conclusion
WineHQ is an excellent way of running Windows programs on your Ubuntu computer. The program is very easy to install and configure on Ubuntu. Furthermore, it allows you to run Windows programs on your Debian computer when you need to. Overall, it’s an excellent, free solution for running Windows programs on your Ubuntu computer.
