In the realm of programming, understanding how to work with dates and times is crucial for a vast array of applications, from scheduling systems to historical data analysis. Among these tasks, determining whether a year is a leap year is a common challenge. Leap years, which have 366 days instead of the usual 365, add a day to February to keep our calendar in alignment with the Earth’s revolutions around the Sun. This article provides a comprehensive guide on how to master leap year calculations in Java, offering a deep dive into the logic behind leap years and showcasing how to implement this functionality in your Java applications.
Understanding Leap Years
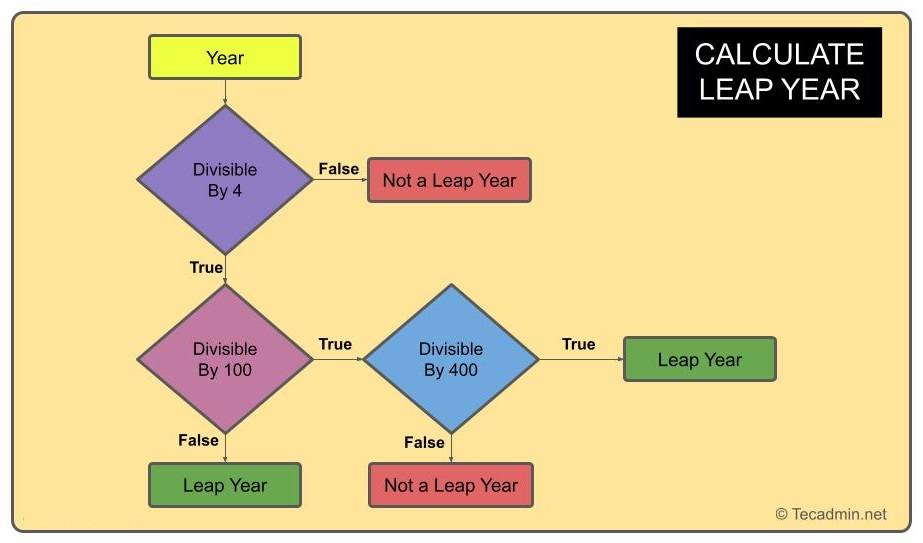
Before diving into the code, it’s important to understand what makes a year a leap year. According to the Gregorian calendar, which is the most widely used civil calendar today, a year is a leap year if it is:
- Divisible by 4, but not divisible by 100, or Divisible by 400.
This means that years like 2000 and 2020 are leap years because they meet these criteria. However, years like 1900 and 2100, despite being divisible by 4, are not leap years because they are divisible by 100 and not divisible by 400. You should also read: What is a Leap Year? and Why?

Implementing Leap Year Logic in Java
To implement leap year calculations in Java, you can use a simple method that takes an integer representing the year as its parameter and returns a boolean indicating whether the year is a leap year. Below is a step-by-step guide to creating this functionality:
Step 1: Setting Up the Environment
Ensure you have Java installed on your system and set up an Integrated Development Environment (IDE) of your choice, such as Eclipse or IntelliJ IDEA, to write and run your Java program.
Step 2: Writing the Leap Year Calculation Method
Open your IDE and create a new Java class named LeapYearCalculator. Within this class, implement the following method:
public class LeapYearCalculator {

    public static boolean isLeapYear(int year) {
        if ((year % 4 == 0 && year % 100 != 0) || (year % 400 == 0)) {
            return true;
        } else {
            return false;
        }
    }
}
This method utilizes the rules for identifying leap years by checking if the year is divisible by 4 but not by 100, unless it’s also divisible by 400.
Step 3: Testing the Method
To verify that your isLeapYear method works correctly, you can create a simple main method within the LeapYearCalculator class to test various years:
public static void main(String[] args) {
    int[] years = {1900, 2000, 2024, 2100};
    for (int year : years) {
        System.out.println(year + " is a leap year? " + isLeapYear(year));
    }
}
Running this program should output:
1900 is a leap year? false
2000 is a leap year? true
2024 is a leap year? true
2100 is a leap year? false
Step 4: Refining and Expanding
Now that you have a basic leap year calculator, consider refining it by adding error handling for negative years or years far into the future. Additionally, you could expand this functionality into a larger date and time utility class, incorporating more complex calendar calculations.
Conclusion
Mastering leap year calculations in Java is a valuable skill that enhances your understanding of date and time manipulation in programming. By following the steps outlined in this guide, you can effectively implement leap year logic in your Java applications, paving the way for more advanced date and time processing tasks. Whether you’re building a calendar application, scheduling system, or historical data analysis tool, the ability to accurately calculate leap years is an essential component of your programming toolkit.
