Python is a widely used programming language that developers use all over the world. Python is usually pre-installed on Ubuntu, a popular Linux distribution, but occasionally you might require a different version. The most recent version of Python is 3.13, which can be installed on Ubuntu by utilizing the Deadsnakes PPA (Personal Package Archive).
This guide will walk you through the process of installing Python 3.13 on Ubuntu 24.04, 22.04, and 20.04 systems. You’ll be able to keep up even if you’re not familiar with Python or Ubuntu.
Deadsnakes PPA: What Is It?
For Ubuntu users, the Deadsnakes PPA is a dedicated repository that offers more recent Python versions than those found in the standard Ubuntu repositories. It is frequently used to install different programs and is maintained by reliable developers.
Step-by-Step Guide to Installing Python 3.13
Step 1: Update Your System
I always recommend to keep system packages up to date. These two commands will update all packages on your systems.
sudo apt updatesudo apt upgrade
Step 2: Install the Required Dependencies
Next, you’ll need to install some software packages that help with adding new repositories and handling software installations. Run the following command:
sudo apt install software-properties-common
This ensures you have the necessary tools to manage PPAs (Personal Package Archives) on your system.
Step 3: Add the Deadsnakes PPA
Now, you can add the Deadsnakes PPA to your system. This is where Python 3.13 is available for installation. Enter this command:
sudo add-apt-repository ppa:deadsnakes/ppa
You may be prompted to press Enter to confirm adding the PPA. This will allow Ubuntu to pull Python versions from the Deadsnakes repository.
Step 4: Install Python 3.13
After adding the Deadsnakes PPA, you’ll need to update your package list again so that Ubuntu recognizes the new repository:
sudo apt update
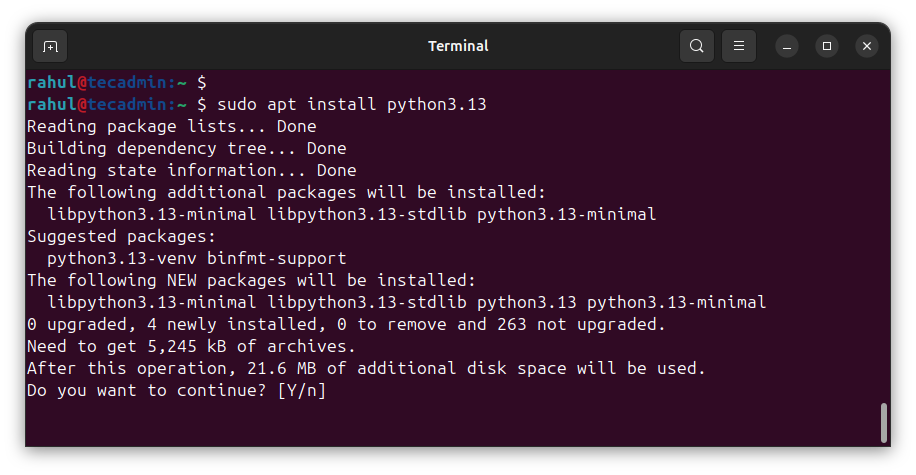
Now that the repository is added and updated, you can install Python 3.13. Type the following command:
sudo apt install python3.13
This command installs Python 3.13 on your system. It may take a few moments to complete, depending on your internet speed.

Step 5: Verify the Installation
Once Python 3.13 is installed, you can check the version to make sure everything went smoothly. Run this command:
python3.13 --version
If Python 3.13 was installed successfully, it will display the version number, like this:
Python 3.13.x
Step 6: Set Python 3.13 as the Default Version (Optional)
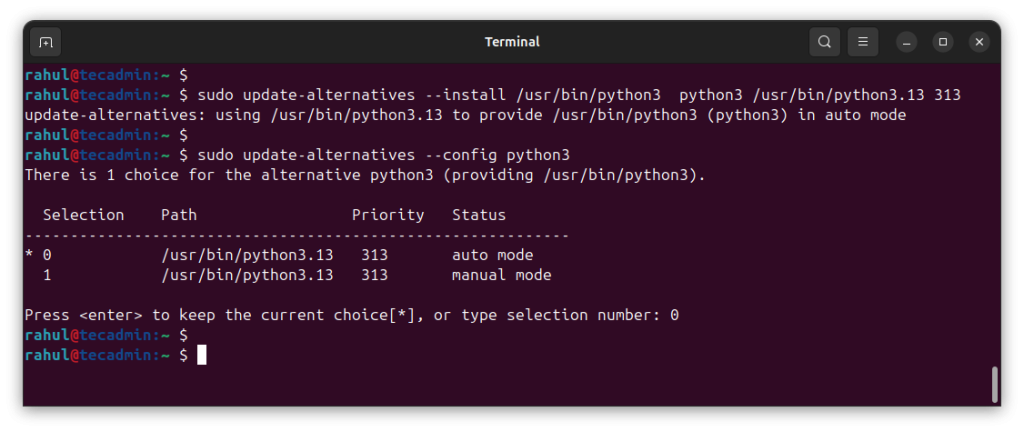
If you want Python 3.13 to be the default version when you type python3, you can set up update-alternatives to manage different versions of Python. Follow these steps:
- Add Python 3.13 to Alternatives:
sudo update-alternatives --install /usr/bin/python3 python3 /usr/bin/python3.13 1 - Select Python 3.13 as Default:
sudo update-alternatives --config python3You will see a list of installed Python versions. Choose the number corresponding to Python 3.13 and press Enter.
Now, when you type python3, your system will use Python 3.13 by default.

Step 7: Install Pip for Python 3.13
Pip is a package manager for Python that allows you to install additional Python libraries and tools. To install pip for Python 3.13, run the following command:
sudo apt install python3.13-distutils
After installing the distutils package, you can get pip by downloading it directly using this command:
curl -sS https://bootstrap.pypa.io/get-pip.py | python3.13
This command downloads and installs pip for Python 3.13.
To make sure pip is installed correctly, check the version by running:
pip3.13 --version
This should display the pip version associated with Python 3.13.
Conclusion
You’ve successfully installed Python 3.13 on your Ubuntu system using the Deadsnakes PPA! Now you can start using this latest version of Python to work on your projects.
