Facebook Twitter Instagram
    TecAdmin
    • Home
    • Ubuntu 20.04
      • Upgrade Ubuntu
      • Install Java
      • Install Node.js
      • Install Docker
      • Install LAMP Stack
    • Tutorials
      • AWS
      • Shell Scripting
      • Docker
      • Git
      • MongoDB
    • FeedBack
    • Submit Article
    • About Us
    Facebook Twitter Instagram
    TecAdmin
    Home»Citrix XenServer»How To Add CentOS 7 Template in XenServer 6.2

    How To Add CentOS 7 Template in XenServer 6.2

    RahulBy RahulMay 11, 20162 Mins ReadUpdated:September 9, 2016

    Recently I had installed a new citrix xenserver 6.2 at my workplace. When I connect it through xencenter, I could not find template for CentOS 7 operating system. After googling I found below steps to add template for CentOS 7 in xenserver. How To Add CentOS 7 Template in XenServer 6.2 .

    Step 1 – Update pygrub in XenServer

    • Edit /usr/lib/python2.4/site-packages/grub/GrubConf.py on the XenServer host machine.
    • Got to line no 428 and change
      from:

          if arg.strip() == "${saved_entry}":
      

      to:

          if arg.strip() == "${saved_entry}" or arg.strip() == "${next_entry}":
      
    • Let’s start with creating new vms.

    Step 2 – Create CentOS 7 Template

    Now execute following commands one by one to add new template in xenserver host. Below is the commands for adding CentOS 7 template in your xenserver host system.

    $ UUID=`xe template-list name-label="CentOS 6 (64-bit)" params=uuid --minimal`
    $ NEW_UUID=`xe vm-clone uuid=$UUID new-name-label="CentOS 7 (64-bit)"`
    $ xe template-param-set uuid=$NEW_UUID other-config:default_template=true 
    

    Step 3 – Create New VM using Template

    Let’s start with creating new vm using newly created template. Open xencenter and right-click on xenserver host and click New VM…

    xenserver-centos7-1

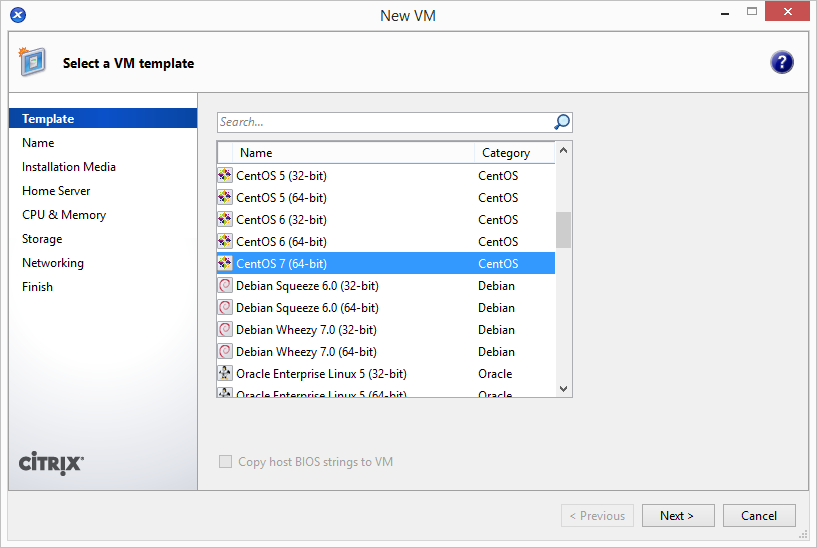
    In the next steps you can select installation media source. If you have already have ISO, select first option and choose ISO from library. Else you can use second option to install using net install url. Enter http://mirror.centos.org/centos/7/os/x86_64 as net install url.

    citrix XenCenter xenserver
    Share. Facebook Twitter Pinterest LinkedIn Tumblr Email WhatsApp
    Previous ArticleHow to Install Node.js on Windows
    Next Article How To Install Latest Nodejs on CentOS/RHEL 7

    Related Posts

    How To Create Ubuntu 16.04 LTS VM in XenServer 6.2

    Updated:April 3, 20182 Mins Read

    How To Add Ubuntu 16.04 LTS Template in XenServer 6.2

    Updated:April 3, 20182 Mins Read

    How to Backup Running Virtual Machine in XenServer

    Updated:January 6, 20183 Mins Read

    How to Limit Bandwidth on Network Interfaces of XenServer VM

    1 Min Read

    How to Backup VMs Metadata in Citrix Xenserver

    Updated:November 22, 20182 Mins Read

    Leave A Reply Cancel Reply

    Recent Posts
    • How to Install Sublime Text 4 on Ubuntu 22.04
    • How to Enable / disable Firewall in Windows
    • How to Install JAVA on Ubuntu 22.04
    • Switching Display Manager in Ubuntu – GDM, LightDM & SDDM
    • Changing the Login Screen Background in Ubuntu 22.04 & 20.04
    Facebook Twitter Instagram Pinterest
    © 2022 Tecadmin.net. All Rights Reserved | Terms  | Privacy Policy

    Type above and press Enter to search. Press Esc to cancel.