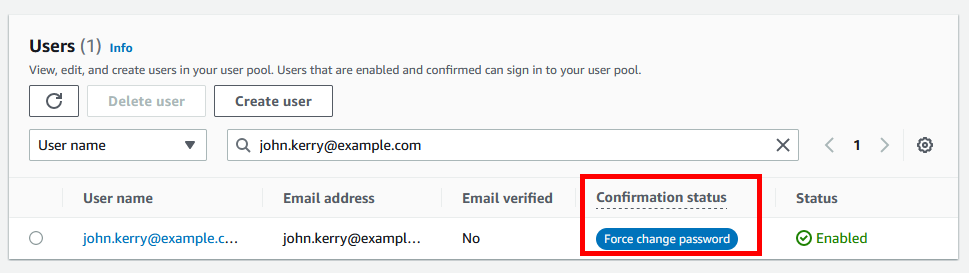
We have configured AWS Cognito for the authentication in our web application. I have created a new user under the User Pool but its confirmation status is showing “FORCE_CHANGE_PASSWORD”. In order to change the status to CONFIRM, we have to set a permanent password. To change a Cognito user’s password, use the admin-set-password command along with the --permanent parameter to make the status CONFIRM.
After creating a new user the account shows as below:
Set Congnito User status to CONFIRMED
The admin-set-user-password command in AWS CLI allows us to set a user’s password with the administrator’s privileges. The temporary password set the user in FORCE_CHANGE_PASSWORD password. In that case, you need to set a permanent password.
The following command will set a new permanent password for Cognito users.
aws cognito-idp admin-set-user-password \
  --user-pool-id YOUR_USER_POOL_ID \
  --username john.kerry@example.com \
  --password "My-Secret-Password-123" \
  --region us-west-1 \
  --profile default \
  --permanent
The successful execution of the command will produce no output on the screen. The command parameters are as follows:
--user-pool-id:Use the correct user pool ID shows in AWS console.--username:This is the username created, not the email address.--password:The password must contain minimum 8 chars, at least 1 number, 1 special character, 1 lowercase and 1 uppercase character.--region:Set the correct AWS region, in which the user pool exists.--profile:If you have created multiple AWS profiles in your system, use correct one.--permanent:This will change the status to CONFIRM.
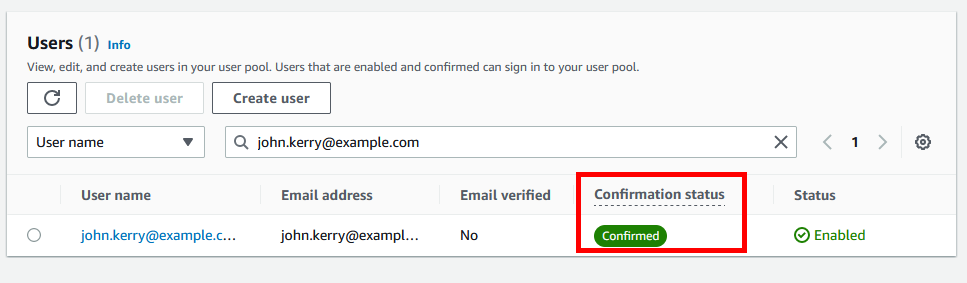
All done. The Cognito user’s status is CONFIRMED now. You can view the status from the AWS Cognito console:
Also, you can get the user status with the admin-get-user command with the awscli command line utility, to query the “UserStatus”. This will show you the current user status.
aws cognito-idp admin-get-user \
  --user-pool-id YOUR_USER_POOL_ID \
  --username john.kerry@example.com \
  --region us-west-1 \
  --profile default \
  --query "UserStatus"
The output will show the user status as below:

Conclusion
Whenever you create a new user with AWS Cognito, a temporary password is created for the account. A user with a temporary password always shows the status as FORCE_CHANGE_PASSWORD. We need to set a permanent password for the user to make its status CONFIRMED. We can call the AWS APIs to set the permanent password using the AWS CLI command. This tutorial shows you how to set a permanent password for Cognito users to make the CONFIRMED status.
1 Comment
Thank you!