A hostname is a unique name for a device in a network, which helps to manage and control the network. It makes it easy to identify and communicate with the device. If you want to change the network settings or manage many devices, changing the hostname on a Windows computer or server is an important step.
Before you change the hostname on your Windows computer, make sure to save all your open work and get ready for the computer to restart. This is especially important if you are working on a server, as it will need to restart after the hostname is changed.
Here is a simple guide on how to change the hostname (also called the computer name or network name) in Windows to help with network management and setup.
Step-by-Step Guide to Changing the Hostname on Windows
Like other operating systems, Windows allows you to easily change its hostname. This is a simple but important task for network setup and system management. Remember, once you change the hostname, the computer must restart to apply the changes.
Method 1: Quick Instructions
Here are the quick steps to change the hostname on your Windows computer:
- Open “My Computer” properties.
- Click Change Settings under the “Computer name, domain, and workgroup settings” section.
- Click the Change button under the “Computer Name” tab.
- Enter a new hostname (computer name) and click OK.
- The computer will need to restart. You can restart it right away or later.
- All done!
After the system restarts, the hostname will be updated.
Method 2: Detailed Instructions
Follow these detailed steps to change the hostname on your Windows system with pictures for help:
- Open the properties of “Computer,” “My Computer,” or “This PC,” depending on your Windows version.

Open My Computer Properties - Click on the Change Settings link under the “Computer name, domain, and workgroup settings” section. See the image below:
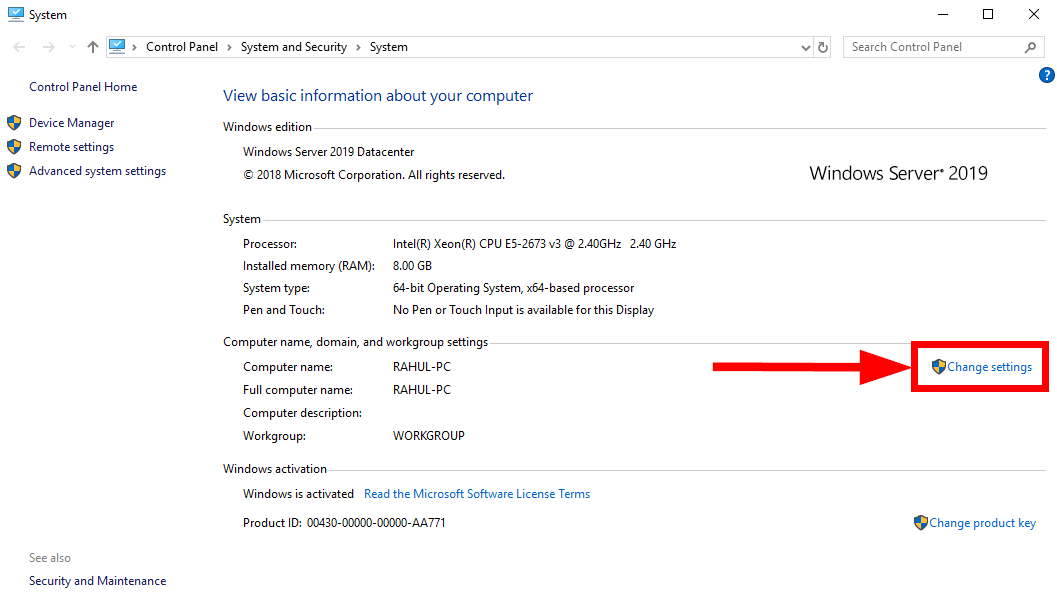
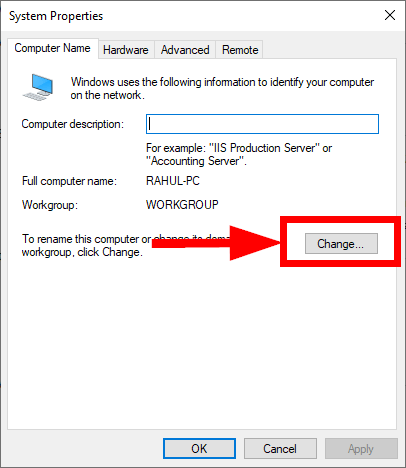
Computer Change Setting Link - A new window will open. In the “Computer Name” tab, click the Change button in front of “To rename this computer or change its domain or workgroup”.
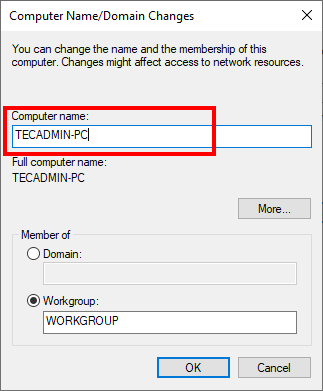
Click the Change Button - In the next window, enter a new name for your computer and click OK.
Input a New Hostname for Windows - A window will pop up asking if you want to restart the system right away or later. Choose an option.
In some versions of Windows, you won’t have the choice to restart later. The system will ask you to save any open files and restart immediately. - After restarting, open the command prompt to check the new hostname.
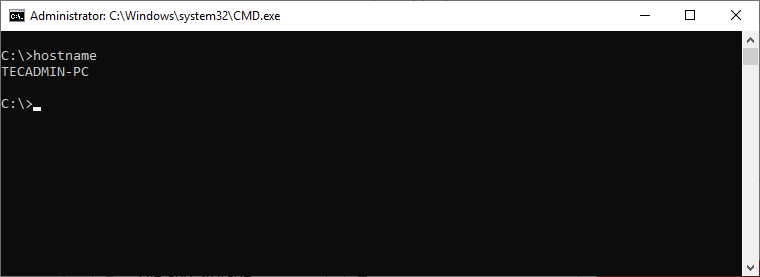
Checking Windows Hostname - All done!
Conclusion
Changing the hostname on your Windows computer can be helpful for many reasons. It makes it easier to identify your device in a large network, can meet software needs, or simply helps to personalize your computer. By following these steps, you can quickly and easily change the hostname. Just make sure to follow the rules for naming your computer to avoid any issues.
1 Comment
REM Change computername through command (reboot required)
WMIC computersystem where caption=’currentname’ rename newname