
A hostname serves as a unique identifier for a device within a network, essential for network administration and management. This distinctive label allows for easy identification and communication within network environments. If you’re looking to update your network settings or manage multiple devices, changing the hostname on a Windows computer or server is a crucial step.
Before proceeding with the hostname modification on your Windows machine, it’s important to save all open documents and prepare for a system reboot. This process is particularly important for IT professionals managing production servers, as changing the hostname on such systems requires careful timing and system restart.
Follow our detailed guide on how to modify the Windows hostname (also known as the computer name or network name) for efficient network management and configuration.
Step-by-Step Guide to Modifying Your Windows Computer’s Hostname
Similar to other operating systems, Windows provides a user-friendly interface for changing its hostname. This is a simple yet essential task for network configuration and system administration. Remember, after altering the hostname of your Windows PC or server, a system reboot is necessary to apply the changes.”
Method 1: Quick Instructions
Here are the short and quick instructions to change the hostname of the Windows system.
- Open my computer properties
- Click change settings under computer name, domain and workgroup settings
- Click Change button under computer name tab
- Set a new hostname (computer name) of your system and click OK
- This will require a system reboot. Reboot system immediately or use option to latest
- All done
Once the system is rebooted the Windows hostname will be changed.
Method 1: Detailed Instructions
Now, follow the detailed instructions to change the hostname of the Windows system with images.
- Open the properties of Computer or My Computer or This PC based on your operating system version.

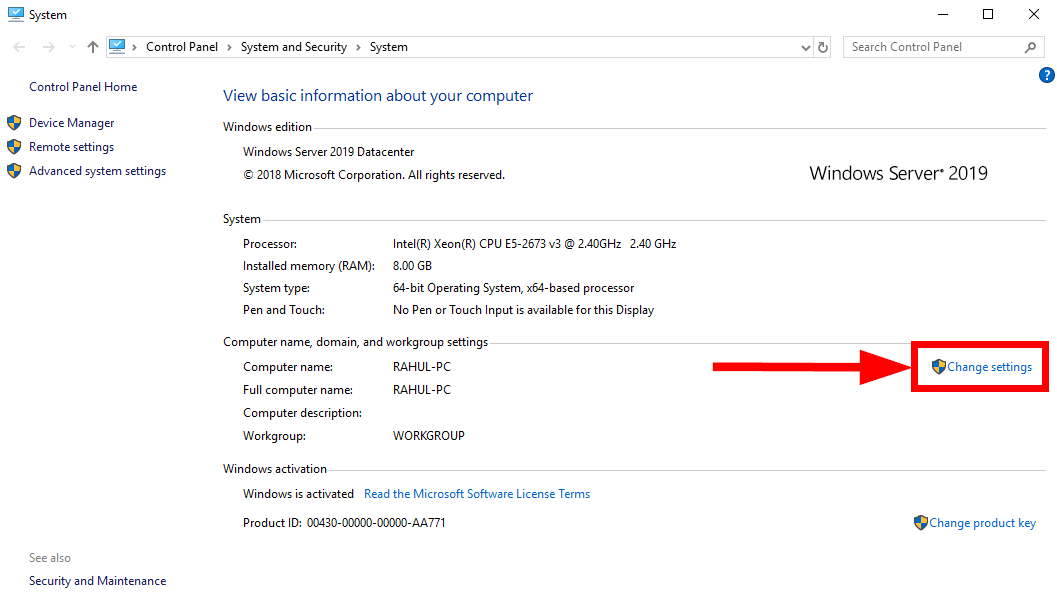
Open My Computer Properties - Click on change settings hyperlink under computer name, domain and workgroup settings section. See the below image:
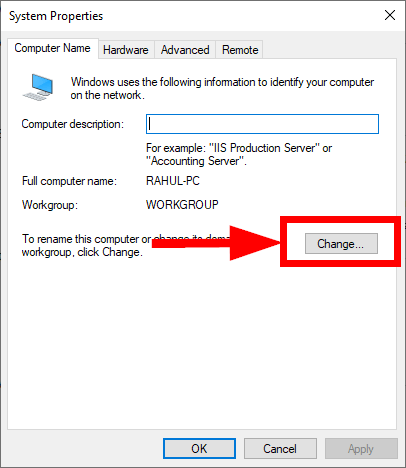
Computer Change Setting Link - The above will open a new dialog box. In the Computer Name tab click Change button in front of “To rename this computer or change its domain or workgroup”.
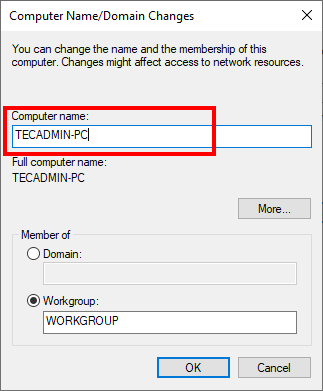
Click the Change Button - You will see another dialog box with an input box. Here set a new name for the Windows hostname and click OK.
Input a New Hostname for Windows - A dialog box will open to allow the system to reboot immediately or reboot it manually latest. Select an option of your choice.
In some of the operating system versions, You will not see a later reboot option. The system will ask you to save any unsaved files and restart the system immediately.
- Once the Windows system rebooted, check the new hostname with a command prompt.
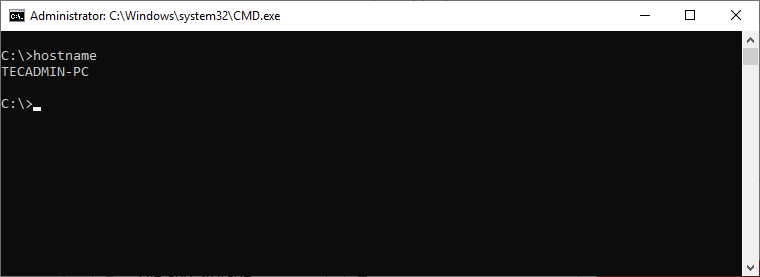
Checking Windows Hostname - All done
Conclusion
Changing the hostname of your Windows PC can be useful for various reasons – to ease identification in a large network, to meet specific software requirements, or simply to personalize your PC. Following these steps will help you perform this task quickly and easily, allowing your computer to be identified by the name you choose. Remember to follow the standard naming conventions for hostnames to avoid potential issues.
1 Comment
REM Change computername through command (reboot required)
WMIC computersystem where caption=’currentname’ rename newname