• Home
  • Ubuntu 18.04
    • Whats New?
    • Upgrade Ubuntu
    • Install Java
    • Install Node.js
    • Install Docker
    • Install Git
    • Install LAMP Stack
  • Tutorials
    • AWS
    • Shell Scripting
    • Docker
    • Git
    • MongoDB
  • Funny Tools
  • FeedBack
  • Submit Article
  • About Us
TecAdmin
Menu
  • Home
  • Ubuntu 18.04
    • Whats New?
    • Upgrade Ubuntu
    • Install Java
    • Install Node.js
    • Install Docker
    • Install Git
    • Install LAMP Stack
  • Tutorials
    • AWS
    • Shell Scripting
    • Docker
    • Git
    • MongoDB
  • Funny Tools
  • FeedBack
  • Submit Article
  • About Us

How to Check IP Address on Ubuntu 18.04 (Desktop)

Written by Rahul, Updated on October 7, 2019

Question – How to Find Local IP Address of My Ubuntu Desktop system? 2 Ways to find IP Address on Ubuntu 18.04 Desktop?

Ubuntu 18.04 desktop provides an attractive GUI for working with it. You can either use the command prompt to check the current IP address on your system or use a GUI option to view the local IP address on your system.

Follow this tutorial to configure new IP on Ubuntu 18.04 desktop system.

Method 1 – Ubuntu 18.04 Check IP via GUI

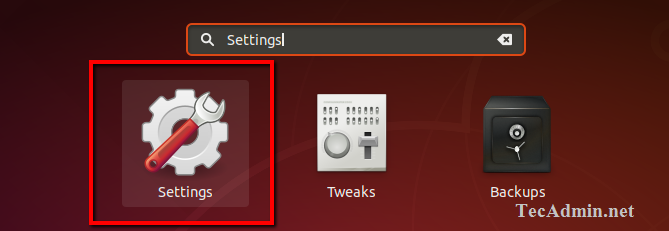
Login to your Ubuntu Desktop system. After that open settings windows on your Ubuntu Desktop machine as showing in the below screen.

Ubuntu open settings

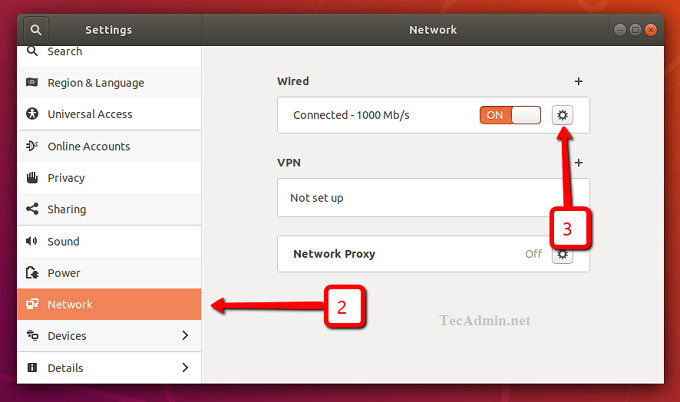
In the left sidebar click on the Network tab. After that click icon to open setting for your systems network interface as shown in the below screen.

Ubuntu open network settings

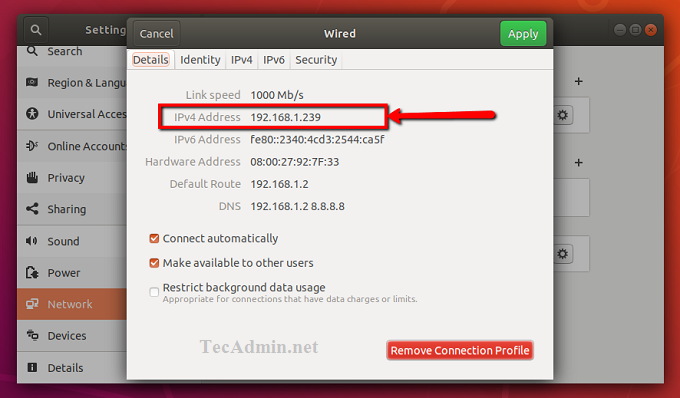
Here is the IP address of your Ubuntu desktop system.

View Ubuntu Local IP Address

Method 2 – Ubuntu 18.04 Check IP via CLI

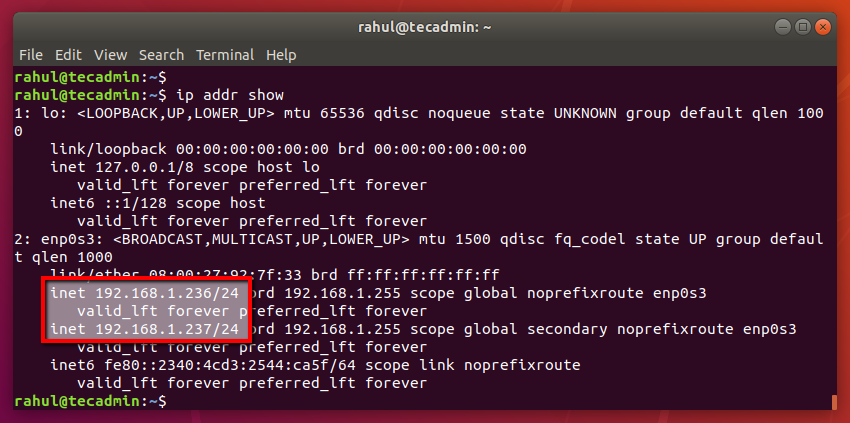
Press CTRL + ALT + T to launch the terminal on your Ubuntu system. Now type following IP command to view current IP addresses configured on your system.

ip addr show

Ubuntu check local ip command

Share it!
Share on Facebook
Share on Twitter
Share on LinkedIn
Share on Reddit
Share on Tumblr
Share on Whatsapp
Rahul
Rahul
Connect on Facebook Connect on Twitter

I, Rahul Kumar am the founder and chief editor of TecAdmin.net. I am a Red Hat Certified Engineer (RHCE) and working as an IT professional since 2009..

13 Comments

  1. Avatar Niketan Reply
    December 9, 2019 at 8:04 pm

    The other way round to do this is using cmd
    The command is ifconfig

    • Avatar Daniel Reply
      May 13, 2020 at 3:42 pm

      Hey, NIKETAN, after entering that command, how do I tell which IP address is the system one?

    • Avatar Jean-Yves Reply
      January 14, 2021 at 8:10 pm

      “ifconfig” is deprecated and has been replaced by command “ip”.

  2. Avatar Patricia Reply
    September 21, 2019 at 8:46 pm

    Thank you!! The screenshots and the red squares helps me a lot!!!

  3. Avatar Mike B Reply
    September 5, 2019 at 8:53 am

    perfect thanks!

  4. Avatar Nick Reply
    August 19, 2019 at 8:43 am

    Thank you

  5. Avatar Gulfam Reply
    August 2, 2019 at 8:44 am

    Nice article. Thanks man

  6. Avatar vijeth Reply
    July 31, 2019 at 6:16 am

    Thanks a lot

  7. Avatar Vignesh Reply
    July 6, 2019 at 6:01 pm

    On terminal, just type
    $ip address
    will get current ipv4 and ipv6 address.

  8. Avatar shawn Reply
    April 30, 2019 at 11:39 pm

    Thank you for this useful information. it helped a lot.

  9. Avatar muslihudin Reply
    April 25, 2019 at 1:23 am

    nice, thanks

  10. Avatar Mike Reply
    March 15, 2019 at 11:42 am

    Thanks for help. 🙂

  11. Avatar Priscilla Shamin Reply
    March 14, 2019 at 4:27 am

    Thank you for this useful information. it helped a lot.

Leave a Reply Cancel reply

Popular Posts

  • How To Install Python 3.9 on Ubuntu 20.04 5
  • How to Install Python 3.9 on CentOS/RHEL 7 & Fedora 32/31 0
  • How To Install VNC Server on Ubuntu 20.04 1
  • How To Install NVM on macOS with Homebrew 0
  • How to Install .NET Core on Debian 10 0
© 2013-2020 Tecadmin.net. All Rights Reserved | Terms  | Privacy Policy