Management of Files and resources can quickly become a headache for Linux administrators as it is a multi-user OS. The administrators have to manage all the resources available on the system. They have to ensure that only the authorized users have the permissions to access and modify certain files.
The administrators can take advantage of many built-in commands like chattr and chown to help them in file management:
What is the chown command?
The chown (short for change owner) command is used to change the ownership of the group of files and directories in a Linux-based operating system. It helps make files more secure and puts restrictions on unauthorized users.
In this how-to guide we will learn to use the chown command in Linux, but let’s first discuss its syntax:
chown [OPTION] USER:GROUP FILE/Directory
The chown command takes an option, a user, and a group name along with the name of the file/directory. chown will change the ownership/group of the file/directory to the specified user and group. Given below are some of the most common options used along with the chown command:
--from=CURRENTOWNER_NAME:CURRENTGROUP_NAMEChange the owner and/or group of the file/directory if and only if the name of the current owner and/or group matches with the one specified here.-R, --recursiveChange the ownership/group of every subdirectory and file present within a directory--helpTo display the help menu of the chown command--versionTo display the version number information of the chown command
The chown command is available in most Linux distributions, but in this article, we will use Ubuntu 21.04 for example demonstration.
Changing file owner with chown command
We just need to give the file name along with the new owner’s username to the chown command to change the ownership of a file in Linux:
chown USER_NAME FILE_NAME
For example, if we have a file named file.txt and we need to change its ownership from a user named rahul to a user named john then we will use the following command:
sudo chown john file.txt
The ownership of the file has been successfully changed from rahul to john. This can be verified by running the below-given command:
ls -l
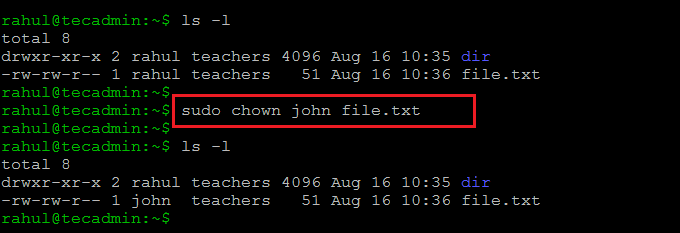
As evident by the screenshot above the ownership of the file has been successfully changed from rahul to john.
Changing the Group owner of File with Chown
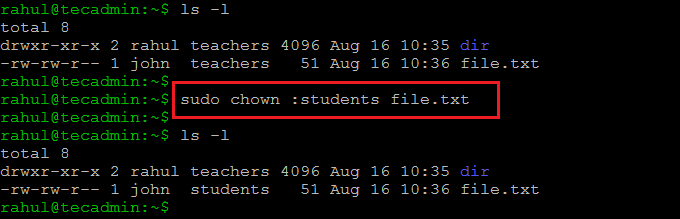
To change the group of the file we just need to give the file name followed by a colon (:) along with the group name to the chown command:
chown :GROUP_NAME FILE_NAME
Now we will transfer the file.txt file from teachers groups to students group:
sudo chown :students file.txt
Changing Owner and Group in Single chown Command
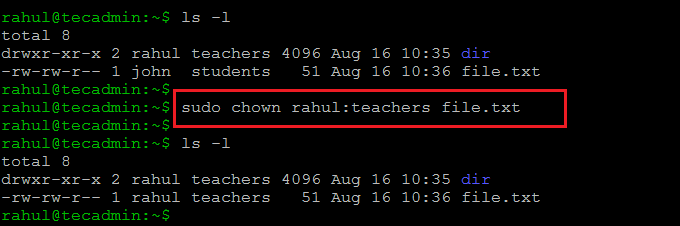
We need to give both user and group name separated by a colon to the chown command to change both the owner and the group of the file:
chown USER_NAME:GROUP_NAME FILE_NAME
Now we will change the ownership of the file.txt file back to rahul and teachers group:
sudo chown rahul:teachers file.txt
If we do not specify the group after the colon then the file’s ownership is transferred to the specified user’s login group:
sudo chown john: file.txt

How to Change the Owner and the Group of a directory
Changing the ownership of a directory is no different than that of a file. Here we will change the ownership of our directory named dir from rahul:teachers to john:students:
sudo chown john:students dir
But this command does not change the ownership of the subdirectories and files present in the directory. We can verify this by going into the dir directory and running the ls -l command:
cd dirls -l
All of the files and subdirectories present within the dir directory still belong to rahul. This can be changed by using the -R option along with the chown command. Now we will go back to the Documents directory where the dir directory is present and run the chown command once again; but this time we will run it with the -R option:
sudo chown -R john:students dir
Conclusion
The chown command is an essential tool for system administrators. It allows them to restrict unauthorized users from accessing certain files. This helps in protecting important files and saves them from accidental modification and deletion.
The chown command can only be used by users with sudo privileges or the root user; The normal/regular users cannot alter the ownership/group of a file/directory even if they are the owners of the file.
In this post, we discussed what the chown command is and how we can use it to help us in file management. Moreover, we also learned to make the command recursive so it applies to all the files and subdirectories that are present within a directory.
