
In the evolving world of operating systems, Ubuntu stands out as a popular, open-source alternative to Windows and macOS. Whether you’re looking to run a dual-boot system, try out Ubuntu without installing it, or need a portable OS, creating a bootable USB drive is an essential first step. This comprehensive tutorial guides you through the process using the Universal USB Installer application in Windows 11/10/8.
Universal USB Installer is a user-friendly, lightweight, and versatile tool compatible with a wide range of operating systems. It simplifies the process of creating a bootable USB drive, making it accessible even for users who are new to such tasks.
Prerequisites
Before starting, ensure you have the following:
- A USB drive with at least 4GB of space.
- A computer running Windows 11, 10, or 8.
- Internet connection to download the necessary software.
- A downloaded ISO file of the Ubuntu version you wish to install.
Step 1: Download Ubuntu ISO
You can easily download the Ubuntu ISO image from its official website. Download the Ubuntu Desktop or server edition as per your requirements.
Step 2: Install Universal USB Installer
For this tutorial, I am going to use the Universal USB Installer utility on Windows to create a bootable USB drive. Use the below link to download this tool and install it on your Windows system.
Download Universal USB Installer
Step 3: Create Ubuntu Bootable USB
At this stage, You have installed Universal USB Installer on your system. Also have downloaded the Ubuntu ISO image. Now start the process of creating an Ubuntu bootable USB.
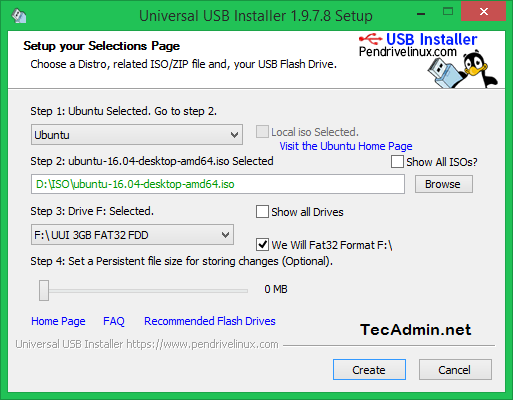
Start Universal USB Installer and select following options.
- Step 1: Select Ubuntu
- Step 2: Browse and select Ubuntu ISO image from your system.
- Step 3: Select the USB drive
Now click on Create button:
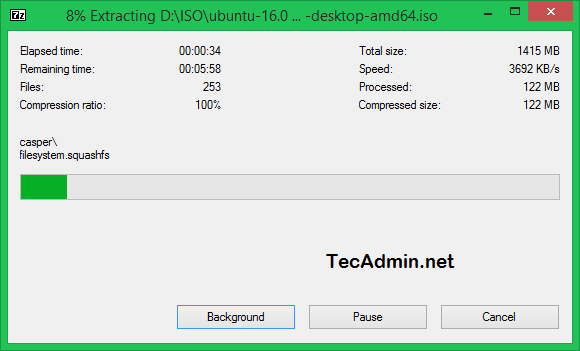
The installation process is in progress.
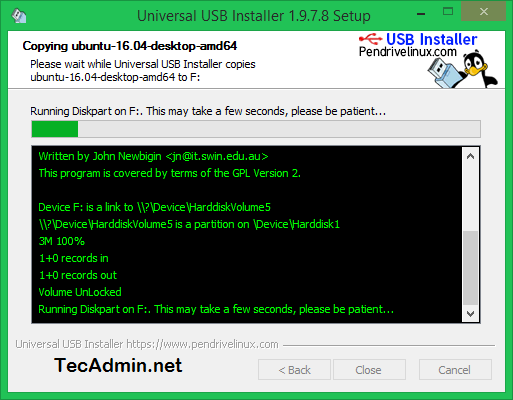
Wait for the installer to complete the process. This process will take time as per your operating system speed.
After completing the process, You will see a screen like this.
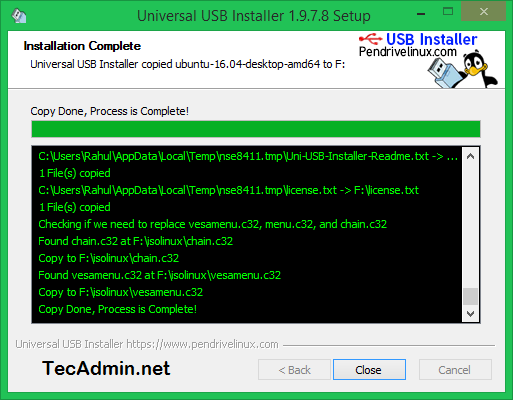
Your Ubuntu bootable USB is ready to use. Use this USB to use as live Ubuntu media or install Ubuntu operating system on your system.
Step 4: Booting from the USB Drive
- Insert the USB Drive: Plug the USB drive into the computer where you want to use Ubuntu.
- Access Boot Menu: Restart the computer and access the boot menu (usually by pressing F12, F10, or ESC, depending on the make and model of your computer).
- Select the USB Drive: From the boot menu, select your USB drive as the boot device.
Conclusion
Congratulations! You now have a bootable Ubuntu USB drive created using Windows 11/10/8. This drive is a gateway to experiencing Ubuntu, whether for testing, installation, or troubleshooting purposes. Remember, booting from a USB drive doesn’t alter your existing operating system unless you choose to install Ubuntu. Enjoy exploring the robust and versatile world of Ubuntu Linux!
6 Comments
Hi Rahul,
Nice Post! Thank you for sharing this valuable post on creating ubuntu bootable USB in windows. and it really works great. And I suggest you to use UNETbootin once, it also works great… Please let me know if it helps 🙂
Keep up the Good Work…
Thanks
Thanks for providing this wonderful article. I would love to share with my friends.
Thanks a lot Rahul!
Thanks For Sharing Such beautiful information with us. i hope you will
share some more information about this post. please keep sharing!
Thanks alot
While Universal USB installer works good, there is a new tool called Etcher that works very well and has a good looking interface as well.