
Introduction
Telnet, a network protocol used for accessing remote servers, may seem like a relic in the age of advanced communication technologies. However, it remains a useful tool for administrators, developers, and IT professionals for testing and managing network services. Windows, by default, does not have the Telnet client installed and enabled. This article provides a comprehensive step-by-step guide on how to enable the Telnet client in Windows.
What is Telnet?
Telnet, short for ‘Teletype Network,’ is one of the oldest Internet protocols. It allows users to communicate with a remote server or device. Primarily used for remote management, Telnet operates on a client-server model where the client sends commands, and the server executes them and returns the results.
Why Enable Telnet in Windows?
While not commonly used by average users, Telnet is vital for professionals who manage networks, servers, or require a simple tool to test the functionality of TCP/IP networks.
Step-by-Step Guide to Enable Telnet in Windows
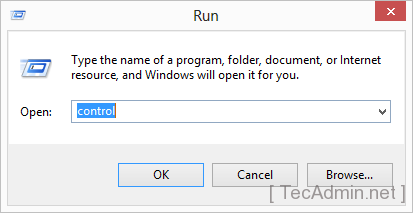
- Open Control Panel: Start by opening the Control Panel. You can do this by searching for ‘Control Panel’ in the Windows search bar or type “control” in run window:
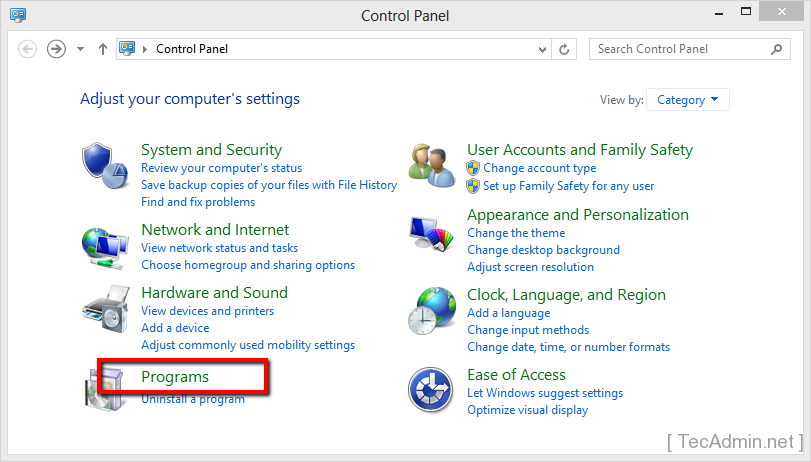
- Access Programs and Features: In the Control Panel, go to ‘Programs’ and then ‘Programs and Features’.
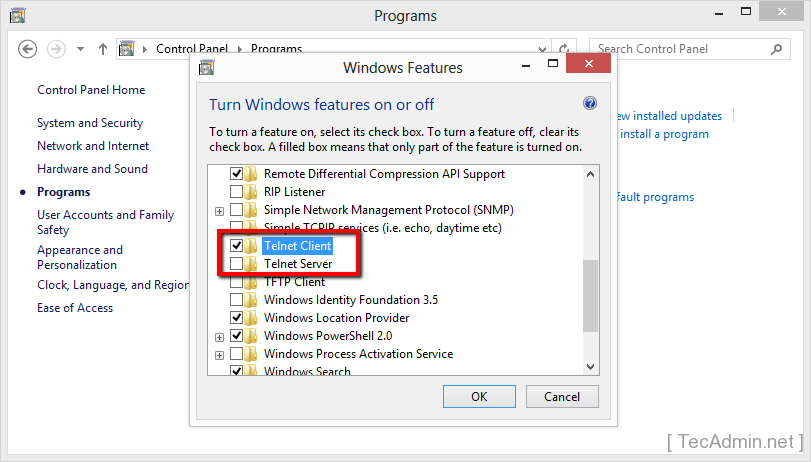
- Turn Windows Features On or Off: On the left side of the ‘Programs and Features’ window, click on the link ‘Turn Windows features on or off’. This requires administrative privileges.

- Enable Telnet Client: In the ‘Windows Features’ window, scroll down to find ‘Telnet Client’. Check the box next to it and click ‘OK’. Windows will then install the necessary files for the Telnet client.
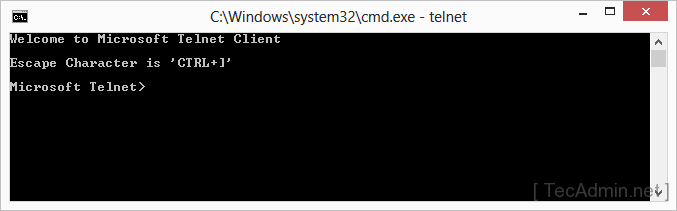
- Verify Installation: To ensure that the Telnet client has been successfully installed, open the Command Prompt (you can do this by typing ‘cmd’ in the Windows search bar) and type ‘telnet’. If the installation was successful, you will see a Telnet command line.
Using Telnet in Windows
Once enabled, you can use Telnet to connect to remote servers. The basic command to start a Telnet session is telnet [hostname] [port]. Replace ‘[hostname]’ with the IP address or domain of the server you wish to connect to and ‘[port]’ with the relevant port number.
Security Considerations
It’s crucial to note that Telnet transmits data, including login credentials, in plaintext. This can pose a security risk, especially over unsecured networks. It is recommended to use more secure alternatives like SSH (Secure Shell) for sensitive connections.
Conclusion
Enabling the Telnet client in Windows is a straightforward process that can be invaluable for specific network-related tasks. While Telnet’s simplicity and lack of encryption make it less ideal for secure communications, it remains a useful tool for testing network connectivity and managing devices in controlled environments. Always consider the security implications when using Telnet and switch to more secure protocols when necessary.
2 Comments
Ok, why on earth would you tell windows users to enable a deprecated program/protocol that passes credentials in the clear??? Wouldn’t it be better to teach them how to use SSH?
Hi Scott,
This tutorial is showing to enable Telnet client ( not telnet server) . I think still most of system administrators used telnet to check port status of remote systems.