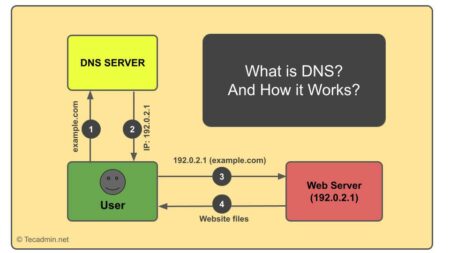
DNS caching is a technique used by operating systems and applications to temporarily store DNS query results to reduce latency and improve the overall performance of internet browsing. However, sometimes it may become necessary to clear the DNS cache, especially when the cached records are outdated or causing connectivity issues. In this article, we will provide a step-by-step guide on how to flush the DNS cache in Ubuntu and Linux Mint.
Understanding DNS Caching
Unlike Windows and macOS, Ubuntu and Linux Mint do not cache DNS queries at the operating system level by default. However, many Linux distributions, including Ubuntu and Linux Mint, use caching DNS resolvers such as systemd-resolved, dnsmasq, or BIND (named) to cache DNS records. To flush the DNS cache on these systems, you need to clear the cache in the specific caching DNS resolver in use.
You may like:
Flushing DNS Cache in systemd-resolved
Systemd-resolved is a DNS resolver and caching service that comes pre-installed on newer versions of Ubuntu and Linux Mint. To flush the DNS cache in systemd-resolved, follow these steps:
- Open a terminal window.
- Run the following command:
sudo systemd-resolve --flush-caches - To verify that the cache has been cleared, you can check the cache statistics using the following command:
sudo systemd-resolve --statistics
Under “Cache”, you should see “Current Cache Size” set to 0.
Flushing DNS Cache in dnsmasq
Dnsmasq is a lightweight DNS and DHCP server often used in home networks and Linux distributions. To flush the DNS cache in dnsmasq, follow these steps:
- Open a terminal window.
- Restart the dnsmasq service using the following command:
sudo systemctl restart dnsmasqBy restarting the service, you effectively clear the DNS cache.
Flushing DNS Cache in BIND (named)
BIND is a popular DNS server software used by many organizations worldwide. If your system uses BIND as a caching DNS resolver, you can clear its cache with these steps:
- Open a terminal window.
- Run the following command to flush the DNS cache:
sudo rndc flushThis command will clear the entire DNS cache in BIND.
Clearing DNS Cache in Web Browsers
Web browsers like Google Chrome and Mozilla Firefox also maintain their DNS caches to speed up web browsing. To clear the DNS cache in your browser, follow the instructions specific to your browser:
- Google Chrome: Navigate to “chrome://net-internals/#dns” and click the “Clear host cache” button.
- Mozilla Firefox: Type “about:networking#dns” in the address bar, then click the “Clear DNS Cache” button.
Conclusion
In this article, we provided a step-by-step guide on how to flush the DNS cache in Ubuntu and Linux Mint for various caching DNS resolvers like systemd-resolved, dnsmasq, and BIND. Additionally, we discussed how to clear the DNS cache in popular web browsers. Clearing the DNS cache can help resolve connectivity issues caused by outdated or incorrect DNS records, ensuring a smoother browsing experience.

3 Comments
Nice. Just twhat I was looking for. Thanks.
Thanks! Worked great on Ubuntu 14.04.
Hi Rahul,
I’m using linus server and hosted a wordpress site on it but when i open my site even after 3 – 4 days i can’t see my new posts without clearing the browser’s cache. Can you tell me the reason behind this?