
Python has been a preferred language for web development for many years, thanks to frameworks such as Django and Flask that have made web application development easier and more efficient. However, in recent years, there’s been an increasing demand for asynchronous web frameworks that can handle a large number of simultaneous connections, as is common with modern web apps. Enter FastAPI: a modern, asynchronous web framework that’s built on top of Starlette for web routing and Pydantic for data serialization/deserialization.
FastAPI is designed to create RESTful APIs quickly and efficiently. It offers automatic interactive API documentation, type checking, and asynchronous request handling, among other features.
In this article, we’ll walk you through the basics of FastAPI, showing you how to set up a new project and how to build a simple API.
Why FastAPI?
- Speed: FastAPI is one of the fastest frameworks for building APIs with Python 3.7+, only slower than NodeJS and Go.
- Type Annotations: Using Python type annotations, FastAPI provides data validation, serialization, and documentation automatically.
- Asynchronous: Built-in support for async/await syntax makes handling a large number of simultaneous connections feasible.
- Automatic Documentation: With FastAPI, you get an automatic interactive API documentation (using Swagger UI and ReDoc) that lets you call your API directly from the browser.
Prerequisites
- Python 3.6 or newer
- Pip (Python package manager)
- Virtual environment (optional but recommended)
Setting Up FastAPI Application
Follow the blow step by step instructions to create a sample application using Python’s FastAPI framework:
Step 1: Creating a Virtual Environment:
First, let’s create a virtual environment. This is a recommended step to ensure that your project dependencies don’t conflict with global Python packages.
First create an directory for your new FastAPI application:
mkdir fastapi_projectcd fastapi_project
Then create the virtual environment and activate it:
python3 -m venv venvsource venv/bin/activate
Step 2: Installing FastAPI and Uvicorn:
Once you’ve activated your virtual environment, install FastAPI and Uvicorn. Uvicorn is an ASGI server that will serve our FastAPI application.
pip install fastapi[all] uvicorn
Create a `requirements.txt` for later deployments.
pip freeze > requirements.txt
Step 3: Creating a Simple FastAPI App:
In the application root directory, create a new Python file, main.py:
touch main.py
Open main.py in your favorite text editor and add the following:
from fastapi import FastAPI

app = FastAPI()

@app.get("/")
def read_root():
    return {"message": "Welcome to FastAPI!"}
Save changes.
Step 4: Running the Application:
With the application ready, you can use Uvicorn to run it:
uvicorn main:app --reload
This command tells Uvicorn to:
- Load the app instance from the main module.
- Use the
--reloadflag for hot-reloading (useful during development).
The application will start, and you can visit http://127.0.0.1:8000/ in your browser. You should see the message:
{"message":"Welcome to FastAPI!"}
Step 5: Interactive API documentation:
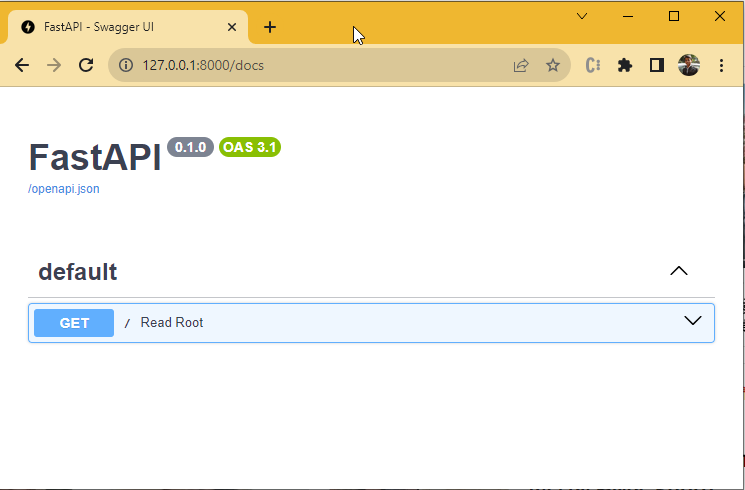
One of FastAPI’s standout features is its automatic interactive API documentation. Navigate to http://127.0.0.1:8000/docs and you’ll be greeted with an interactive Swagger UI for your API. This is generated from your Python code and type hints, without requiring additional configuration or annotations.

Expanding the App
FastAPI makes it simple to add more routes and work with parameters:
@app.get("/items/{item_id}")
def read_item(item_id: int, query_param: str = None):
    return {"item_id": item_id, "query_param": query_param}
With the above route, you can visit URLs like:
- http://127.0.0.1:8000/items/5 – Here, the item_id will be 5.
- http://127.0.0.1:8000/items/5?query_param=somevalue – This will return {“item_id”: 5, “query_param”: “somevalue”}.
FastAPI will automatically validate the types. If someone tries accessing /items/some_string, they’ll receive a clear error response indicating that item_id should be an integer.
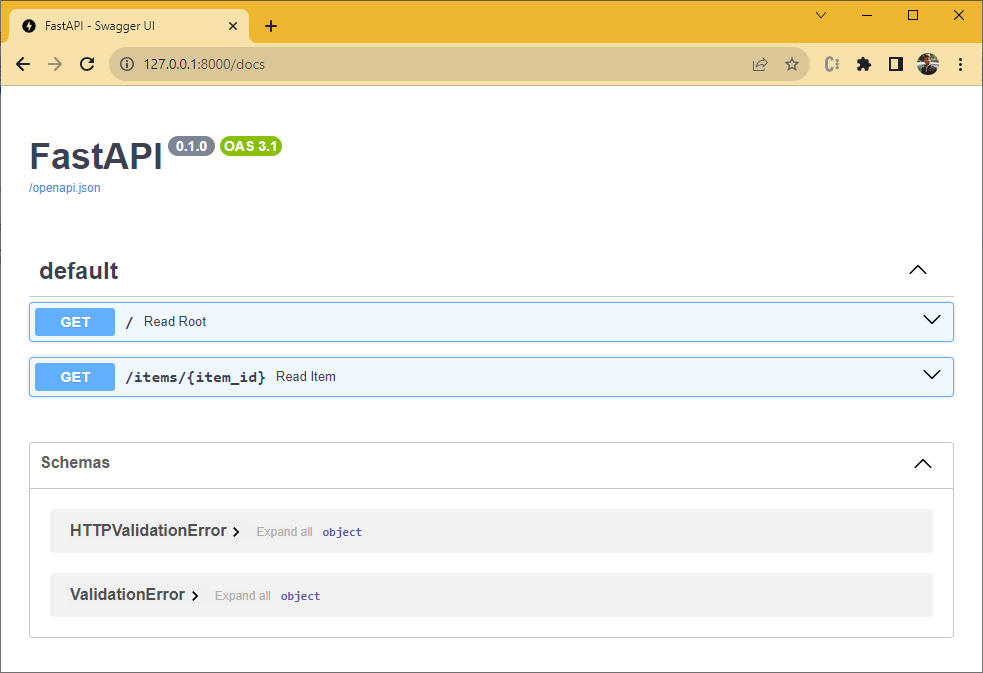
Visit the interactive documentation again. You’ll now see a new GET route for /items/{item_id} that allows you to send JSON items to your API.

Conclusion
FastAPI offers a powerful and efficient way to build APIs in Python. With automatic interactive documentation, type hint validation, and lightning-fast performance, it’s a compelling choice for modern web development. This guide provided a basic setup on a Linux environment, but FastAPI’s features and capabilities extend far beyond this introduction. Dive into the official documentation to learn more and unlock its full potential.