
Changing password at a regular interval is a good practice for all system administrators. In this production environment, change the password at least every 3 months and for other environments do it every 6 to 12 months. In this tutorial, we will explain the steps to change a user’s password in Windows Server 2019.
Advertisement
Prerequisites
Log in as an Administrator account to your Windows Server 2019 system.
Change User Password in Windows Server 2019
Let’s follow the below steps to change a user’s password in Windows Server 2019.
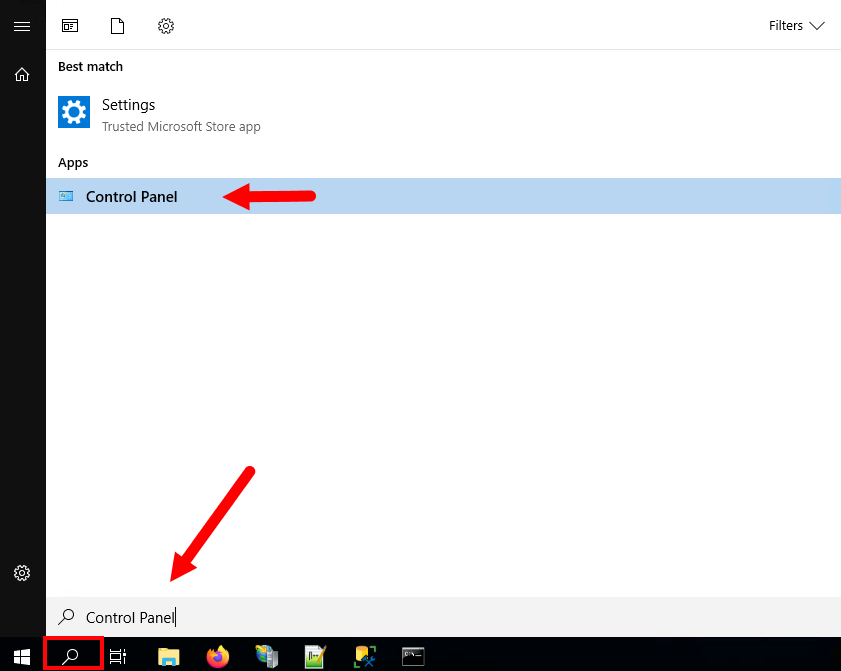
- Search for the system Control Panel and launch it.
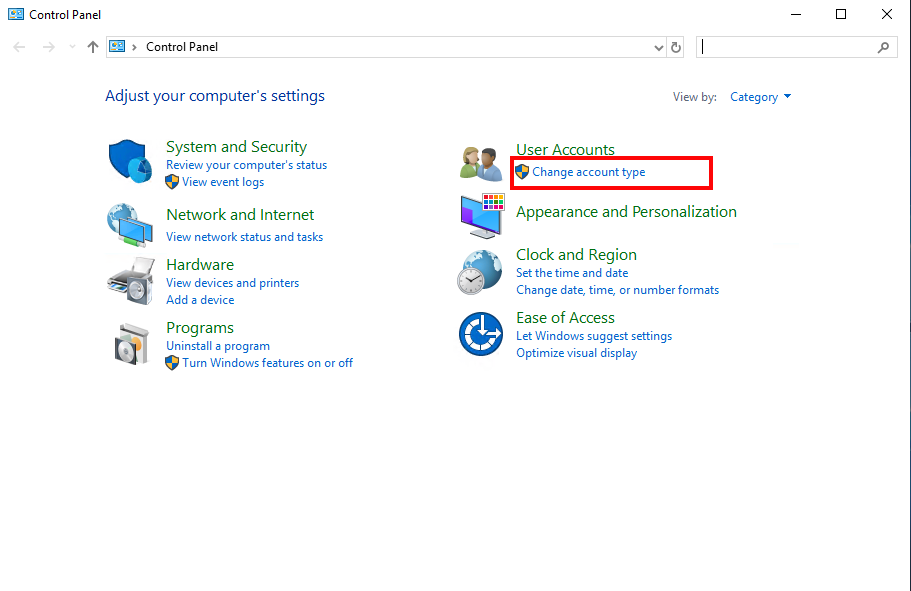
- Under the User accounts click “Change account type” link:
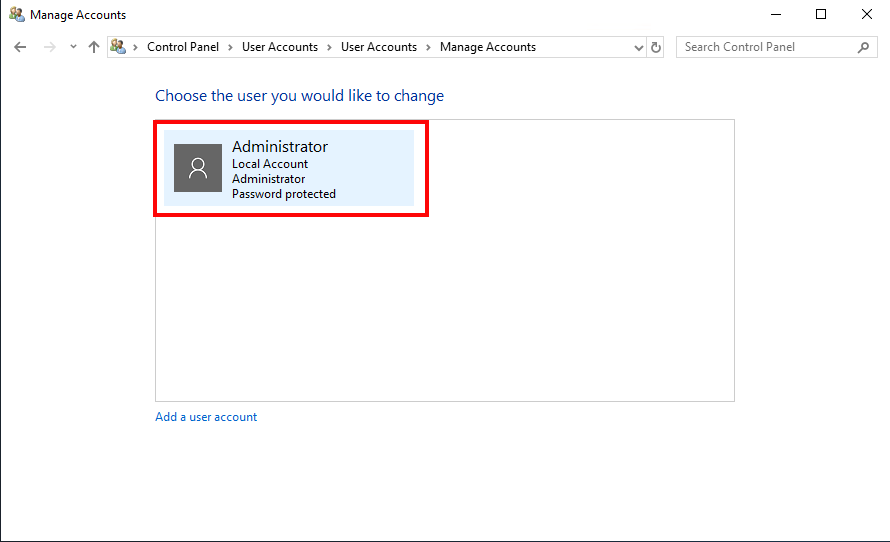
- You will see a list of all user accounts. Select the user account, you need to change the password.
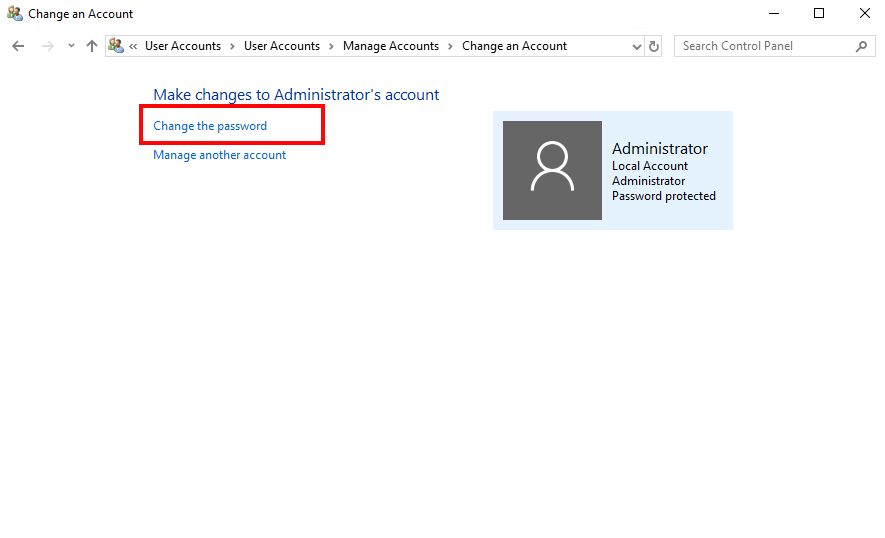
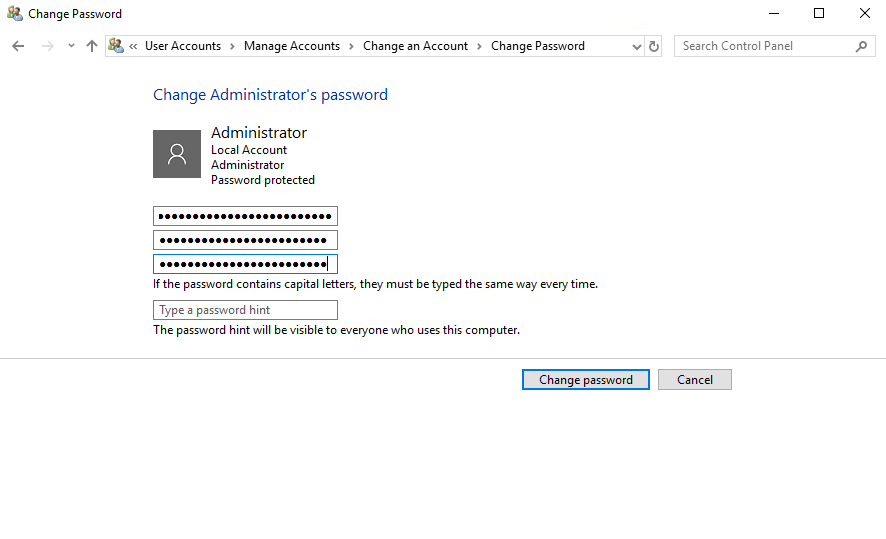
- Make sure the correct account is selected. Now click on the “Change the password” link.
- Enter your current user password, then provide a new password to set for the user. Make sure you have noted this password in a safe place. Now click on the “Change password” button.
Conclusion
Congratulations, You have successfully changed the password of a user in Windows Server 2019.