SFTP is a protocol that allows for the secure transfer of files over a network. It is often used by businesses and individuals to transfer sensitive data. SFTP is similar to FTP but uses a different protocol for communication. SFTP is more secure than FTP and is often used in conjunction with SSH (Secure Shell) to provide an even higher level of security.
In this tutorial, we will help you to set up an SFTP server and create an SFTP-only user on Ubuntu 22.04 systems. That account can connect over SFTP but is not able to connect over SSH. Also, this will restrict (chroot) the SFTP user to a specific directory only.
Prerequisites
- A running Ubuntu 22.04 LTS system with shell access
- Requies a sudo privileged account
Step 1 – Installing OpenSSH Server
The Ubuntu servers have already installed the OpenSSH server but the desktop systems may not have it. Use the following command to install and run OpenSSH server:
sudo apt updatesudo apt install openssh-server
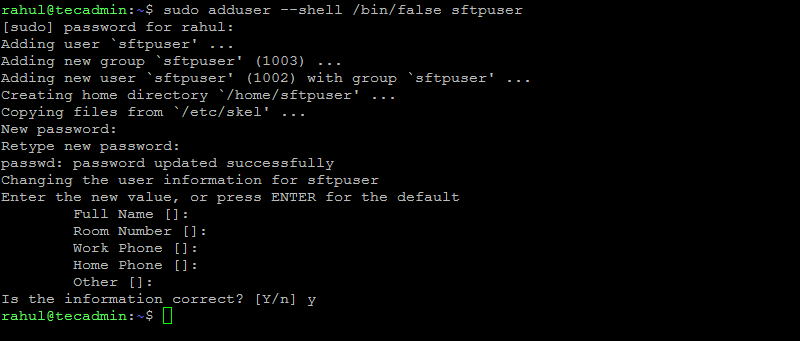
Step 2 – Create SFTP User
First of all, create a new account in your system to use as sftp user.
The following command will create a new account named sftpuser with no shell access. You can change the username of your choice
sudo adduser --shell /bin/false sftpuser
Step 3 – Configure SFTP Directory
Now, create the directory structure to be accessible by the sftp user.
sudo mkdir -p /var/sftp/files
Here we will allow users to access the “files” directory only.
Now, change the ownership of the files directory to the sftpuser. So that sftpuser can read and write on this directory only.
sudo chown sftpuser:sftpuser /var/sftp/files
And set the owner and group owner of the /var/sftp to root. The root user has read/write access on this access. Group members and other accounts have only read and execute permissions.
sudo chown root:root /var/sftpsudo chmod 755 /var/sftp
Step 4 – Update SSH Configuration File
Now edit the SSH configuration file in a text editor
sudo vim /etc/ssh/sshd_config
and add the following settings at end of file.
Match User sftpuser
	ForceCommand internal-sftp
	PasswordAuthentication yes
	ChrootDirectory /var/sftp
	PermitTunnel no
	AllowAgentForwarding no
	AllowTcpForwarding no
	X11Forwarding no
Make sure to add configuration after the Subsystem line as shown in below screenshot:

Save the configuration file and close it.
Now validate the configuration file.
sudo sshd -t
If the validation is successful, no output will be displayed. In case, any error shows in the output, make sure to fix it before running the next commands.
Restart the SSH service to apply changes.
sudo systemctl restart ssh
All done. SFTP-only user is successfully created on your Ubuntu system. Now try logging into the remote system with the new user’s credentials, and check if everything is working correctly.
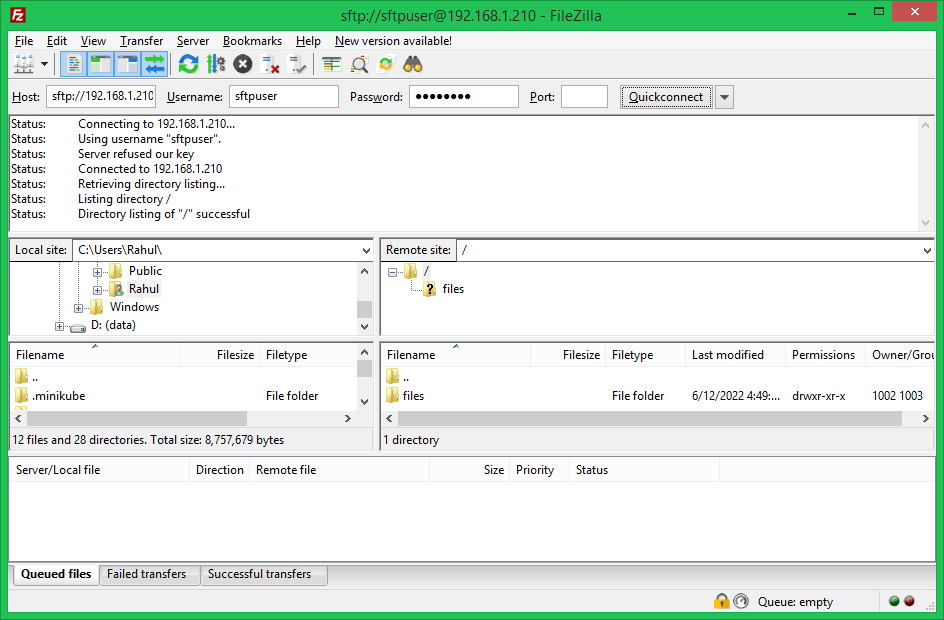
Step 5 – Connect to SFTP User
One can connect to a remote SFTP server using a command line or graphical applications like Filezilla or WinSCP. In this tutorial, I will show you both ways to connect sftp to only an account on the Ubuntu system.
Linux users can use the sftp command-line utility to connect to a remote sftp instance.
sftp sftpuser@192.168.1.210

sftpuser@192.168.10.100's password:
sftp>
You can also connect to a remote SFTP server using graphical interface applications like FileZilla. That is available for both Linux and Windows users. Open the Filezilla application and input to sftp details:
- Host: sftp://system-ip-host
- Username: Use SFTP user created in step 1.
- Password: Use SFTP user password created in step 1.
- Port: Use SSH server port or keep empty for default port.
Click the Quickconnect button:
Verify no shell access:
As this account is configured for SFTP-only connection. So if any user tried to connect via SSH will be disconnected immediately after successful authentication. The user will get the below message:
ssh sftpuser@192.168.1.210

sftpuser@sftp.tecadmin.net's password:
This service allows sftp connections only.
Connection to sftp.tecadmin.net closed.
Conclusion
In conclusion, setting up an SFTP server is a great way to securely transfer files between computers. By following the steps in this article, you can set up your own SFTP server in no time on Ubuntu systems. If you have any questions, feel free to leave a comment below and we’ll be happy to help.

2 Comments
On fresh ubuntu 22.04.1 there is no /etc/ssh/sshd_config file
You may need to install openssh-server server. I have updated the article accordingly.