
Deploying a .NET Core application on Internet Information Services (IIS) can seem daunting at first, but with the right steps, it’s a straightforward process. This guide will walk you through deploying your .NET Core application on IIS, from prerequisites to troubleshooting common issues.
Prerequisites
Before starting, ensure you have the following:
- .NET Core Runtime and Hosting Bundle: Installed on the server where IIS is running. This bundle allows IIS to host .NET Core applications.
- IIS Configured on Windows Server: Make sure IIS is installed and running. You can install it through the Windows Server Manager or PowerShell.
- Administrator Access: You’ll need administrator access to the server for installing the Hosting Bundle and configuring IIS.
Step 1: Install the .NET Core Hosting Bundle
- Visit official .NET download page.
- Select the required version and download the .NET Core Hosting Bundle
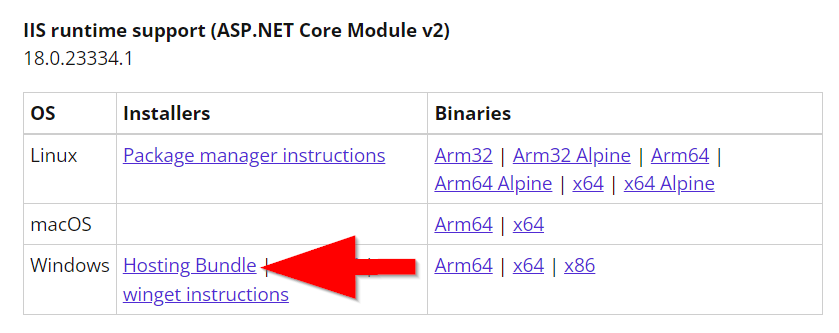
Download .NET Hosting Bundle - Run the installer on your server. This will install the .NET Core Runtime, .NET Core Library, and the ASP.NET Core Module. The ASP.NET Core Module is a necessary component for hosting .NET Core applications on IIS.
- Restart IIS to load the newly installed modules. You can do this by running iisreset in the command prompt.

Step 2: Publish Your .NET Core Application
Using Visual Studio
- Open your solution in Visual Studio.
- Right-click on your project in the Solution Explorer and select “Publish”.
- Choose “Folder” as the publish target and specify a folder to publish your application files.
- Click “Publish”, Visual Studio will compile your application and copy the necessary files to the specified folder.
Using Command Prompt
To publish your .NET Core application, navigate to the project directory in the command line. Then, execute the following command:
dotnet publish -c Release
This command compiles the application in release mode and outputs to the “bin/Release/netcoreapp{version}/publish” directory.
Step 3: Create an IIS Application Pool
Using IIS Manager
- Open the IIS Manager.
- In the “Connections” pane, right-click on “Application Pools” and select “Add Application Pool”.
- Name your application pool and set the .NET CLR version to “No Managed Code” since .NET Core does not rely on the CLR runtime. The Managed Pipeline Mode should be set to “Integrated”.
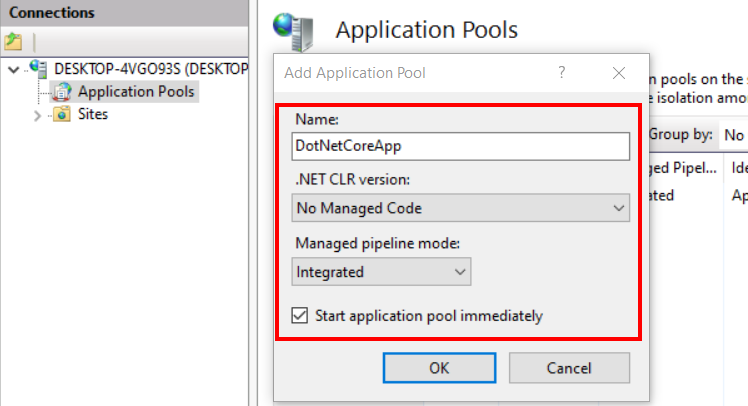
Create IIS Application Pool for .NET Core - Click “OK” to create the application pool.

Using Command Prompt
- Open Command Prompt as Administrator.
- Execute the following commands:
cd %windir%\system32\inetsrv
appcmd add apppool /name:"DotNetCorePool" /managedRuntimeVersion:"" /managedPipelineMode:"Integrated"
Replace “DotNetCorePool” with the name you wish to give to your new application pool.
- This command creates a new application pool with the .NET CLR version set to “No Managed Code” (/managedRuntimeVersion:””) and the Managed Pipeline Mode set to “Integrated” (/managedPipelineMode:”Integrated”).
Step 4: Deploy the Application on IIS
Using IIS Manager
- In the IIS Manager, right-click on “Sites” in the “Connections” pane and choose “Add Website”.
- Enter a name for your website, and select the application pool you created earlier.
- For the physical path, browse and select the folder where you published your .NET Core application.
- Specify the binding information (e.g., IP address, port, and host name).
- Click “OK” to add the website.
Using Command Prompt
You can also create website in IIS using command prompt. To create website, type:
cd %windir%\system32\inetsrv
appcmd add site /name:MyWebsite /physicalPath:C:\inetpub\wwwroot\MyApp /bindings:http/*:80:example.com /apppool:DotNetCorePool
Replace “MyWebsite” with your website name, C:\inetpub\wwwroot\MyApp with the application path, example.com with your domain name, and DotNetCorePool with your application pool created in previous step.
Step 5: Configure the ASP.NET Core Module
Ensure your web.config file is correctly set up for the ASP.NET Core Module to forward HTTP requests to your application. This file should be included in the published output and contain settings like the following:
<configuration>
  <system.webServer>
    <handlers>
      <add name="aspNetCore" path="*" verb="*" modules="AspNetCoreModuleV2" resourceType="Unspecified" />
    </handlers>
    <aspNetCore processPath="dotnet" arguments=".\YourApplication.dll" stdoutLogEnabled="false" stdoutLogFile=".\logs\stdout" hostingModel="InProcess" />
  </system.webServer>
</configuration>
Replace YourApplication.dll with your application dll name.
Step 6: Test Your Application
Open a web browser and navigate to the URL you configured for your site. If everything is configured correctly, your .NET Core application should be running on IIS.
Troubleshooting Common Issues
- HTTP Error 502.5 – Process Failure: This often indicates a problem with the application’s startup process. Check the event logs and stdout logs (if enabled) for specific errors.
- 500 Internal Server Error: This can occur for various reasons, including issues with the web.config file or application dependencies. Again, the logs are invaluable for diagnosing these problems.
- 404 File or Directory Not Found: This may happen if the application’s physical path is incorrect or the application pool is misconfigured.
Conclusion
Deploying a .NET Core application on IIS involves several steps, from installing the .NET Core Hosting Bundle to configuring IIS and publishing your application. By following this guide, you can ensure a smooth deployment process and have your .NET Core application running on IIS in no time. Remember, troubleshooting is an integral part of deployment, so don’t be discouraged by initial hiccups; use the logs and error messages as guides to resolve any issues.