
n an age where nearly everything is connected, network monitoring is no longer a luxury—it’s a necessity. The consequences of network downtimes can be severe, ranging from financial losses to brand damage and customer distrust. Hence, monitoring tools that can keep up with the complexity and scale of modern networks are crucial. LibreNMS, a flexible, open-source network monitoring system, fits this description. Built on PHP, MySQL, and SNMP, it provides comprehensive insights into the health of your network infrastructure. If you’re running on an Ubuntu server, you’re in luck.
In this article, we’ll delve into the step-by-step process of installing and setting up LibreNMS on Ubuntu 22.04/20.04, giving you the tools you need to ensure your network’s reliability and performance.
Prerequisites
- Fresh Ubuntu 22.04 or 20.04 server installation.
- Sudo or root access to the server.
- A web server (We’ll use Apache for this tutorial).
- MariaDB or MySQL for the database.
Step-by-step Installation
Step 1: Update Your System
First of all, launch a terminal and update the system packages to the latest version by executing the following command:
sudo apt update && sudo apt upgrade -y
Step 2: Install Dependencies
Before installing LibreNMS, you need to install some necessary packages:
sudo apt install software-properties-common composer fping git graphviz imagemagick mariadb-server mtr-tiny nmap python3-pymysql python3-dotenv python3-redis python3-setuptools rrdtool snmp snmpd whois -y
Step 3: Install PHP and Extensions
LibreNMS requires PHP. Add the PHP repository and install the necessary PHP extensions:
sudo add-apt-repository ppa:ondrej/php
Now install the PHP 8.1 with required extensions:
sudo apt install libapache2-mod-php8.1 php8.1-cli php8.1-curl php8.1-fpm php8.1-gd php8.1-mbstring php8.1-mysql php8.1-snmp php8.1-xml php8.1-zip -y
Step 4: Configure MySQL/MariaDB
Once MariaDB is installed, secure your installation:
sudo mysql_secure_installation
Next, log into the MariaDB shell and create a database and user for LibreNMS:
sudo mysql -u root -pCREATE DATABASE librenms2 CHARACTER SET utf8mb4 COLLATE utf8mb4_unicode_ci;CREATE USER 'librenms'@'localhost' IDENTIFIED BY 'your_password';GRANT ALL PRIVILEGES ON librenms.* TO 'librenms'@'localhost';FLUSH PRIVILEGES;exit
Replace ‘your_password’ with a secure password.
Step 5: Download and Install LibreNMS
Navigate to the web server’s root directory and clone the LibreNMS repository:
cd /optsudo git clone https://github.com/librenms/librenms.git
Set the proper permissions:
cd /opt/librenmssudo chown -R librenms:librenms .sudo setfacl -d -m g::rwx rrd/ logs/sudo chmod -R ug=rwX rrd/ logs/
Install the required PHP libraries using composer:
composer install
Step 6: Other Required Configuration
- Setup Timezone: You need to edit the PHP configuration file and setup the required time zone:
Ref: https://tecadmin.net/setup-timezone-in-php-configuration/
- Setup scheduler service:
sudo cp /opt/librenms/dist/librenms-scheduler.service /opt/librenms/dist/librenms-scheduler.timer /etc/systemd/system/sudo systemctl enable librenms-scheduler.timersudo systemctl start librenms-scheduler.timer - Setup lnms binary:
sudo ln -s /opt/librenms/lnms /usr/local/bin/lnms - Setup bash completion:
sudo cp /opt/librenms/misc/lnms-completion.bash /etc/bash_completion.d/ - Setup log rotate:
sudo cp /opt/librenms/misc/librenms.logrotate /etc/logrotate.d/librenms
Step 7: Configure SNMP
- Copy the LibreNMS SNMP configuration:
sudo cp /opt/librenms/snmpd.conf.example /etc/snmp/snmpd.conf - Edit the SNMP configuration:
sudo nano /etc/snmp/snmpd.confReplace RANDOMSTRINGGOESHERE with a secure community string of your choice.
- Restart the SNMP service:
sudo systemctl restart snmpd
Step 8: Configure Apache
- Create a new Apache configuration file for LibreNMS:
sudo nano /etc/apache2/sites-available/librenms.conf - Add the following configuration:
<VirtualHost *:80> DocumentRoot /opt/librenms/html/ ServerName your_domain_or_ip AllowEncodedSlashes NoDecode <Directory "/opt/librenms/html/"> Require all granted AllowOverride All Options FollowSymLinks MultiViews </Directory> </VirtualHost> - Enable the configuration and restart Apache:
sudo a2ensite librenms.confsudo systemctl restart apache2
Step 9: Final Installation Steps
Now, open a browser and navigate to your server’s domain or IP address. Follow the on-screen instructions to complete the LibreNMS installation.
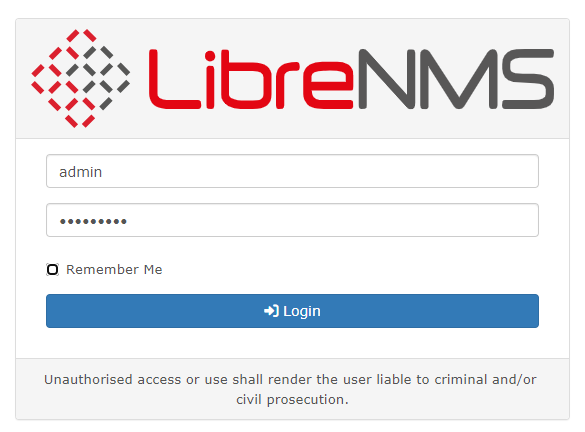
You will see a configuration wizard to complete the installation process. Follow on screen instruction to makesure all required packages are configured. Then setup the database credentials and create admin user. After the successful completed wizard, You will find the login screen:

Conclusion
Network monitoring is indispensable in our interconnected world. Tools like LibreNMS offer a holistic view of your network’s state, ensuring you can react swiftly to potential issues and maintain optimal performance. With our guide, you have installed and configured LibreNMS on your Ubuntu 22.04/20.04 system, laying the groundwork for robust network management. But the journey doesn’t stop here. Continuously explore LibreNMS’s plethora of features to fine-tune your monitoring practices, ensuring a robust, efficient, and secure network environment for your organization. Remember, in the world of networking, vigilance is the key to reliability.