MongoDB is a popularly used document-oriented, NoSQL, database program. The term NoSQL refers to not only SQL which is an approach to designing databases. A NoSQL database is modeled in a way that the storage and retrieval of data are done through documents, instead of using the tabular structure (tables and rows) used in the more traditional relational databases.
MongoDB is a general-purpose database in which data is stored in flexible JSON-like documents in key-value pairs. Each MongoDB database has collections that contain documents. These documents can have different sizes, contents, and numbers of fields. It supports an optional schema model which means that the blueprint of the database doesn’t need to be defined beforehand. The MongoDB databases are very scalable.
The document-oriented model makes MongoDB very flexible. It is great at load balancing and duplicating data and can run on multiple servers. These features allow it to keep the system running even if there is hardware failure. Following are some of the key features of MongoDB:
- Ad-hoc queries
- Indexing
- Aggregation
- Load balancing
- Capped collections
- Replication
How to install MongoDB on CentOS 8
To install MongoDB on your system you must be logged in as a root user or have sudo privileges.
MongoDB is not available by default in CentOS 8 repositories. So, first, we will have to create a new file and add MongoDB to the repositories of CentOS 8. Use the below-given command to create a new file:
sudo nano /etc/yum.repos.d/mongodb-org-5.0.repo
Now copy and paste the following text into the text file created above, so you can install MongoDB directly from the terminal:
[mongodb-org-5.0]
name=MongoDB Repository
baseurl=https://repo.mongodb.org/yum/redhat/$releasever/mongodb-org/5.0/x86_64/
gpgcheck=1
enabled=1
gpgkey=https://www.mongodb.org/static/pgp/server-5.0.asc
Save the file and close it.
Now to install MongoDB use the command given below:
sudo dnf install mongodb-org -y

The command given above will install the newest stable version of MongoDB. As of now, it is 5.0. You can visit MongoDB’s official website to check out the latest version. If you want to install a specific version then replace 5.0 with your preferred version in the text file.
To verify the installation, run the MongoDB database:
mongo
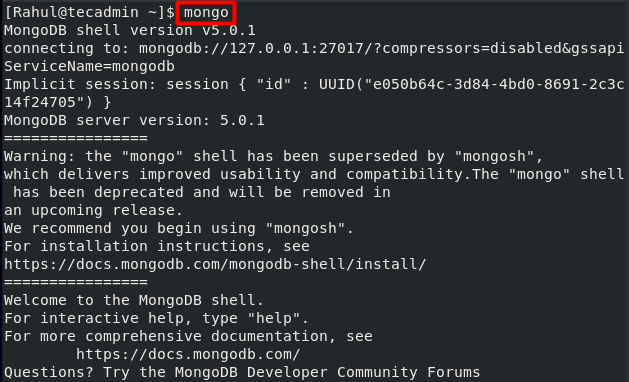
Now execute the below-given command to check the version installed on your system:
db.version()
Output:5.0.1
Now, use the following command to exit the shell:
exit
Once the installation process is completed, start MongoDB by using the below-mentioned command:
sudo systemctl start mongod
Now enable the MongoDB service using the command given below.
sudo systemctl enable mongod
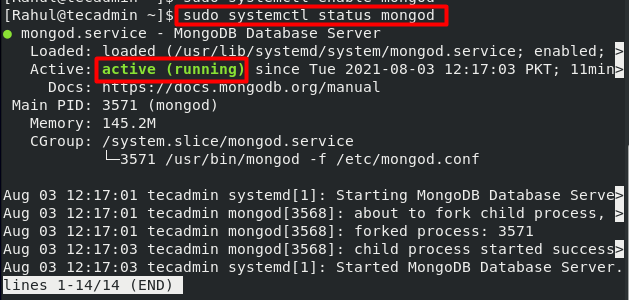
You can use the below-given command to check the status of the MongoDB service:
sudo systemctl status mongod
How to Enable MongoDB Authentication
Now that we have successfully installed MongoDB on our system, we will configure it to make it more secure.
Authentication is disabled by default for MongoDB. This allows any user to modify, create, delete or interact with databases. It is recommended to enable authentication and restrict access to MongoDB. MongoDB authentication can be enabled by editing the following configuration file:
nano /etc/mongod.conf
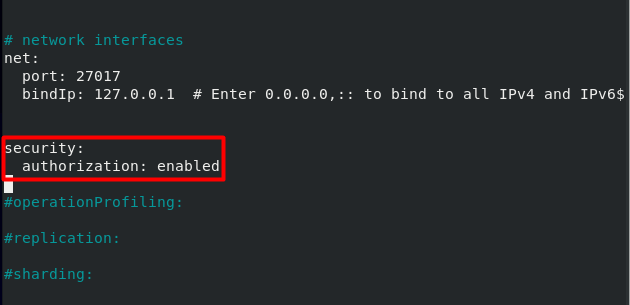
After opening the config file in your preferred browser search for #security. Uncomment the security section by removing the # sign and add authorization: enabled on the next line. The “authorization: enabled” line should be indented by using two spaces. The config file should look something like this after you are done editing it:
Save and exit the file using Ctrl + X if you’re using Nano. Now to apply the changes to MongoDB; restart the service using the following command:
systemctl restart mongod
You can again check the status of the MongoDB service to verify if the service has restarted successfully by using the above-mentioned command.
How to Create an Admin user for MongoDB
Now we will create an admin user for MongoDB who will have all the administrative privileges. To create a new MongoDB admin user, first access the MongoDB service by using the following command:
mongo
Now execute the following command to use the service as an admin:
use admin
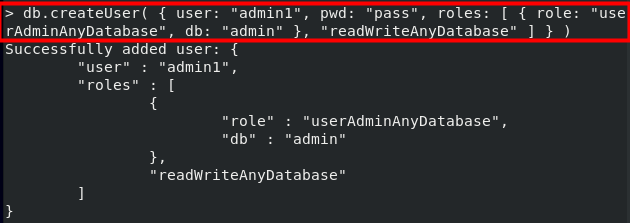
Now use the below given command to create a new user:
db.createUser( { user: "admin1", pwd: "pass", roles: [ { role: "userAdminAnyDatabase", db: "admin" }, "readWriteAnyDatabase" ] } )
You can replace admin1 and pass with your preferred username and password.
Now exit the shell by using the below-given command:
exit
How to verify MongoDB Authentication
Now you will not be able to run a command on the MongoDB shell without authentication as we have configured it to make authentication necessary.
You can open the MongoDB service and try to run different commands to verify this:
show users
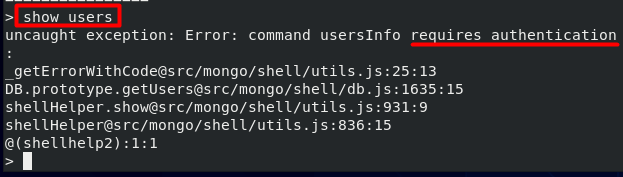
show dbs
In the example above no output has been shown as the access is now restricted.
You can access the MongoDB service with the administrative user by using the command given below:
mongo -u admin1 -p --authenticationDatabase admin
Now if I use the show dbs command again, I get the following output:
show dbs
Output:admin 0.000GB config 0.000GB local 0.000GB
Conclusion
MongoDB is a free, open-source, NoSQL database. It offers developers a lot more flexibility than traditional relational-based databases. It stores data in JSON-like documents which allows faster and efficient data transfer between the client and the database.
In this comprehensive guide, we learned to install and configure MongoDB on CentOS 8 operating system.
