
Django is a Python Web framework that encourages the rapid development of applications. The Django framework is designed for developers to take applications from initial to completion as quickly as possible. It provides higher security for the application and avoids developers from making common security mistakes.
This tutorial will help you to install the Django web framework in Ubuntu 20.04 Linux system. It will also help you to create a sample Django application. Let’s go through the tutorial:
Step 1 – Installing Python
Most of the latest operating systems come with default Python 3 installed. But if your system doesn’t have Python installed, Execute the below commands to install it. Also, install pip on your system.
sudo apt update -ysudo apt install python3 python3-pip -y
The installed Python version is:
python3 -V

Python 3.8.2
And pip version is:
pip3 -V

pip 20.0.2 from /usr/lib/python3/dist-packages/pip (python 3.8)
Step 2 – Installing Django Python Module
You can install Django either from source code available in Github repository or install it using PIP . In this tutorial, I use pip for the Django installation on Ubuntu 20.04 system. Run the below command from Linux terminal:
pip3 install Django
You will get a django-admin command for creating new projects. Check the current installed version:
django-admin --version

3.1
Step 3 – Create Django Application
First, navigate to the directory you need to create a new application. Then use django-admin startproject command followed by the application name to create a new Django application. Open a terminal on your system and type:
mkdir -p /var/www && cd /var/wwwdjango-admin startproject django_app
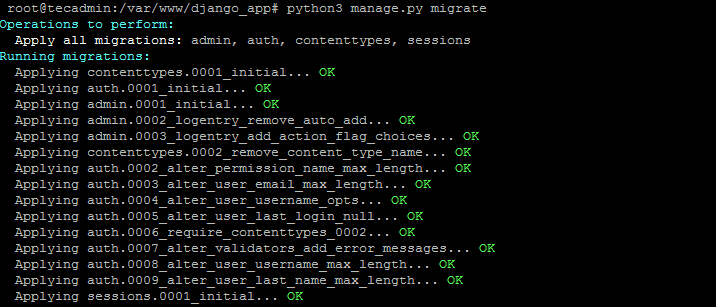
After that migrate the pending changes.
cd django_apppython3 manage.py migrate
Step 4 – Create Django Super Admin Account
Also, create a superuser account for the administration of the Django application. Run the following command from your Django application directory.
python3 manage.py createsuperuser

Step 5 – Running Django Application
The Django application is ready to serve. By default, Django doesn’t allow external hosts to access the web interface. To allow external hosts, edit settings.py file and add IP under ALLOWED_HOSTS.
vi django_app/settings.py
Add IP:
ALLOWED_HOSTS = ['192.168.1.239']
Here 192.168.1.239 is the IP address of the system where Django is installed.
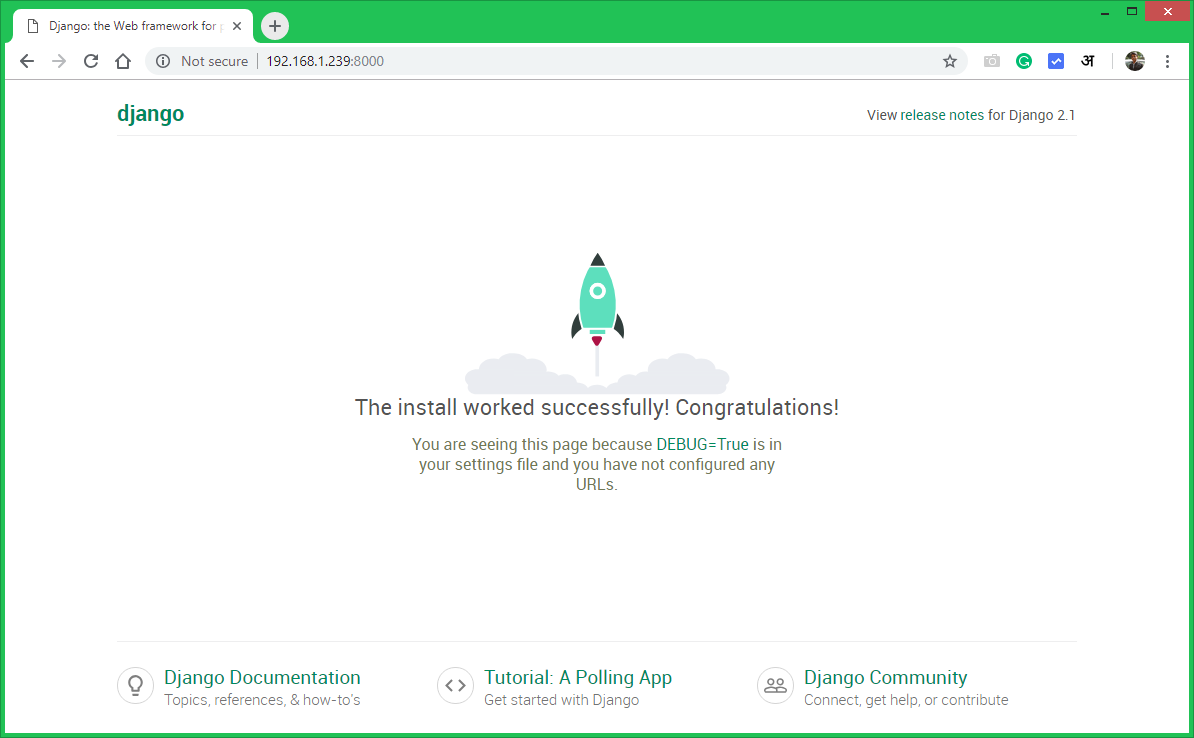
Finally, run the Django application server with below command. Here 0.0.0.0:8000 defined that Django will listen on all interfaces on port 8000. You can change this port with any of your choices.
python3 manage.py runserver 0.0.0.0:8000

Django application server is running now. Open your favorite web browser and access to Django system ip on port 8000. This will show you the default Django web page.
http://192.168.1.239:8000
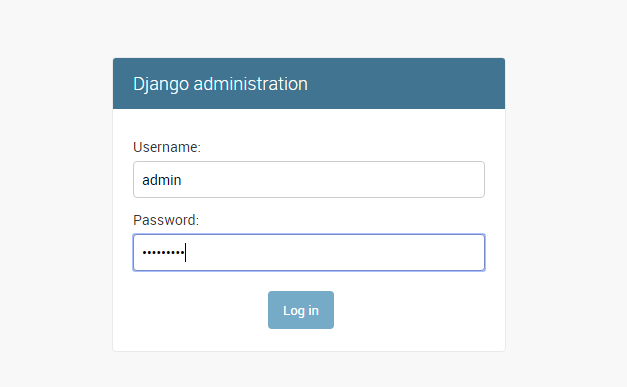
You can also access Django administrator page on /admin subdirectory url. Use your superuser login credentials created in the previous step to get access.
http://192.168.1.239:8000/admin
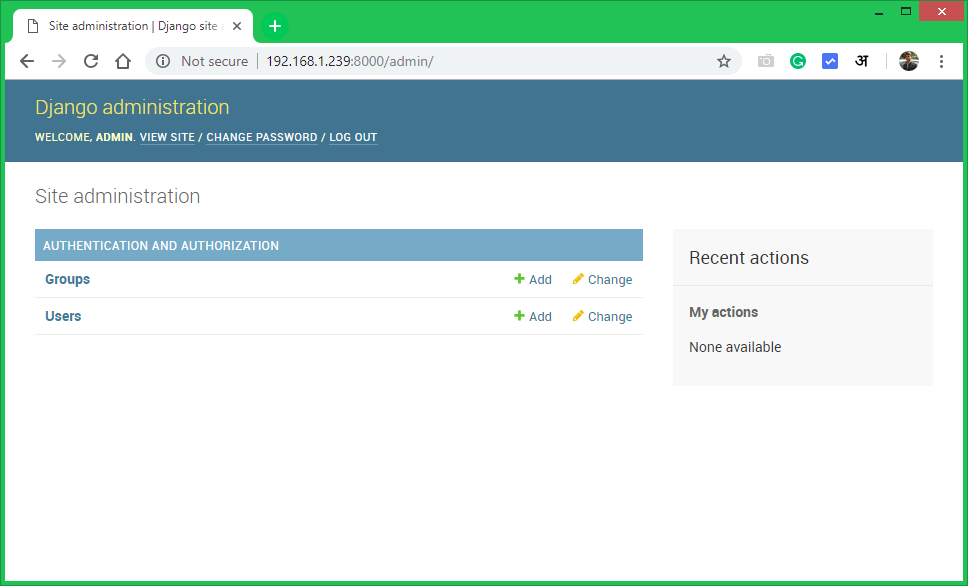
You will get the Django admin dashboard like below. You can add more users and groups for your application on dashboard.
Conclusion
You have successfully created Django application on your system. Let’s start building your Django application.
2 Comments
for example i have a VPS and i want to hosting a few domains so i hace to do this for every single domain? thanks
hello, but i woulk line to know after this beacuse it should be works without port 8000 the project so can you help me with that please i have been trying but i could not thanks