Google Chrome is one of the most popular web browsers with over 1 billion users worldwide. It can be used on Windows, macOS, and Linux. To install Google Chrome on a Mac, you need to use its standalone installer file from the official website. This guide will show you how to install Google Chrome on macOS.
Steps to Install Google Chrome on macOS
To install Google Chrome on your Mac, follow these steps:
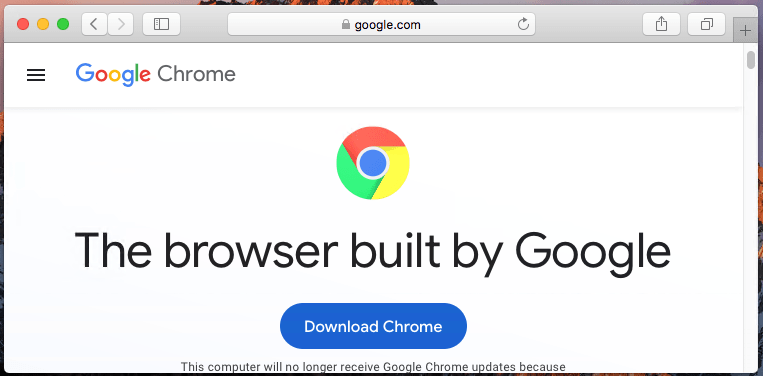
- Open Safari and visit google.com/chrome.
- Download Application:
You will see a download button in center of page as seen in below screenshot. Click the “Download Chrome” button to download chrome application.

- Open downloaded file:
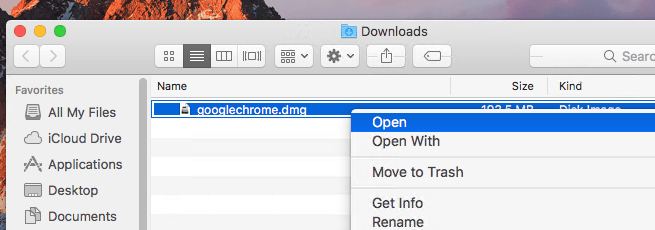
When the download is finished, open the file called googlechrome.dmg from the Downloads folder.
- Install chrome application:
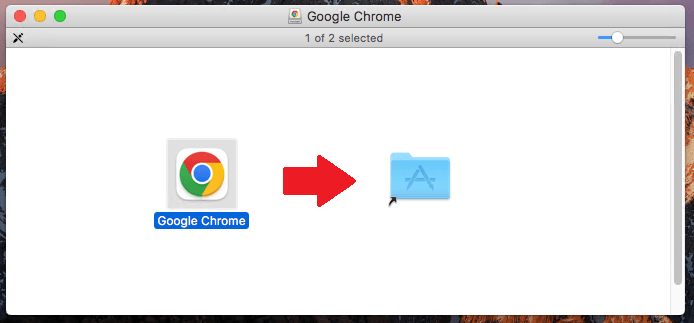
Drag the Chrome icon to the Applications folder to complete the installation process.

- Launch chrome application:
Launch Google Chrome from the Applications folder or from your Dock.

- Disk cleanup: Remove the Google Chrome dmg file from the Downloads folder.
Google Chrome Shortcuts on macOS
Here are some useful Google Chrome shortcuts for macOS:
- ⌘ + T: Open a new tab
- ⌘ + Shift + N: Open a private window (Incognito mode)
- ⌘ + W: Close current tab
- ⌘ + L: Go to the address bar
- ⌘ + Shift + R: Reload current tab
- ⌘ + F: Open the browser’s built-in search feature
- ⌘ + D: Bookmark the current page
- ⌘ + J: Open Downloads
- ⌘ + P: Print the current page
- ⌘ with + or – keys: Zoom in and out
Conclusion
In conclusion, installing Google Chrome on macOS is straightforward and only takes a few minutes. By following the steps outlined in this guide, you can quickly download, install, and start using Google Chrome on your Mac. Once installed, you will enjoy its speed, security, and many useful features. Whether you are browsing the web, working, or studying, Google Chrome is a great choice for a reliable and efficient web browser. Enjoy your new browsing experience on macOS!


