The ionCube loader is the library used to load ionCube encoded files on the server. It is required to installed on the webserver to decode any ionCube encoded files before running. The ionCube provides a feature to encrypt your PHP script to keep them secure. It also keeps them secure from unauthorized uses.
This tutorial will help you to configure the ionCube loader with PHP on Ubuntu 20.04 Linux system.
Pre-Requisites
We assume you already have PHP installed on your Ubuntu system. If not, you can follow these instructions to install required PHP version.
Step 1 – Download Ioncube Loader
First of all download the latest ioncube loaders php modules from ioncube from ioncube download page. Alternatively you can also use following command to download ioncube loaders. Also extract the downloaded archive under /usr/local directory.
wget http://downloads3.ioncube.com/loader_downloads/ioncube_loaders_lin_x86-64.tar.gztar xzf ioncube_loaders_lin_x86-64.tar.gz -C /usr/local
Step 2 – Find Correct PHP.ini
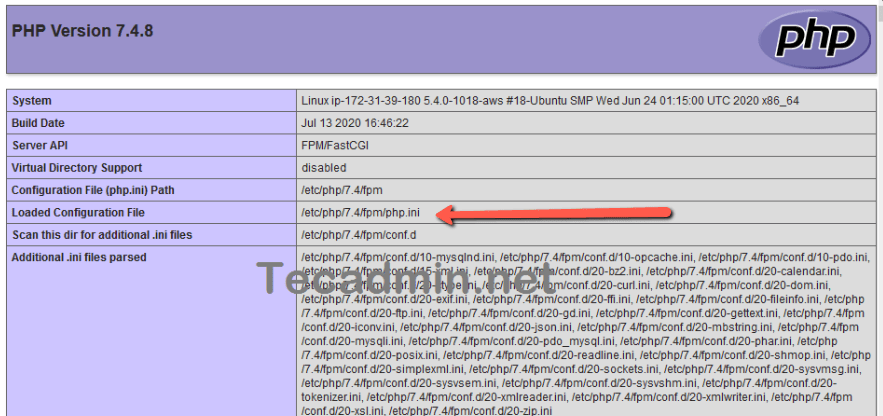
It is important to find the correct php configuration file (php.ini) to enable ionCube for that only. The php -i command provides you the details information about the active php version on command line interface.
You can grep the php.ini location by running command:
php -i | grep php.ini

Configuration File (php.ini) Path => /etc/php/7.4/cli
Loaded Configuration File => /etc/php/7.4/cli/php.ini
But, might be Apache have been configured with the another version of the PHP. To find that you need to put a phpinfo(); file on server web server document root.
By default PHP stored configuration files at the following location. For example, the configuration files for the PHP 7.4 are stored at below location
- /etc/php/7.3/cli/php.ini
#for PHP CLI - /etc/php/7.3/fpm/php.ini
#for PHP FPM - /etc/php/7.3/apache/php.ini
#for PHP with Apache
Step 3 – Configure ionCube Loader in PHP
Now, edit the required PHP configuration files or you may update in all the configuration files found above. Append the below code to the end of the files based on your PHP version.
zend_extension = /usr/local/ioncube/ioncube_loader_lin_7.4.so
Make sure to replace /usr/local/ioncube/ioncube_loader_lin_7.23.so file path with your matching PHP version file.
Step 4 – Test Configuration
All done. You have added ionCube settings to your php configuration. To verify the configuration, type:
php -v

PHP 7.4.8 (cli) (built: Jul 13 2020 16:46:22) ( NTS )
Copyright (c) The PHP Group
Zend Engine v3.4.0, Copyright (c) Zend Technologies
    with the ionCube PHP Loader + ionCube24 v10.4.1, Copyright (c) 2002-2020, by ionCube Ltd.
    with Zend OPcache v7.4.8, Copyright (c), by Zend Technologies
You will see that ionCube PHP loader has been configured with your PHP version. Similarly, to view configuration for Apache use phpinfo() file.
Conclusion
In this tutorial, you have learned to install and configure ionCube PHP Loader on Ubuntu 20.04 Linux system.


3 Comments
Thanks for making this tutorial noob friendly. I didn’t understand shit
Well this is greatest shot clean tutorial.
Thank you
Thanks! This was just what I was looking for. Apparently I’m not the only one, I did a google search for “ubuntu 20.04 install ioncube loader.” While your site came up first for that search, the sites further down in the SERPs all linked back to your site. I know this because I checked three or four of them, hoping that I would find whether there was an ioncube loader in the Ubuntu repositories.
Your instructions worked like a charm.