In the ever-evolving landscape of software development, efficiency and automation stand as pillars of success. Jenkins, an open-source automation server, enables developers to automate the various aspects of software development related to building, testing, and deploying, facilitating a more streamlined development process. This guide will walk you through the comprehensive steps to install Jenkins on Ubuntu, a popular choice for many development and production environments due to its stability, security, and ease of use.
Prerequisites
Before we dive into the installation process, ensure you have the following prerequisites covered:
- An Ubuntu server (we recommend using the latest LTS version for longer support life).
- A user account with sudo privileges.
- Internet access for downloading necessary packages.
Step 1: Installing Java
Jenkins is a Java-based application, so the first step is to install Java. Jenkins requires Java 8 or Java 11. Here’s how you can install Java OpenJDK 11 on your Ubuntu system:
To install OpenJDK Java on your Ubuntu system, type:
sudo apt updatesudo apt install default-jdk
Once the installation is finished, Type java -version on terminal to test java version.
Step 2: Installing Jenkins on Ubuntu
Jenkin’s official team provides the Debian packages for the installation on Ubuntu systems. You just need to configure the official PPA to your system and install Jenkins on Ubuntu systems.
Use the below steps to install Jenkins on Ubuntu:
- Import GPG Key – Use the following command to import GPG to your system.
wget -q -O - https://pkg.jenkins.io/debian/jenkins.io.key | sudo apt-key add - - Add PPA – Next, configure the Jenkins PPA to your Ubuntu system using the following command:
sudo sh -c 'echo deb http://pkg.jenkins.io/debian-stable binary/ > /etc/apt/sources.list.d/jenkins.list' - Install Jenkins – Update the apt-get cache before installing Jenkins on Ubuntu. After that, you can install Jenkins on an Ubuntu system by running the below commands.
sudo apt updatesudo apt install jenkinsOnce the installation is completed, the Jenkins service will start automatically on port 8080. If the same port is occupied by any other service on your system, You can edit the /etc/default/jenkins file and change its port by setting the HTTP_PORT value.
- Check Service – Finally check the jenkins service status using the following command.
sudo systemctl status jenkins
You have successfully installed Jenkins on Ubuntu 20.04 system. Next, initialize the Jenkins installation first and configure it.
Step 3: Access Jenkins Web Interface
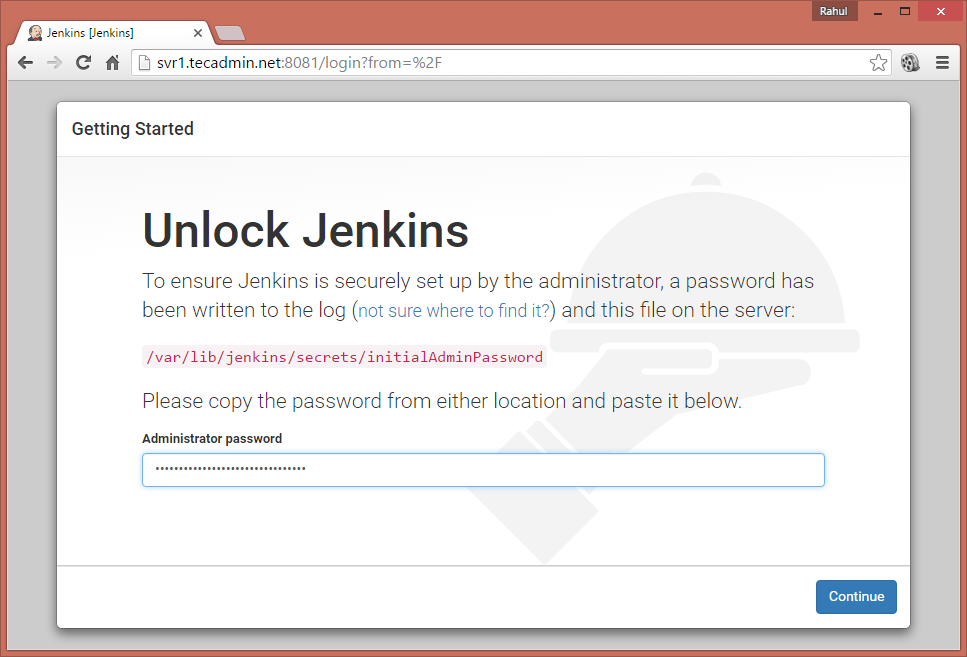
Access your server on port 8080 (Or updated port) in your favorite web browser. The default installation password can be found at /var/lib/jenkins/secrets/initialAdminPassword as showing in the below image.
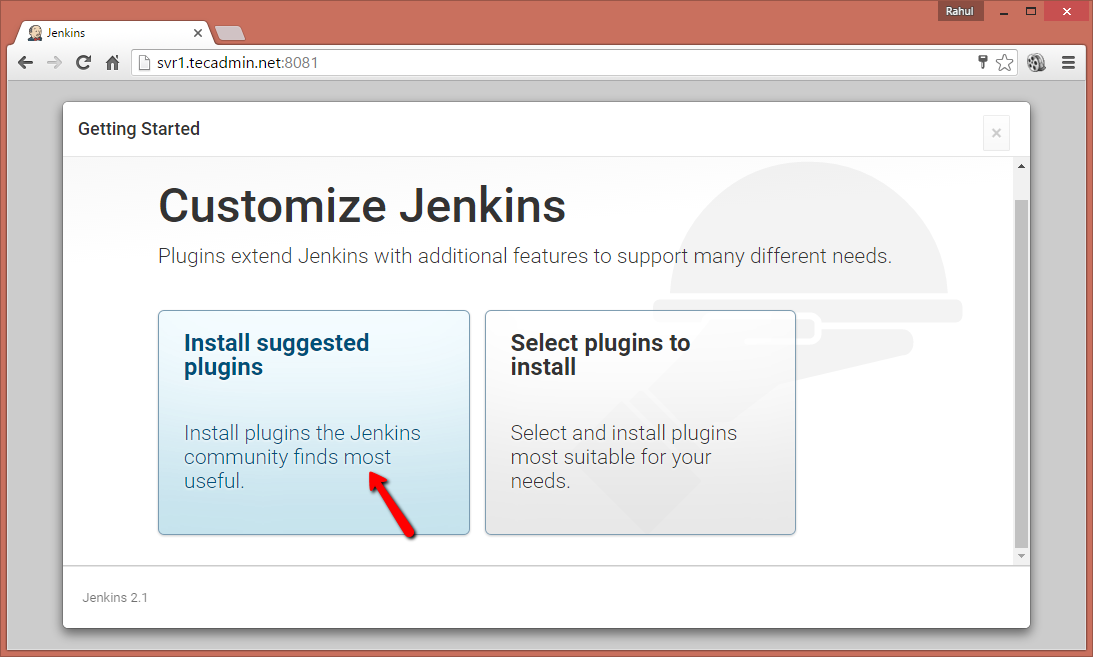
Now select the appropriate option to install the plugin. You can choose to install suggested plugins or select the required plugins options.
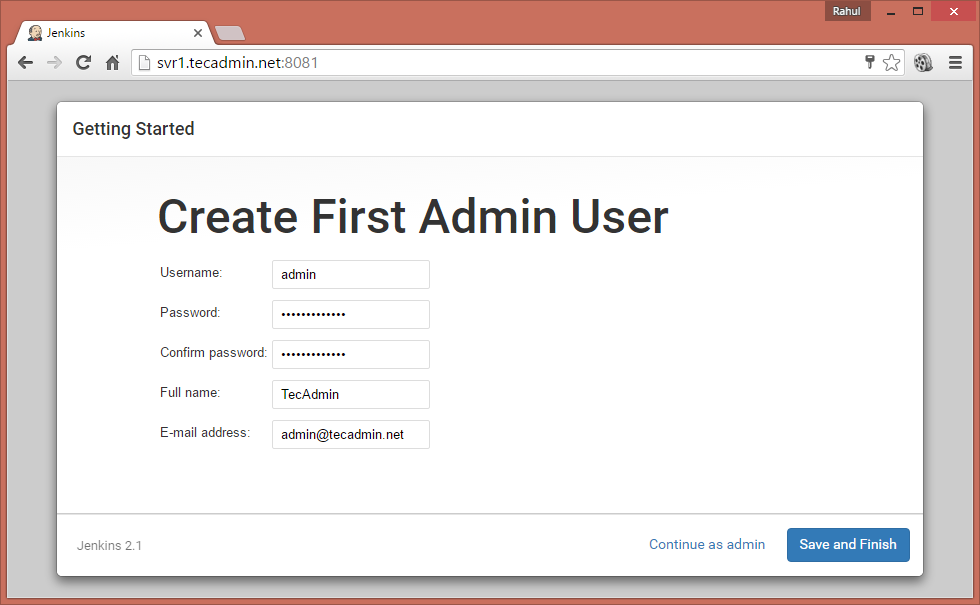
Next, create an admin account for your Jenkins setup. Which is required to log in to Jenkins.
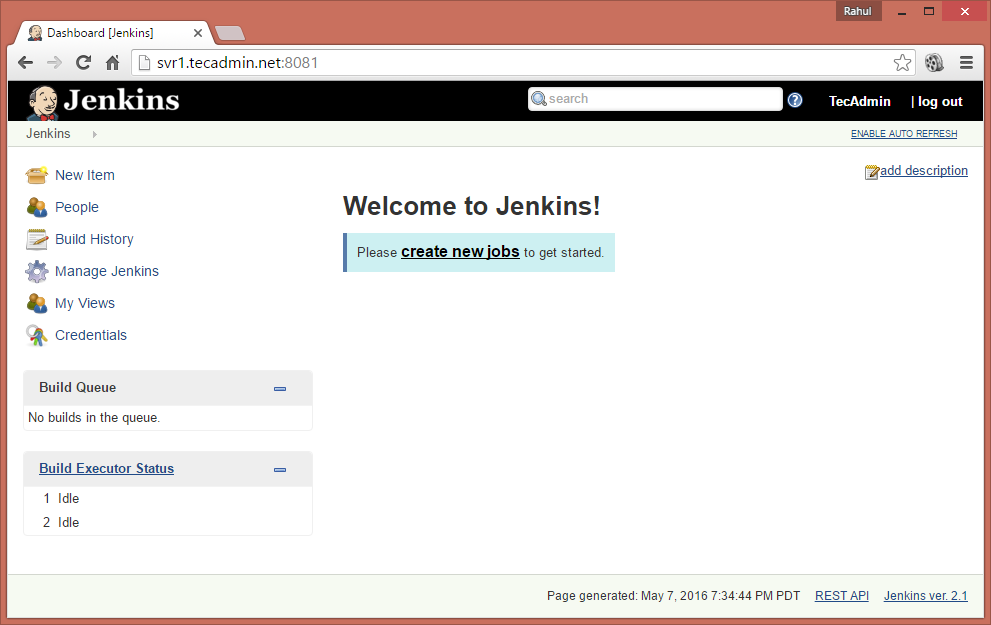
After the successful completion of the Jenkins setup wizard, You will be redirected to the Jenkins dashboard.
Step 4: Installing Jenkins Plugin
Login to Jenkins dashboard and navigate to Manage Jenkins >> Manage Plugins >> Available Tab and select the plugins to install.
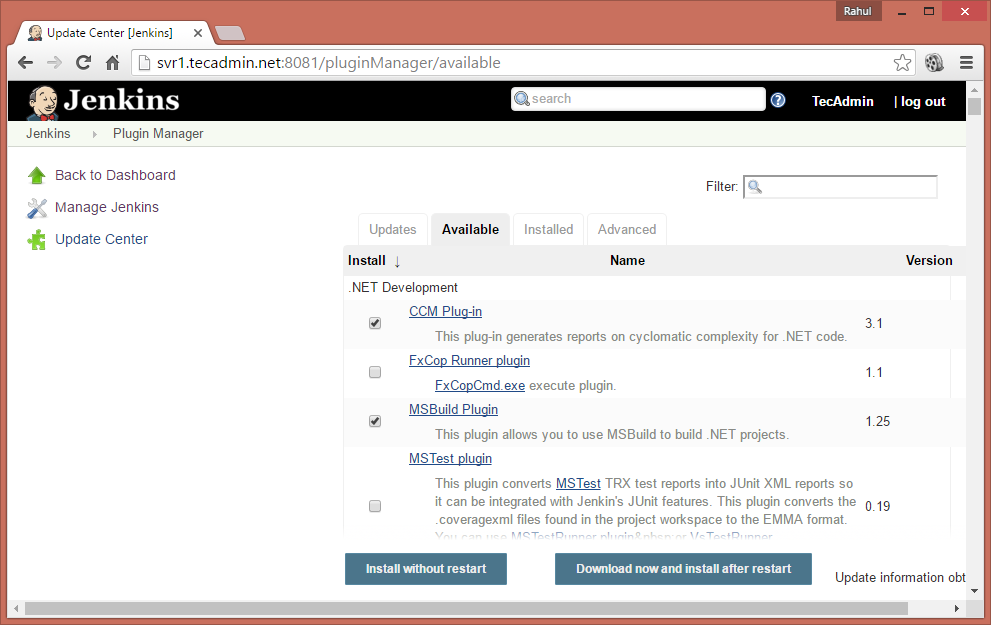
To update existing installed plugins in Jenkins Manage Jenkins >> Manage Plugins >> Update Tab
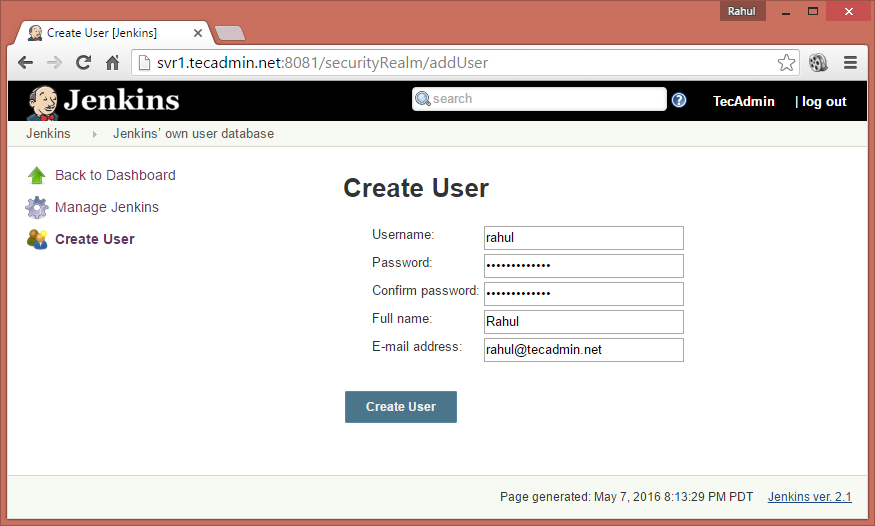
Step 5: Adding More Accounts
To create more accounts, login to the Jenkins admin panel and then navigate to Manage Jenkins >> Manage Users >> Create User . Enter the required details and click Create User.
Conclusion
You now have Jenkins installed and running on your Ubuntu server, marking a significant step toward automating and streamlining your software development process. Jenkins’s powerful automation capabilities can significantly reduce manual effort, enhance efficiency, and facilitate continuous integration and continuous delivery pipelines. As you grow more comfortable with Jenkins, explore its extensive plugin ecosystem to customize and expand your automation workflows further.


