
Let’s Encrypt is a Certificate Authority (CA) that offers complimentary SSL certificates for websites. These certificates can be issued for any domain name, making them suitable for deployment in production settings due to their trusted status.
To utilize an SSL certificate, it’s necessary to possess an active domain or subdomain. Moreover, this domain should be directed towards a Windows server via a DNS server. For the purposes of this guide, we have established a subdomain, “secure.tecadmin.net,” and directed it to our Windows system.
This guide is designed to assist you in installing the Let’s Encrypt SSL certificate on IIS for Windows Server.
Useful tutorials:
- How to Install IIS on Windows
- How to Create Site in IIS via command line
- Steps to Redirect HTTP to HTTPS in IIS
Download Win-ACME Tool
Win-ACME is a simple ACME windows client for use with Let’s Encrypt SSL certificate authority.
First of all, download the latest Windows ACME Simple (WACS) application. This can be downloaded from the official github releases page. Use the below link to visit download page:
https://github.com/win-acme/win-acme/releases,
At the time of writing this post, the downloaded archive is win-acme.v2.2.8.1635.x64.pluggable.zip.
Create A New SSL Certificate
Here is the step-by-step instructions to issue a new SSL certificate from Let’s Encrypt and configure with IIS on Windows server.
- Download and Extract Win-ACME: After downloading the Win-ACME archive file, extract it on your Windows system. Navigate to the extracted directory and execute
wacs.exeas an administrator. Administrator privileges are necessary for modifying IIS settings.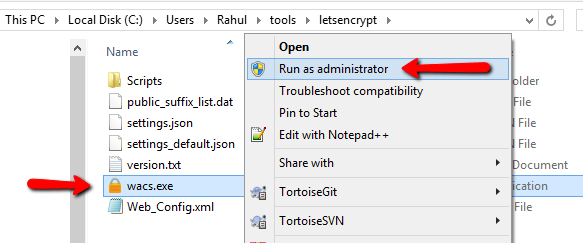
Launch Application as Administrator - Initiate Certificate Creation: Launching
wacs.exewill open a terminal window, presenting you with multiple options. Press “N” to select “Create new certificate (simple for IIS)”.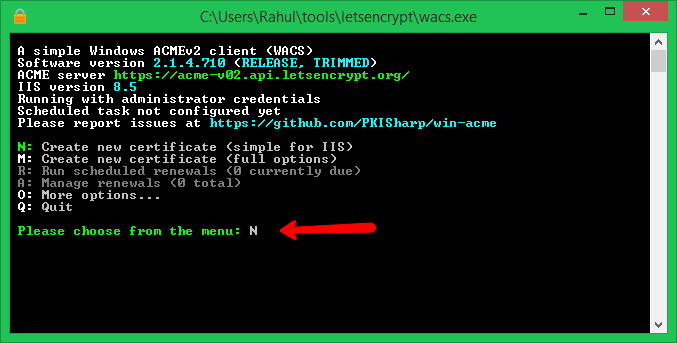
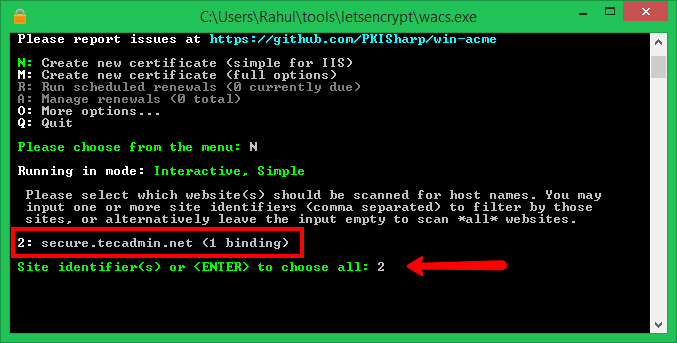
Select New Certificate Option - Select Sites for Certificate Issuance: You will see a list of sites configured in IIS. Choose the site or sites for which you want to issue an SSL certificate by entering their numbers separated by commas.
Input Site ID from List - Choose Bindings: Select option 1 when asked how you want to pick the bindings, then press enter. Simply press enter again when prompted to “Include bindings”.
Then Just press enter for Include bindings:
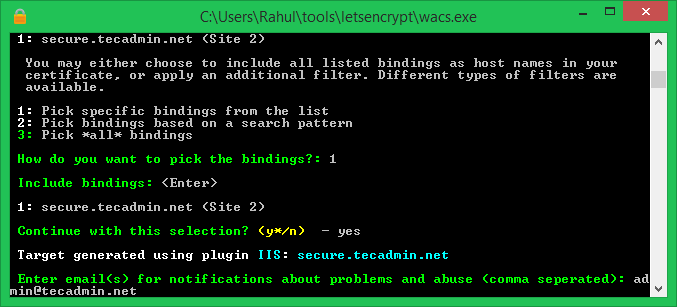
Setting Up Let’s Encrypt SSL with IIS on Windows - Accept Terms and Complete Authorization: Enter “yes” and press enter to accept the terms and proceed. Let’s Encrypt will then start the domain authorization process via HTTP. Once authorization is successfully completed, the SSL certificate will be issued and associated with your site’s bindings in IIS.
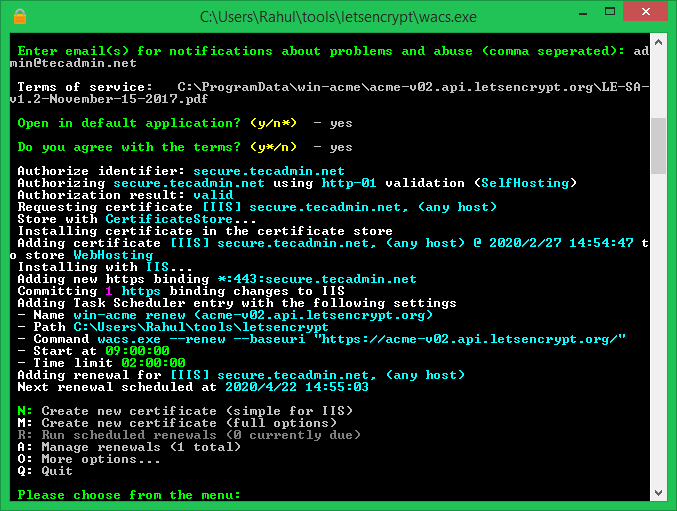
SSL Certificate Issued This will also associate SSL certificates with site bindings in IIS.
.


Test Certificate and Binding
To verify the SSL certificate, open your website using the HTTPS protocol in a web browser. A valid SSL certificate should be visible. For additional verification, use the free tool from ssllabs to check your server’s SSL configuration and security settings.

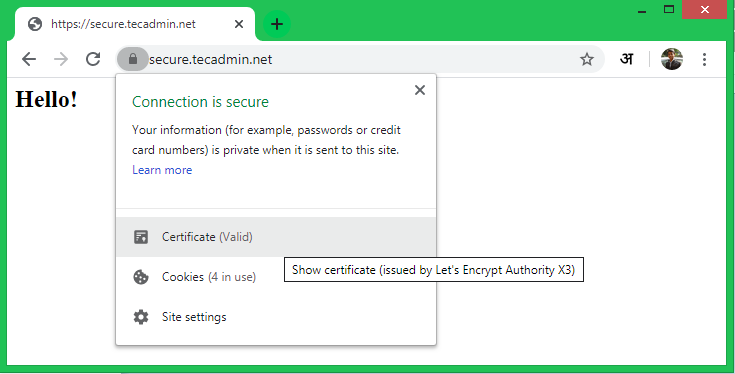
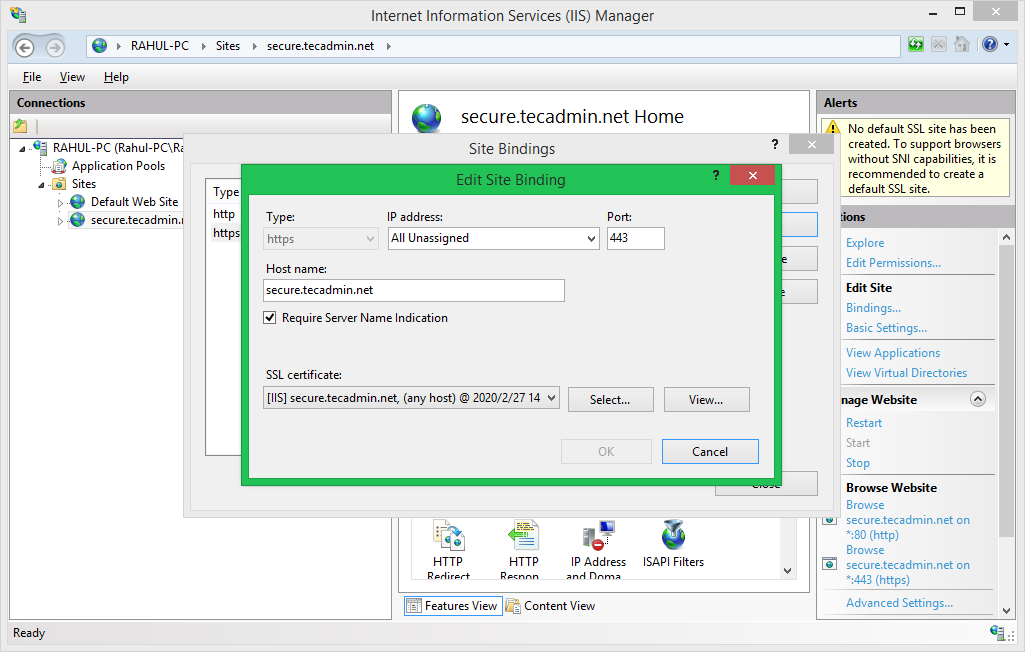
You may also modify the site bindings in IIS to ensure SSL has been properly configured.

Conclusion
In this tutorial, we navigated the process of obtaining and setting up a new SSL certificate from Let’s Encrypt for an IIS website. By following a series of straightforward steps, from downloading Win-ACME to selecting sites and accepting terms for certificate issuance, we successfully enhanced the website’s security. The ability to verify the certificate’s proper configuration through both a web browser and SSL verification tools underscores the effectiveness and accessibility of implementing SSL certificates to secure web communications.