Memcached is a distributed memory object caching system which stored data in memory on key-value basis. It is very useful for optimizing dynamic websites and enabled speed by caching objects in memory. Read more about Memcache.
This article will help you to install Memcached and PHP Memcache extension on CentOS 8 and RHEL 8 Linux systems.
Prerequisites
You must have a running CentOS 8 or RHEL 8 Linux system with sudo privileged account access.
Step 1 – Install Memcached Server
The Memcached rpm packages are available under the default packages repository on CentOS/RHEL 8 systems.
First, update the DNF cache on your system. After that install Memcached using the following commands. This will also install required libraries on your system.
sudo dnf update -ysudo dnf install memcached libmemcached -y
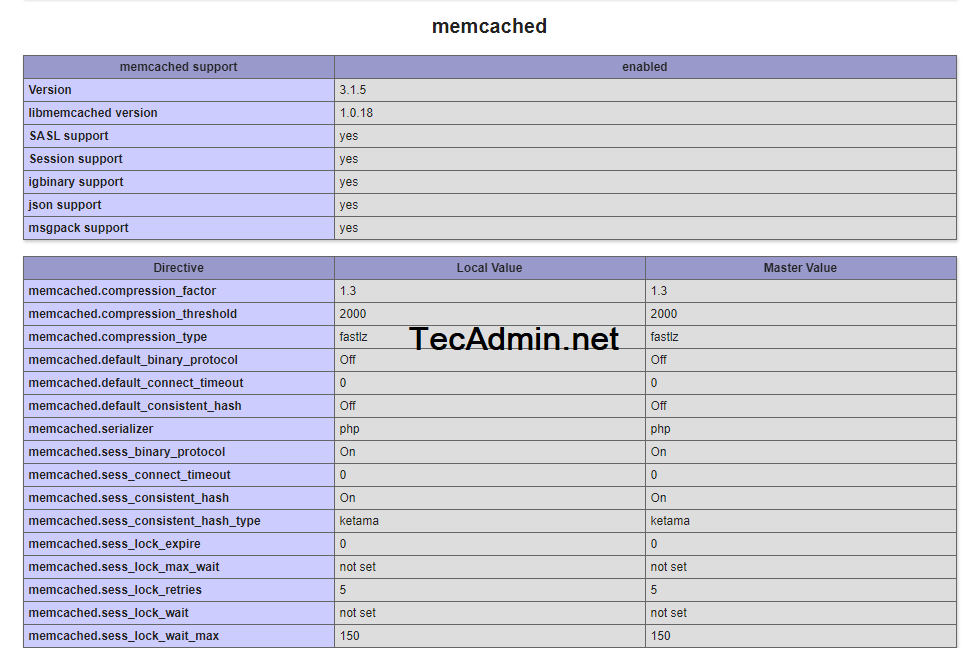
Above commands will install You have successfully installed Memcached server. Now configure your Memcache server for various options. Memcached service configuration file is /etc/sysconfig/memcached, Edit the configuration file in your favorite text editor: Now update the following values as per your requirements. Here the options are: Save your file and close it. Now start Memcached service by running the following command. You also need to enable Memcached service to start on system boot. Run below command to do this: The Memcached service is up and running now. To view the stats of the Memcached service, execute following command from terminal. This will provide all details about the Memcached service. Output: Additionally, we need to allow traffic to the Memcached server by opening the default port ( port 11211) on the firewall. Therefore, run the commands below: To connect Memcache service from a PHP based applications, you need to install Memcache PHP extension. This extension must be installed on the same server where PHP application is running on. If your PHP application also running with CentOS/RHEL 8 system, follow below instructions to enable Memcached extension. There are two type of extensions available for PHP. First is Memcache is used by earlier version of PHP applications. The latest PHP Application’s uses “Memcached” extension. The below commands will install both (Memcache and Memcached) extension on your CentOS 8 and RHEL 8 system. Restart Apache service to enable extension Now check if memcache PHP extension is enabled and working properly. Create a phpinfo.php file using following code Now access phpinfo.php on web interface and search for Memcache or Memcached, You will get result like below. In this tutorial you have learned to install Memcached caching server on CentOS/RHEL 8 system. Also installed PHP Memcached extension.
sudo vi /etc/sysconfig/memcached
PORT="11211"
USER="memcached"
MAXCONN="1024"
CACHESIZE="64"
OPTIONS="-l 127.0.0.1,::1"
Step 3 – Manage Memcached Service
sudo systemctl start memcached
sudo systemctl enable memcached
echo "stats settings" | nc localhost 11211
STAT maxbytes 67108864
STAT maxconns 1024
STAT tcpport 11211
STAT udpport 0
STAT inter 127.0.0.1,::1
STAT verbosity 0
STAT oldest 0
STAT evictions on
STAT domain_socket NULL
STAT umask 700
STAT growth_factor 1.25
STAT chunk_size 48
STAT num_threads 4
STAT num_threads_per_udp 1
STAT stat_key_prefix :
...
...
END
Step 4 – Adjust Firewall Rules
sudo firewall-cmd --zone=public --permanent --add-port=11211/tcp
sudo firewall-cmd --reload
Step 5 – Install PHP Memcached Extension
sudo dnf install epel-release -y
sudo dnf install https://rpms.remirepo.net/enterprise/remi-release-8.rpm -y
sudo dnf module reset php
sudo dnf module enable php:remi-7.4 -y
sudo dnf install php-pecl-memcached php-pecl-memcache -y
sudo systemctl restart httpd.service
sudo vi /var/www/html/phpinfo.php
http://server-ip-addr/phpinfo.php
Conclusion
