MongoDB is a database and in comparison to other databases, it is easy to handle because there is no need to work in a table-based conventional relational database structure. We can save a large amount of data because of its feature of horizontal partitioning. A lot of companies are using MongoDB like CISCO, Facebook, Nokia, etc.
MongoDB offers data aggregation as it allows us to store data according to our preferences. Otherwise, we have to manage data according to the data management of a conventional database.
This article will help us to understand how to install MongoDB in Ubuntu 20.04.
Prerequisites
You must have shell access to the Ubuntu system with sudo privileged account.
Installing MongoDB on Ubuntu
01. Open the terminal and add the repository key of MongoDB to the apt keyring. We can do this by following commands. It will ask for a password:
wget -qO - https://www.mongodb.org/static/pgp/server-5.0.asc | sudo apt-key add -
02. Now, we will add the MangoDB repository to our repository list by editing in the system’s list of sources. To access the editor of the system’s list we open the source list:
sudo nano /etc/apt/sources.list.d/mongodb.list
Add the following line in the file as shown in the image:
deb [ arch=amd64,arm64 ] https://repo.mongodb.org/apt/ubuntu focal/mongodb-org/5.0 multiverse
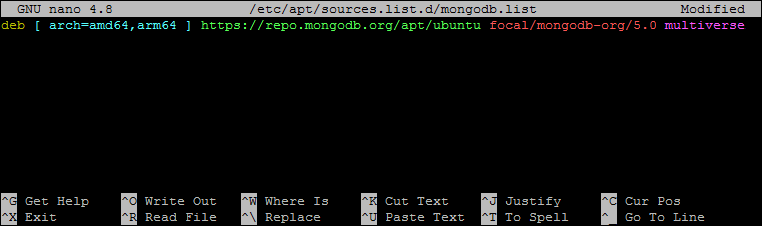
Press CTRL + O to save changes and CTRL + X to exit from the editor.
03. Update the apt repository and then install the Mongodb server packages.
sudo apt updatesudo apt install mongodb-org
This will install the MongoDB server on your system along with the required dependencies.
04. Now, start the MongoDB daemon using the systemctl utility. Also, enable the service to auto-start on system reboot.
sudo systemctl enable mongodsudo systemctl start mongod
05. Once the service started successfully, check the service status by typing the following command.
sudo systemctl status mongod
06. Type “mongo” command on terminal and run to connect to the mongo shell:
mongo
That’s it, the MongoDB server is up and running on your system.
Enable Authorization in MongoDB
By default, anyone can access MongoDB and can make changes to it. To secure it we will enable user authentication on the MongoDB server. This will prevent anonymous access to the database server.
Login to the Mongo shell:
mongo
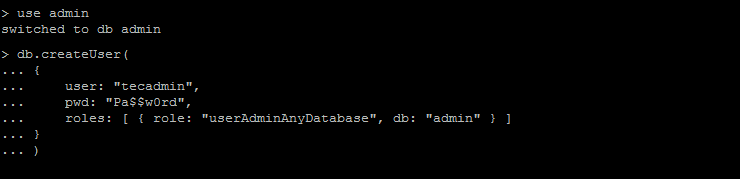
We will type “use admin” in the mongo shell so now we are in its administration section.
use admin
Next, create a user account with admin privileges in MongoDB.
db.createUser(
  {
    user: "tecadmin",
    pwd: "Pa$$w0rd",
    roles: [ { role: "userAdminAnyDatabase", db: "admin" } ]
  }
)
Now exit the editor by pressing CTRL + C.
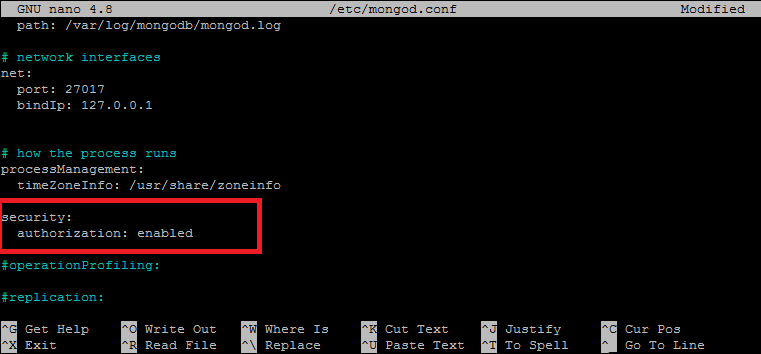
Next we need to enable security in MongoDB configuration file. Edit the mongo configuration file by using:
sudo nano /etc/mongod.conf
The setting will be open and go to the “#security” section. Remove the “ # ” and type “authorization: enabled”.
Now exit by pressing CTRL + x, type “ y ” and press ENTER to exit by saving the file. Now restart the MongoDb and then check its status:
sudo systemctl restart mongod
Now the database is secured, only admin users can access it by entering the set password. Use the following command to connect to the MongoDB server.
mongo -u tecadmin -p
Output:MongoDB shell version v5.0.2 Enter password: connecting to: mongodb://127.0.0.1:27017/?compressors=disabled&gssapiServiceName=mongodb Implicit session: session { "id" : UUID("0876c195-18dc-4e6c-a0c8-368364f10d03") } MongoDB server version: 5.0.2 ================ Warning: the "mongo" shell has been superseded by "mongosh", which delivers improved usability and compatibility.The "mongo" shell has been deprecated and will be removed in an upcoming release. We recommend you begin using "mongosh". For installation instructions, see https://docs.mongodb.com/mongodb-shell/install/ ================ >
Conclusion
If we are doing a startup project and you know you have to make a lot of changes then MongoDB is the best database to work with as compared to conventional databases. In this article, we learned about MongoDB and how we can install and secure MongoDB on Ubuntu 20.04.
