Monit is a versatile and powerful open-source utility for managing and monitoring Unix-based systems. It can be used to monitor system resources, services, and applications, allowing you to ensure that they are running optimally and remain available. Monit can also be configured to automatically restart services and send notifications when certain conditions are met. In this article, we will discuss how to install and use Monit on Ubuntu 22.04.
Prerequisites
- An Ubuntu 22.04 system with administrative access (sudo).
- A basic understanding of the command-line interface.
- Familiarity with editing text files using a command-line text editor like nano or vim.
Step 1: Update Your System
First, update your system to ensure you have the latest packages and security patches:
sudo apt updatesudo apt upgrade -y
Step 2: Install Monit
The Monit packages are available under the default Apt repositories. You can simply install Monit by executing the following command:
sudo apt install monit
Step 3: Configure Monit
Now that Monit is installed, we need to configure it. The main configuration file for Monit is located at /etc/monit/monitrc. To open and edit the file using the nano text editor, run:
sudo nano /etc/monit/monitrc
Modify the following settings as needed:
- Set the Monit polling interval:1set daemon 60
This sets Monit to check the status of monitored services every 60 seconds. You can adjust this value according to your needs.
- Configure the Monit web interface:
By default, the Monit web interface is disabled. To enable it, uncomment the following lines:1234set httpd port 2812 anduse address localhostallow localhostallow admin:passwordThis will enable the web interface on port 2812 and restrict access to localhost. To allow access from other IP addresses, add allow
after the allow localhost line.
Save and close the configuration file.
Step 4: Enable and Start Monit
- Enable the Monit service to start automatically at system boot:
sudo systemctl enable monit - Start the Monit service:
sudo systemctl start monit - Check the status of the Monit service:
sudo systemctl status monit
Step 5: Configure Monit to Monitor Services
Monit can monitor various system resources and services. To configure Monit to monitor a specific service, create a configuration file for the service in the /etc/monit/conf.d/ directory. For example, to monitor the SSH service, create a new file called ssh.conf:
sudo nano /etc/monit/conf.d/ssh.conf
Add the following content to the file:
1 2 3 4 5 | check process sshd with pidfile /var/run/sshd.pid start program = "/usr/sbin/service ssh start" stop program = "/usr/sbin/service ssh stop" if failed port 22 protocol ssh then restart if 5 restarts within 5 cycles then timeout |
This configuration checks the SSH service, specifying the PID file, start and stop commands, and conditions for restarting the service. Save and close the file.
Reload the Monit configuration to apply the changes:
sudo monit reload
Step 6: Accessing the Monit Web Interface
To access the Monit web interface, open your web browser and navigate to:
1 | http://localhost:2812 |
Replace localhost with your server’s IP address if you configured remote access. Use the default username “admin” and the password you set in the monitrc file to log in.
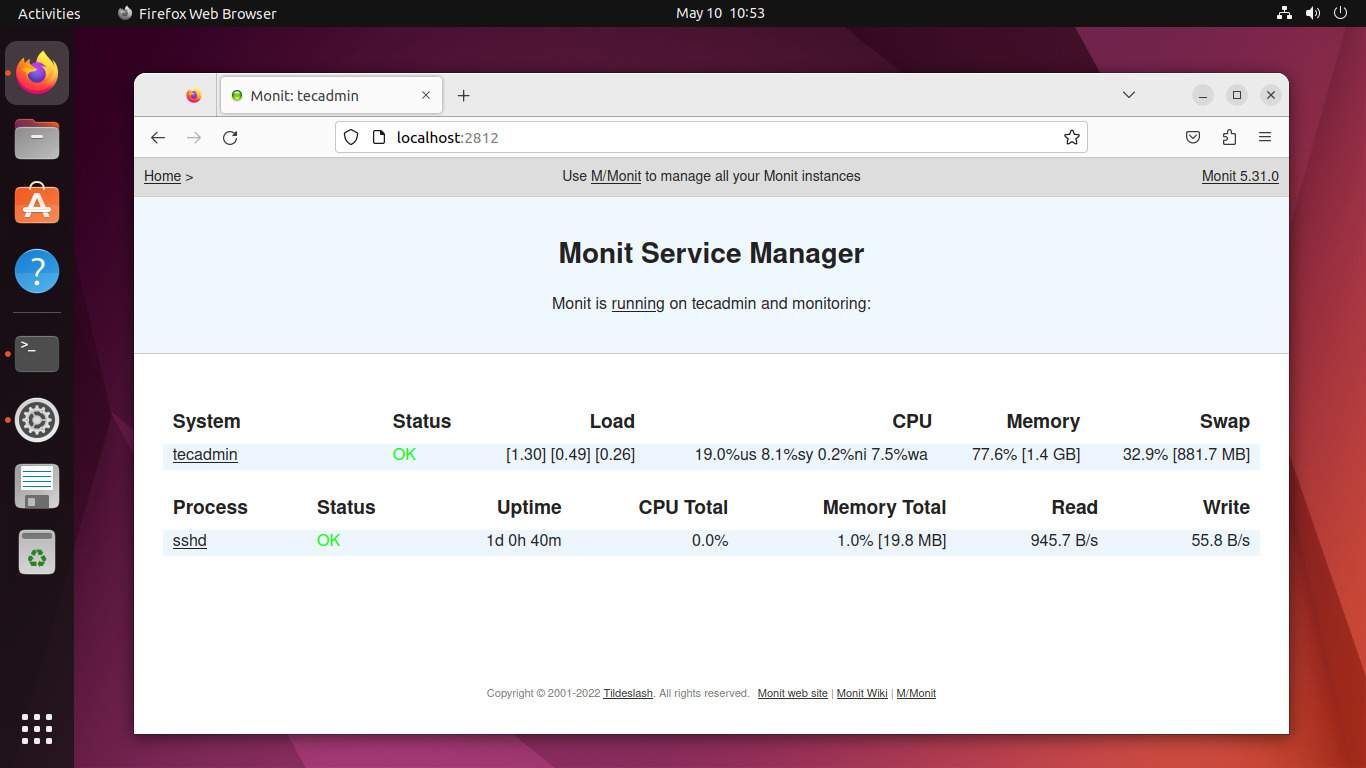
Once logged in, you will see an overview of your monitored services and their current status. You can click on each service for more details and perform actions such as starting, stopping, or restarting the service.
Step 7: Additional Monit Configuration Examples
Below are some additional examples of Monit configuration files for monitoring different services:
Apache web server:
Create a new file called apache.conf:
sudo nano /etc/monit/conf.d/apache.conf
Add the following content:
1 2 3 4 5 | check process apache with pidfile /run/apache2/apache2.pid start program = "/usr/sbin/service apache2 start" stop program = "/usr/sbin/service apache2 stop" if failed host 127.0.0.1 port 80 protocol http then restart if 5 restarts within 5 cycles then timeout |
MySQL database server:
Create a new file called mysql.conf:
sudo nano /etc/monit/conf.d/mysql.conf
Add the following content:
1 2 3 4 5 | check process mysqld with pidfile /run/mysqld/mysqld.pid start program = "/usr/sbin/service mysql start" stop program = "/usr/sbin/service mysql stop" if failed host 127.0.0.1 port 3306 protocol mysql then restart if 5 restarts within 5 cycles then timeout |
Remember to reload the Monit configuration after adding new service configurations:
sudo monit reload
Conclusion
In this article, we have covered how to install and configure Monit on Ubuntu 22.04. By following these steps, you can monitor your system resources, services, and applications, and automatically restart them or receive notifications when issues are detected. Monit is a powerful tool that can greatly improve the stability and reliability of your Ubuntu 22.04 system.
