
Netdata is an open source tool designed for the real-time system performance monitoring solution. It collects real-time metrics for system activities like CPU uses, memory uses, bandwidth uses and disk activities etc. And displays the information on web interface with graphical charts.
Netdata official team recommend to install netdata monitoring tool using the kickstart script. But this tutorial will help you to install Netdata on Ubuntu using default repositories.
This tutorial describe you to how to install Netdata on Ubuntu 20.04 LTS Linux system.
Prerequisites
Login to your Ubuntu 20.04 LTS Linux system with sudo privileged account.
Install Netdata on Ubuntu
Ubuntu 20.04 default apt repositories contains Netdata Debian packages. You can install netdata on Ubuntu by running the following commands.
sudo apt updatesudo apt install netdata
Press ‘y’ if confirmation prompted by the installer.
Next, edit netdata configuration file in your favorite text editor.
sudo vim /etc/netdata/netdata.conf
The default “bind socket to IP” is set to 17.0.0.1. This is fine for access netdata on local system. To enable access from remote system update this with your systems IP address.
[global]
    run as user = netdata
    web files owner = root
    web files group = root
    bind socket to IP = 172.30.2.38
Save your file and restart netdata service.
sudo systemctl restart netdata
All done, you have successfully installed Netdata on a Ubuntu system.
Access Netdata Web Interface
The default netdata works on port 19999. Open web browser on your system and connect on port 19999 to systems ip address.
http://172.30.2.38:19999
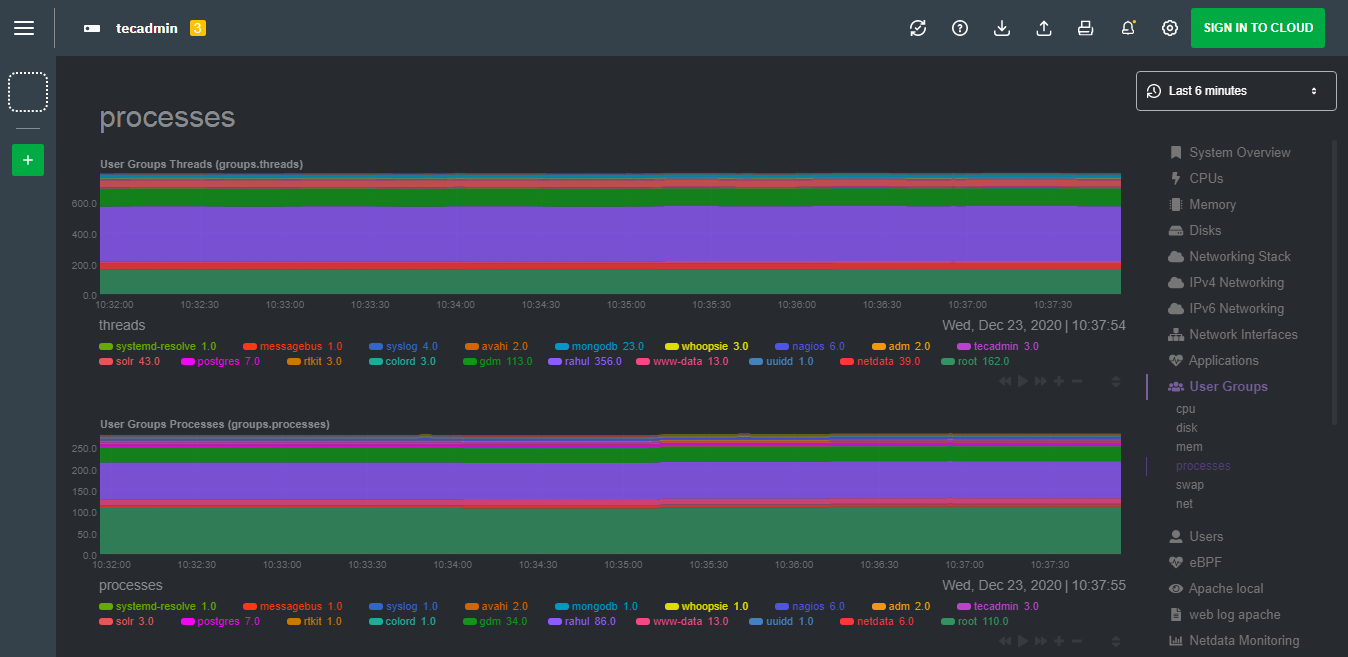
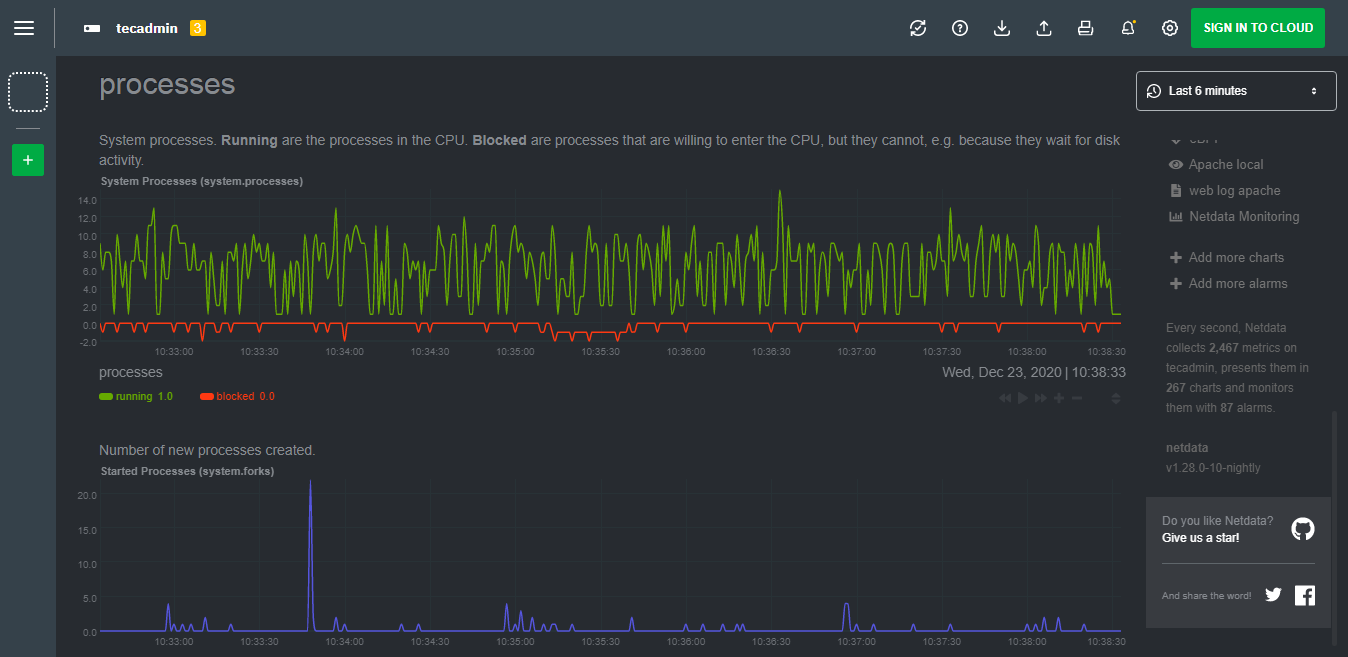
You will see the Netdata dashboard with detailed statics about the system.
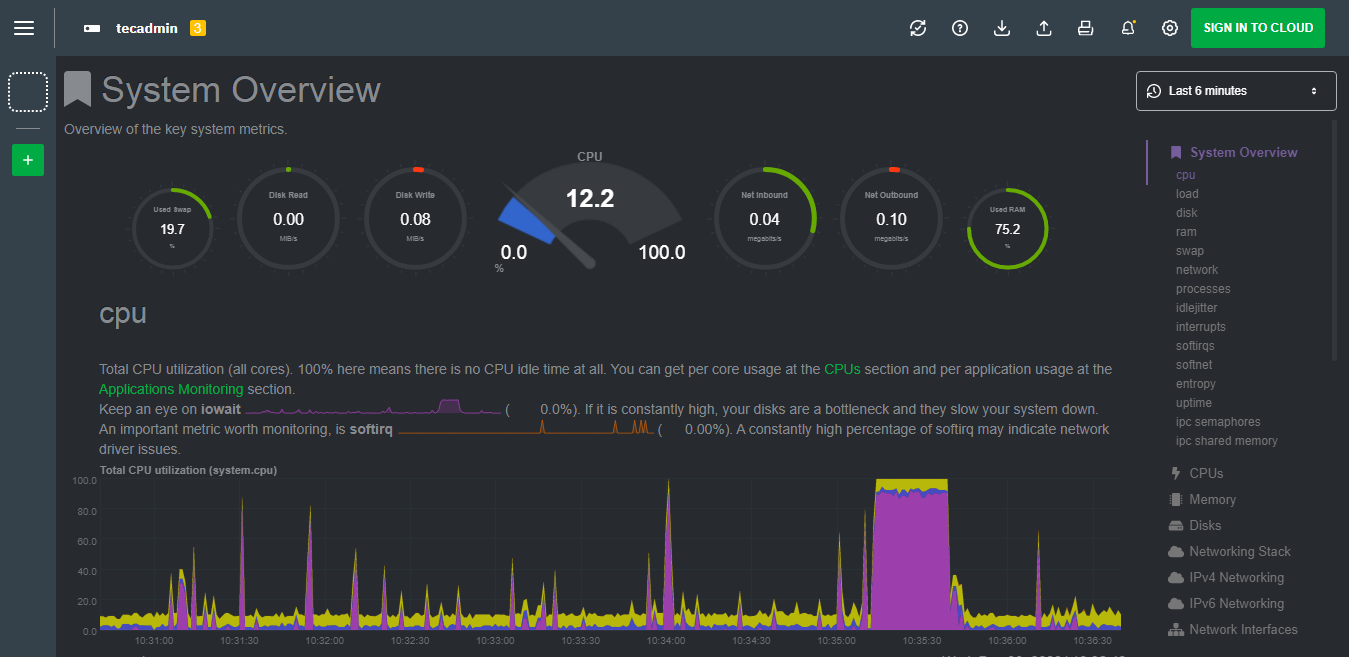
View the various graphical statics by clicking on links in right side bar.
Conclusion
This tutorial helped you to install Netdata monitoring solutions on a Ubuntu system. Read another guide Linux system and performance monitoring tool.