Node.js is an essential tool for modern web development because it is efficient and scalable. However, managing multiple Node.js versions on one machine can be difficult, especially for developers working on different projects. This is where Node Version Manager (NVM) helps by making it easy to manage multiple Node.js environments. This guide will show you how to install NVM on Ubuntu 22.04, so you can easily switch between Node.js versions.
What is NVM?
NVM stands for Node Version Manager. It is a command-line tool that lets you install, manage, and use multiple Node.js versions. It allows you to switch between versions for different projects, ensuring compatibility and avoiding conflicts.
Prerequisites
- You need an Ubuntu 22.04 Linux system with shell access.
- Log in with a user account where you want to install Node.js.
Step 1: Installing NVM on Ubuntu
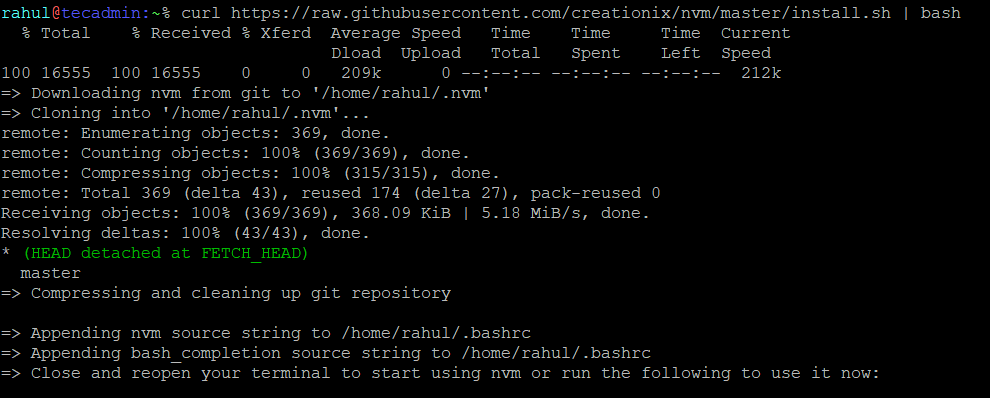
You can install NVM on Ubuntu 22.04 using a shell script. Open a terminal on your system or connect to a remote system using SSH. First, install curl with the following command, then run the NVM installer script.
sudo apt install curlcurl https://raw.githubusercontent.com/creationix/nvm/master/install.sh | bash
The NVM installer script adds an environment entry to the login scripts of the current user. You can log out and log in again to load the environment, or you can run the command below to do the same.
source ~/.bashrc

Step 2: Installing Node using NVM
You can install multiple versions of Node.js using NVM. Then, you can use the required version for your application.
- To install the latest version of Node.js, use the following command. Here, “node” is the alias for the latest version.
nvm install node - To install a specific version of Node.js, for example, 20.11.0, use the command:
nvm install 20.11.0

You can install any other version using the above command. The first version you install becomes the default. New shells will start with the default Node.js version (e.g., nvm alias default).
Step 3: Using NVM
You can list the Node.js versions installed for the current user with the command:
nvm ls
To list available Node.js versions for installation, use:
nvm ls-remote
You can select a different version for the current session. This version will be active only for the current shell.
nvm use 20.11.0
To find the default Node.js version set for the current user, type:
nvm run default --version
You can run a Node.js script with the desired version using:
nvm exec 20.11.0 server.js
Step 4: Using .nvmrc File
Using a .nvmrc file in your project specifies the Node.js version to use, ensuring consistency across development environments. By including this file, developers can automatically switch to the correct Node.js version with the nvm use command, improving compatibility and reducing version issues.
To create a .nvmrc file, run the following command in your project’s root directory:
echo "20.11.0" > .nvmrc
Replace “20.11.0” with your desired Node.js version. This file then instructs NVM to use the specified version with the command:
nvm use
Conclusion
In this article, you learned how to install NVM on Ubuntu 22.04 and use it to manage multiple Node.js versions. NVM is a powerful tool for developers who need to work with different Node.js versions for various projects. With NVM, you can easily switch between Node.js versions, install new ones, and remove those you no longer need. This keeps your development environment clean and organized, allowing you to focus on coding and testing. Enjoy the flexibility and ease of managing Node.js versions with NVM on your Ubuntu 22.04 system!
1 Comment
HI. I don’t know why but I keep getting
Command ‘nvm’ not found
I’ve followed the procedure according to the tutorial. I’m using Ubuntu 22 LTS, only difference was that I installed curl through snapp install .
My .bashrc file does have the exported lines
export NVM_DIR=”$HOME/.nvm”
[ -s “$NVM_DIR/nvm.sh” ] && \. “$NVM_DIR/nvm.sh” # This loads nvm
[ -s “$NVM_DIR/bash_completion” ] && \. “$NVM_DIR/bash_completion” # This loads nvm bash_completion