Odoo ERP is an enterprise resource planning (ERP) software that allows you to manage all aspects of your business, from accounting to sales. It gives you the ability to streamline your organization and increase efficiency. As a result, it can help you save time and money while increasing profits.
The main advantages of using Odoo ERP include the following:
- It allows for a complete view of your business operations, allowing you to identify issues early on and take action quickly.
- It’s easy to use. You can set up an Odoo ERP account in just a few minutes by simply filling out a few forms. And once you’re set-up, you can start working within minutes.
- It’s reliable and secure. It’s designed with security in mind from the start – with two-factor authentication for users and several security measures built into the application itself. It also comes with a built-in auditing system that lets you keep track of every transaction that happens with your accounts and assets.
In this blog post, you will learn to install Odoo 16 on Ubuntu 22.04 Jammy Jellyfish Linux system.
Step 1 – Installing Required Packages
There are some steps involved in the installation. Apart from that, there are some files that are necessary to install as a prerequisite.
First, update your server and then upgrade it. If it asks for a password, give it:
sudo apt update && sudo apt upgrade
The command will upgrade available updates for the installed packages. Then install all the required packages for the Odoo setup on the Ubuntu system. This will install essential packages for build, Python, and Node.js on your system.
sudo apt install git wget nodejs npm python3 build-essential libzip-dev python3-dev libxslt1-dev python3-pip libldap2-dev python3-wheel libsasl2-dev python3-venv python3-setuptools node-less libjpeg-dev xfonts-75dpi xfonts-base libpq-dev libffi-dev fontconfig
Also, install the below node module to enable RTL support.
sudo npm install -g rtlcss
Step 2 – Installing wkhtmltopdf
Now, you also need to install wkhtmltox Debian package, which provided useful wkhtmltoimage and wkhtmltopdf binary commands.
Download the Debian package from Github:
wget https://github.com/wkhtmltopdf/packaging/releases/download/0.12.6.1-2/wkhtmltox_0.12.6.1-2.jammy_amd64.deb
Then install it on your system.
sudo dpkg -i wkhtmltox_0.12.6.1-2.jammy_amd64.deb
Step 3 – Create a New System Account
Running the Odoo service as a separate user is a good practice. Now for the creation of a user for Odoo who can access the Odoo and can make changes to it.
sudo adduser --system --group --home=/opt/odoo --shell=/bin/bash odoo
This will create a new account to use for Odoo service.
Step 4 – Installing PostgreSQL
As we know that PostgreSQL is required as the database server for Odoo. So we will install it:
sudo apt install postgresql -y
Now for the creation of an Odoo user in PostgreSQL:
sudo su - postgres -c "createuser -s odoo"
This will add a new role odoo in PostgreSQL server.
Step 5 – Installing Odoo 16 on Ubuntu
We can download the Odoo from the Github repository. So clone it on your system. Make sure to clone the correct branch you need to install on your system. As we are installing Odoo 16, so use the branch name “16.0”.
cd /opt/odoogit clone https://github.com/odoo/odoo.git --depth 1 --branch 16.0 --single-branch odoo-server
Change the file ownership to the odoo user.
sudo chown -R odoo:odoo /opt/odoo/odoo-server
It’s a good practice to create a Python virtual environment for isolating applications. Create a virtual environment with the following commands:
cd /opt/odoo/odoo-serverpython3 -m venv venvsource venv/bin/activate
Once the virtual environment is activated, you will see the system prompt as “(venv) $”. Now install the Python dependencies for the Odoo under the virtual environment.
pip3 install wheelpip3 install -r requirements.txt
After finishing the installation, deactivate the virtual environment with the following command.
deactivate
Now we will create the directory of log and also change its permissions settings
sudo mkdir /var/log/odoosudo chown odoo:odoo /var/log/odoosudo chmod 777 /var/log/odoo
Step 6 – Create Odoo Configuration File
Next, create a configuration for the Odoo server. This is useful for customizing the Odoo application. Edit the configuration file /etc/odoo-server.conf in your favorite text editor:
sudo nano /etc/odoo-server.conf
Add the below content to file:
1 2 3 4 5 6 | [options] admin_passwd = pass$123 db_user = odoo addons_path = /opt/odoo/odoo-server/addons logfile = /var/log/odoo/odoo-server.log log_level = debug |
Make sure to change the admin_passwd value with a strong password. Save your file and close it.
Next, change the ownership to oddo user for the configuration file. Also, change file permissions
sudo chown odoo:odoo /etc/odoo-server.conf
Step 7 – Create Odoo Systemd Unit File
Create a Systemd unit file for the Oddo service management. It will help you manage Odoo’s service easily. Also allowed us to start Odoo on system boot. Create a new file odoo.service and edit in a text editor:
sudo nano /etc/systemd/system/odoo.service
Add the following content.
1 2 3 4 5 6 7 8 9 10 11 12 13 14 15 16 | [Unit] Description=Odoo 16.0 Service Requires=postgresql.service After=network.target postgresql.service [Service] Type=simple SyslogIdentifier=odoo PermissionsStartOnly=true User=odoo Group=odoo ExecStart=/opt/odoo/odoo-server/venv/bin/python3 /opt/odoo/odoo-server/odoo-bin -c /etc/odoo-server.conf StandardOutput=journal+console [Install] WantedBy=multi-user.target |
Save the file and close it.
Now, reload the systemd daemon to load the newly created file.
sudo systemctl daemon-reload
Start the Odoo service, Also enable it to auto-start on system boot:
sudo systemctl enable --now odoo.service
Verify the service status:
sudo systemctl status odoo.service
You should see that the Odoo service is active and running:

Step 8 – Access Odoo Application
Odoo default runs on port 8069. Open a web browser on your system and connect to the Odoo server on the 8069 port.
http://server-ip-host:8069
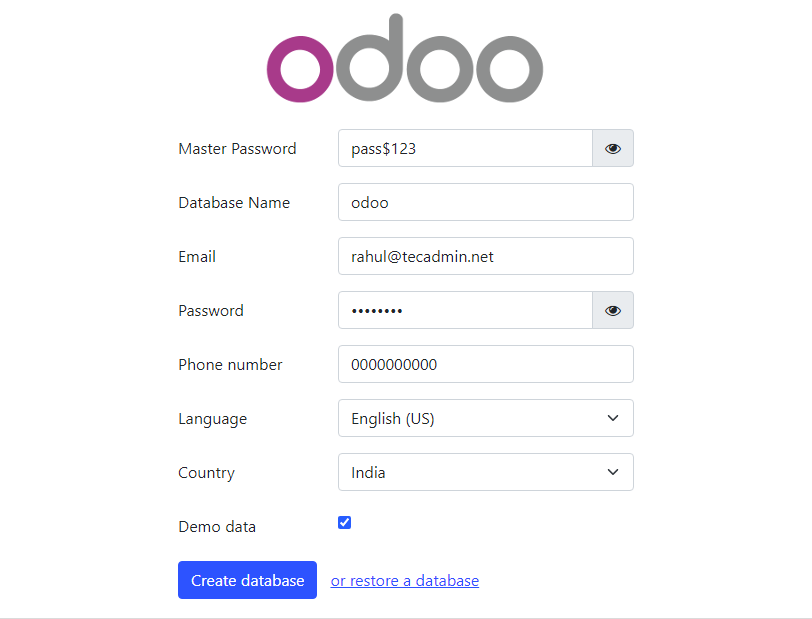
You will find the Odoo create database page for the first time. Use the master password configured on odoo-server.conf file. Set a database name of your choice. Then set username and password, that will be used for future logins to Odoo dashboard. Select the Demo data checkbox to import it. Finally, click the “Create Database” button to complete the installation.

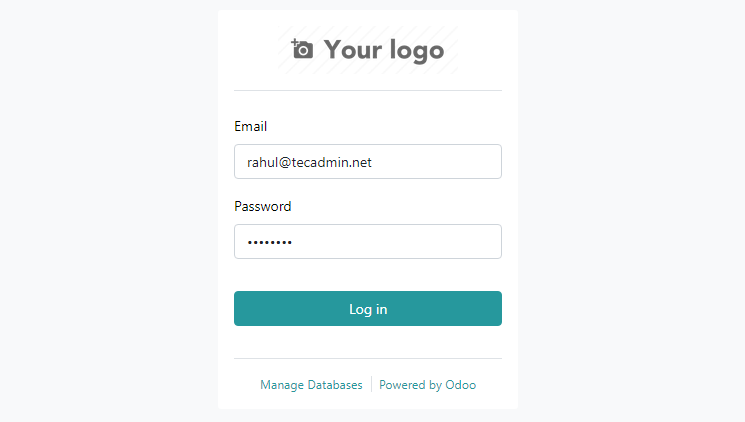
After successfully creating the Odoo database, you will be redirected to the login page. Use the login credentials created in the previous screen:

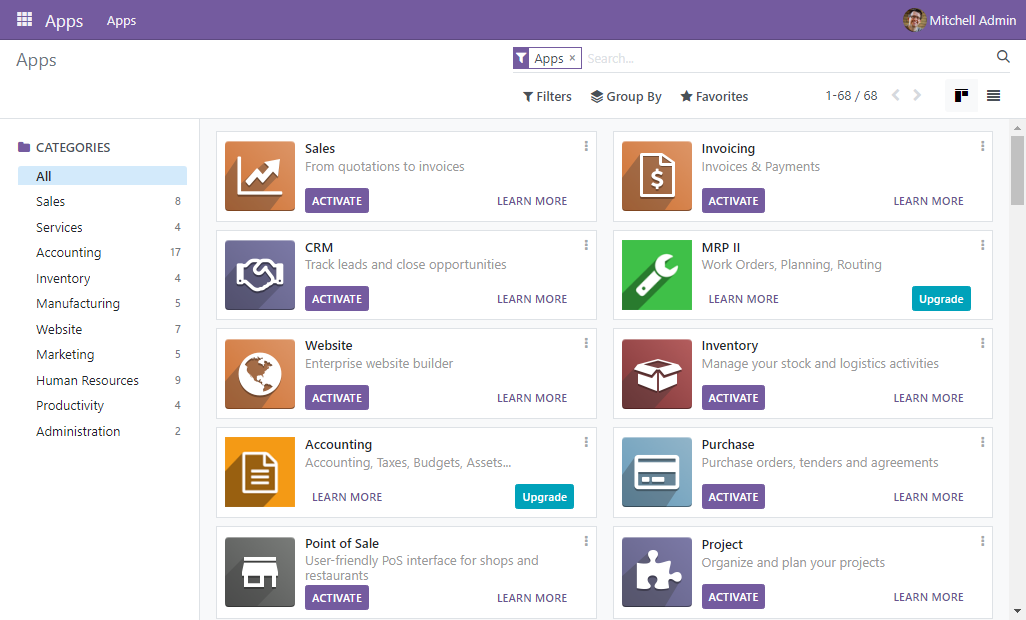
After successful login, you will be redirected to apps page, where you can install applications of your choice.

Conclusion:
Everyone wants ease in life so Odoo fulfills this by providing all departments needed to run a business in one place. Now you don’t have to recruit a lot of employees to handle your company, all the needs are being fulfilled by Odoo. In this article, we learned how to install Odoo 16 ERP server on Ubuntu 22.04 Jammy Jellyfish Linux system.

20 Comments
How to exit the demo database?
Two of us installed odoo-16-on-ubuntu-22-04.
We did it in a sophisticated way as my partner is well accastomed to use the terminal.
The installation ha been succeful up to the last step. After entering admin password ect the answer is:
Database creation error: connection to server on socket “/var/run/postgresql/.s.PGSQL.5432” failed: File o directory non esistente Is the server running locally and accepting connections on that socket?
What do you suggest?
Newbie
Got a error:
sudo su – odoo -s /bin/bash
su: user – does not exist or the user entry does not contain all the required fields
Means that Postgres not installed
Install wkhtmltopdf error
root@server1166:~# sudo dpkg -i wkhtmltox_0.12.6.1-2.jammy_amd64.deb
Selecting previously unselected package wkhtmltox.
(Reading database … 125776 files and directories currently installed.)
Preparing to unpack wkhtmltox_0.12.6.1-2.jammy_amd64.deb …
Unpacking wkhtmltox (1:0.12.6.1-2.jammy) …
dpkg: dependency problems prevent configuration of wkhtmltox:
wkhtmltox depends on libssl3; however:
Package libssl3 is not installed.
dpkg: error processing package wkhtmltox (–install):
dependency problems – leaving unconfigured
Processing triggers for man-db (2.9.1-1) …
Errors were encountered while processing:
wkhtmltox
You need to add the following to your list of great instructions,
$ ufw allow 8069/tcp
man, muchas gracias gran post. Thank you my friend.
I am facing very slow user interface although the server usage is 600M out of 4GB RAM.
thanks for this good install tuturial!
But i have a error, when i:
klick in the left top Corner Main Menue, APPS and than UPDATES!
TypeError: Cannot read properties of null (reading ‘node’)
at handleError (http://192.168.5.10:8069/web/assets/20-5c89860/web.assets_common.min.js:1213:140)
at owl.App.handleError (http://192.168.5.10:8069/web/assets/20-5c89860/web.assets_common.min.js:2039:29)
at ComponentNode.initiateRender (http://192.168.5.10:8069/web/assets/20-5c89860/web.assets_common.min.js:1520:19)
thanks
Philip
no traceback in my cli upon installing is it normal?
Hi thanks for the tutorial, it worked like a cake, wondering how to enable ssl, as it only accept http at this moment, thanks in advance
Live Chat and Live Survey not working.
How to configure Nginx and odoo.conf?
Best Odoo install tutorial!
Just found an error after installing the e-mail marketing module:
“UncaughtPromiseError > OwlError
Uncaught Promise > An error occured in the owl lifecycle (see this Error’s “cause” property)”
Any idea on how to solve?
If got the same problem how did you solve it?
Same Problem after odoo 16 update,
Did you solve it problem?
did you sloved problem?
I get a permission denied when I try to change the directory to /opt/odoo. Any idea why?
sudo su – odoo -s /bin/bash
su: user – does not exist or the user entry does not contain all the required fields