PostgreSQL, often simply known as Postgres, is an open-source object-relational database system with a strong reputation for reliability, feature robustness, and performance. pgAdmin4, on the other hand, is a popular and versatile open-source administration and development platform for PostgreSQL. For Fedora Linux users, installing these tools can greatly enhance data management and development capabilities. This guide provides a comprehensive walkthrough for installing PostgreSQL and pgAdmin4 on Fedora Linux.
Prerequisites
- A system running Fedora Linux
- Access to a terminal
- Sudo privileges
Step 1: Update Fedora System
Before you begin, ensure your Fedora system is up-to-date with the latest packages and security patches:
sudo dnf updatesudo dnf upgrade
Step 2: Installing PostgreSQL on Fedora
Follow the below instructions to install the PostgreSQL server on a Fedora system.
- First of all, search for the available DNF modules contains the PostgreSQL server packages. Open a terminal and type the below command:
sudo dnf module list postgresql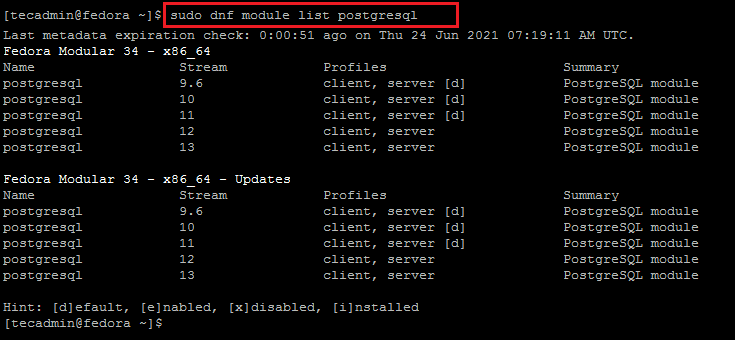
- In the above command, you will see the available PostgreSQL versions. Now enable the repository of the required version. The below command will enable the repository for the PostgreSQL 13 on your system.
sudo dnf module enable postgresql:13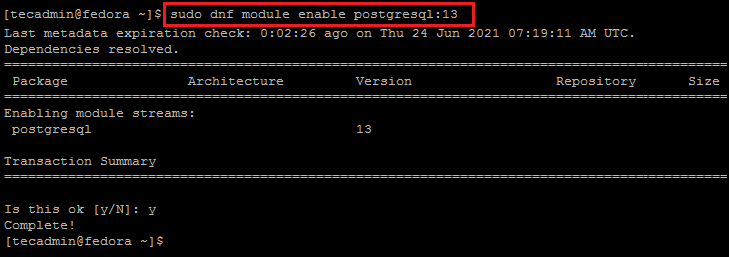
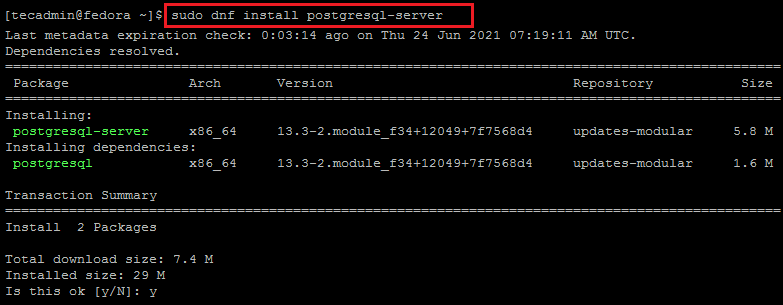
- Once you have successfully enabled the required DNF module. Use the following command to install the PostgreSQL server packages using DNF package manager. This will also install additional required packages on your system.
sudo dnf install postgresql-serverPress ‘y’ to confirm and finish the packages installation.
- After that, you need to initialize the PostgreSQL data directory. In other words, this will create a data directory and other configuration files on your system.
To initialize the database server, type:
sudo postgresql-setup --initdb
After finishing the above command, the PostgreSQL server installation is completed on your Fedora system. PostgreSQL server uses PGDATA environment variable to contain the data directory location.
Step 3: Manage PostgreSQL Service
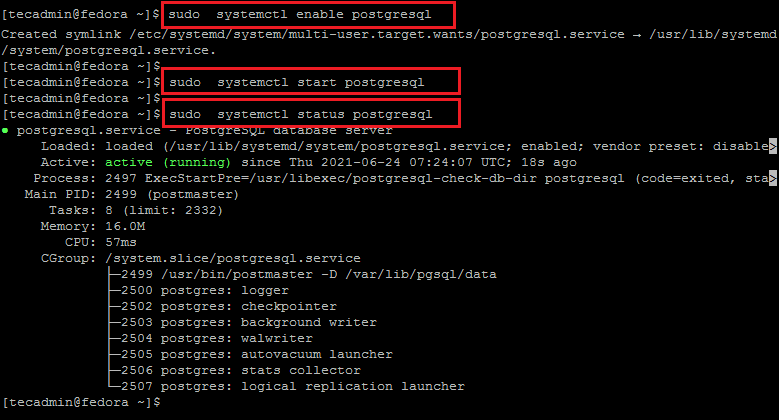
To start the PostgreSQL service use the following command as per your operating systems. Also, enable the PostgreSQL service to autostart on system boot.
sudo systemctl enable postgresqlsudo systemctl start postgresql
You can see the current status of the service using the following command.
sudo systemctl status postgresql
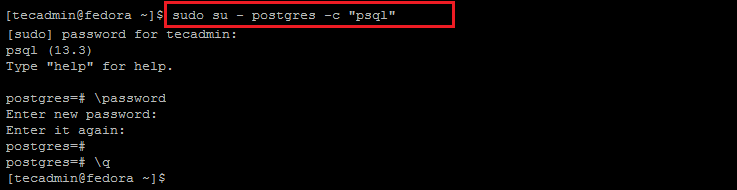
Step 4: Secure postgres User
After completing the above steps. Your PostgreSQL 11 server is ready to use. Log in to the postfix instance to verify the connection.
su - postgres -c "psql"
You may create a strong password for the “postgres” account to enhance server security.
postgres=# \password postgres
Step 5: Installing pgAdmin4 on Fedora
The pgAdmin4 is a great tool for managing PostgreSQL server databases with a graphical interface. It is available as an application for desktop systems. Also, a web version is available to access in a web browser. The below steps will help you to set pgAdmin4 on your Fedora system.
- First, configure the pgAdmin4 repository to your Fedora system. In a terminal execute the following command.
sudo rpm -Uvh https://ftp.postgresql.org/pub/pgadmin/pgadmin4/yum/pgadmin4-fedora-repo-2-1.noarch.rpm - After that, install the pgadmin4-web package on your system. This will also add other dependencies to your system.
sudo dnf install pgadmin4-web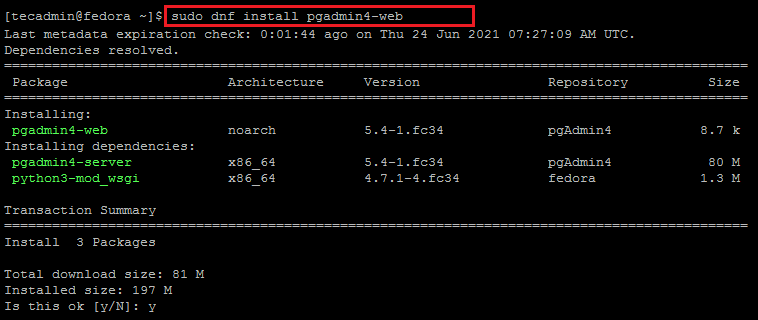
- The policycoreutils-python-utils package contains the management tools use to manage an SELinux environment for the Python applications. Install it on your system with the following command.
sudo dnf install policycoreutils-python-utils - Finally, run a shell script to configure the pgAdmin4 on your system. This will prompt for an email address and password to enable web application authentication.
sudo /usr/pgadmin4/bin/setup-web.sh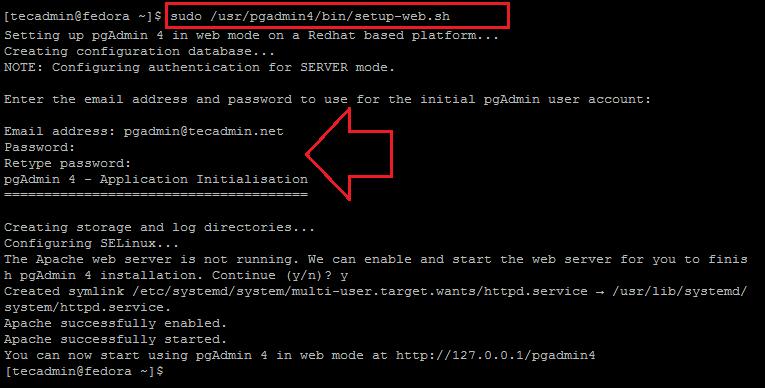
Remember that, this authentication is just for login to the pgAdmin4 dashboard. It can’t be used to log in to the PostgreSQL server.
Step 6: Allow Public Access to pgAdmin4
The Fedora systems use a firewall to protect the server from external users. You need to allow access on port 80 to access pgAdmin4 from outside of the server.
To open web port in firewall, type:
sudo firewall-cmd --add-port=80/tcp --permanentsudo firewall-cmd --reload
As the Fedora system has default SELinux in enforcing mode, you need to apply SELinux setting to allow network access to the webserver.
sudo setsebool -P httpd_can_network_connect 1
In the end, restart the Apache service to reload all the settings and changes.
sudo systemctl restart httpd
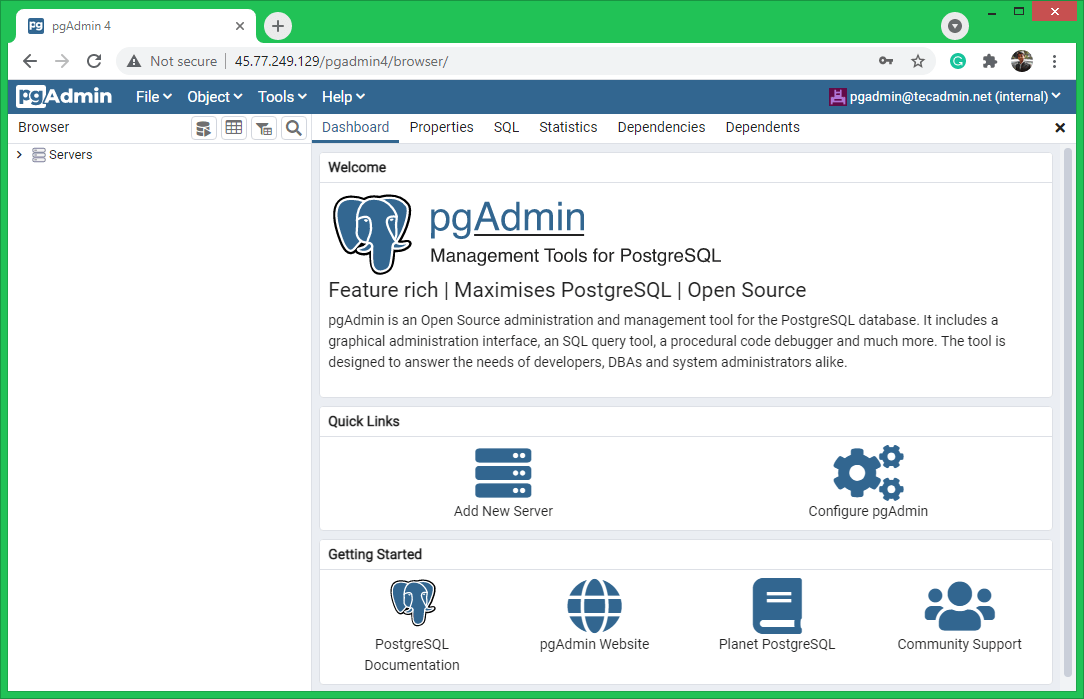
Step 7: Access pgAdmin4
Now, you can access the pgAdmin4 web application in a web browser. Access your server with the IP address following with /pgadmin4
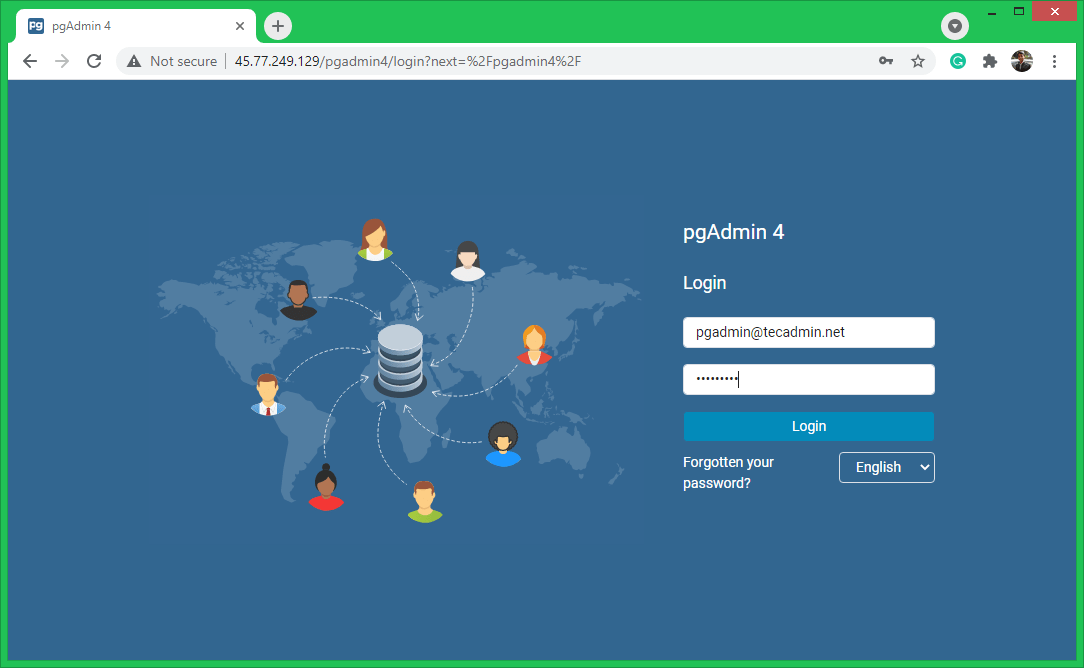
Enter login credentials created in the above step. After a successful login, you will get access to the pgAdmin4 dashboard. Here you can connect multiple PostgreSQL servers and manage them.
Conclusion
You now have PostgreSQL and pgAdmin4 installed and configured on your Fedora Linux system. This setup allows you to manage your databases through a powerful graphical interface, enhancing your productivity and simplifying database administration tasks.
If you encounter any issues during installation, check the PostgreSQL and pgAdmin4 official documentation or the Fedora Linux forums for solutions.
Remember, the steps might vary slightly depending on the version of Fedora and the packages. Always refer to the official documentation for the most accurate and up-to-date information.


6 Comments
I’ve been looking for this article…was truly helpful for me
Thanks!, this article is excellent
Thanks, this article is perfectly.
This was a flawless how-to. Thank you.
Thanks!
Working perfectly