PostgreSQL is an object-relational database management system that stores data in the form of tables. It is highly secure and reliable and allows for easy storage, access, and retrieval of data.
The pgAdmin is a feature-rich web-based interface for the administration, development, and management of PostgreSQL. It is also an open-source, free software just like PostgreSQL.
In this how-to guide we will learn to install PostgreSQL and pgAdmin4 on CentOS 8:
How to Install PostgreSQL on CentOS 8
01. Multiple versions of PostgreSQL are available in a default repository of CentOS 8. They can be listed on the terminal by using the below-given command:
dnf module list postgresql
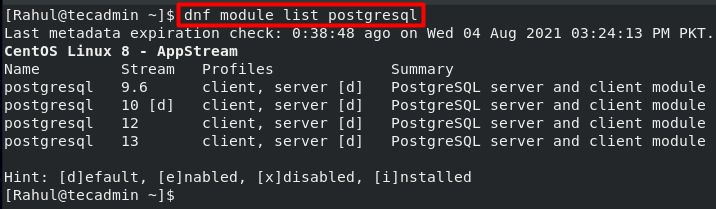
There are four different versions available in the AppStream repository on my system. The [d] after the PostgreSQL version 10 indicates that version 10 is the default version of PostgreSQL.
02. By default it will install PostgreSQL 10 on your system. We can install any other version on our CentOS 8 system as well. To install any other version we will first need to reset the already installed module stream:
sudo dnf module reset postgresql -y
03. Now we will enable the module stream of the latest PostgreSQL version:
sudo dnf module enable postgresql:13 -y
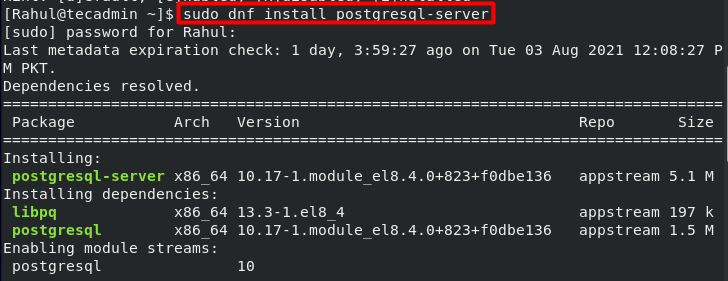
04. Now run the installation command again. The terminal will now install the latest version i.e. version 13:
sudo dnf install postgresql-server -y
05. You can verify the installed version by using the below-given command:
postgres --version
Output:postgres (PostgreSQL) 13.3
06. Now that the latest version of PostgreSQL has been installed, initialize it by using the below-given command:
sudo postgresql-setup initdb

07. You can start the database by running the command:
sudo systemctl start postgresql
08. The PostgreSQL can also be enabled to automatically start at the boot:
sudo systemctl enable postgresql
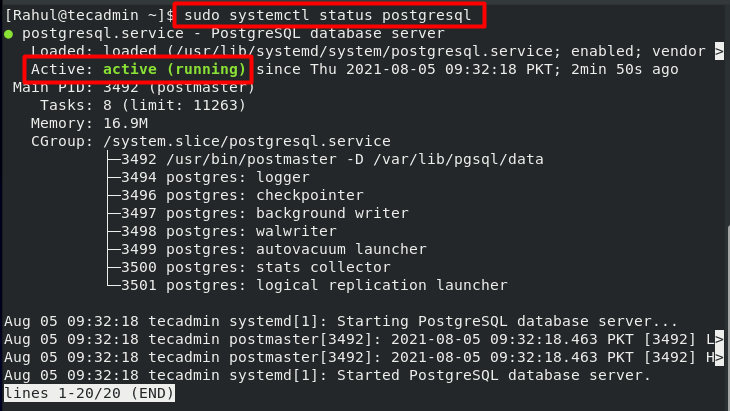
09. You can check the status of the service by using this command:
sudo systemctl status postgresql
10. You can also check whether the service has been successfully enabled to start at the boot:
sudo systemctl is-enabled postgresql

How to Install pgAdmin4 in CentOS 8
01. Now we will install pgAdmin4, the web-based PostgreSQL database management tool. To install pgAdmin4 we first need to install the EPEL repository:
sudo dnf install epel-release
02. Next, we will install a pgAdmin repository to resolve the dependencies:
sudo dnf install -y https://ftp.postgresql.org/pub/pgadmin/pgadmin4/yum/pgadmin4-redhat-repo-1-1.noarch.rpm
03. In order to install the pgAdmin4 on our system we will also need to remove some PostgreSQL repositories:
sudo dnf remove -y pgdg-redhat-repo
This repository has already been uninstalled from my system.
04. Now we will make a cache for pgAdmin4 by executing the below-given command:
sudo dnf makecache
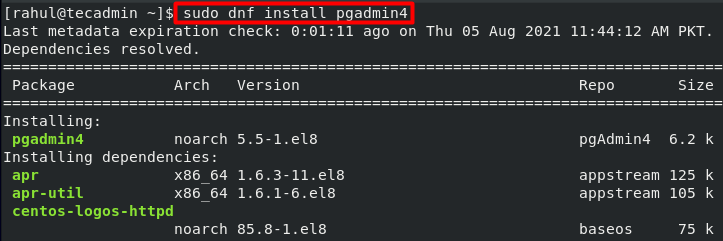
05. We can finally install pgAdmin4 on our system as all the dependencies have been resolved:
sudo dnf install pgadmin4
Press y and hit Enter whenever prompted to do so:
The pgAdmin4 has been successfully installed on the system.
06. The next step is to set up pgAdmin4. This can be done by opening the configuration file that comes with the pgAdmin4 package:
sudo /usr/pgadmin4/bin/setup-web.sh
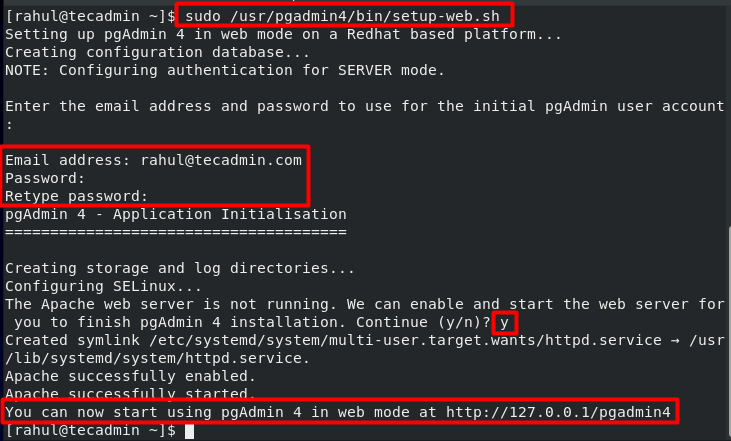
07. The configuration script will ask you for an email and a password to create a new user account for the web interface.
You can now access pgAdmin4 by navigating to the following address on your browser:
http://localhost/pgadmin4
For the remote systems, change “localhost” with the remote server IP address or domain name.

Conclusion
The latest versions of PostgreSQL and pgAdmin4 have been successfully installed on your system. Now you can configure them according to your requirements.
PostgreSQL is a powerful RDBMS; It is open-source and runs across platforms and is known for its reliability and robust features. RDBMS helps store, organize, and access data in a structured manner. pgAdmin4 is a GUI-based web application that is used for the management of the PostgreSQL databases.
In this installation guide, we have learned to install PostgreSQL and pgAdmin4 on our CentOS 8 system.

