PostgreSQL is a powerful, reliable, robust and open source object-relational database system.
The latest version of this database system is PostgreSQL 13.2, while versions 12.6, 11.11, 10.16, 9.6.21, & 9.5.25 still getting regular updates.
This tutorial describes how to install the latest PostgreSQL on Ubuntu 20.04 LTS Linux system. Also, include the steps to install pgAdmin4.
Prerequisites
A running Ubuntu 20.04 LTS system with shell access.
Log in as a sudo user and press “CTRL+ALT+T” to open a terminal. Then install a few required packages.
sudo apt updatesudo apt install wget curl ca-certificates
Step 1 – Install PostgreSQL in Ubuntu 20.04
First of all, Import the repository signing GPG key to your system. Open a terminal and use the below command to import key:
wget -O - https://www.postgresql.org/media/keys/ACCC4CF8.asc | sudo apt-key add -
Next, create a PPA file for PostgreSQL on your Ubuntu 20.04 system.
sudo sh -c 'echo "deb http://apt.postgresql.org/pub/repos/apt/ focal-pgdg main" >> /etc/apt/sources.list.d/pgdg.list'
After adding the PPA to your system. Execute the following command to install the PostgreSQL server on your system.
sudo apt updatesudo apt-get install postgresql postgresql-contrib
![]()
Press ‘y’ for any confirmation prompted by the installer. The above command will install the latest version of the PostgreSQL server on your Ubuntu system.
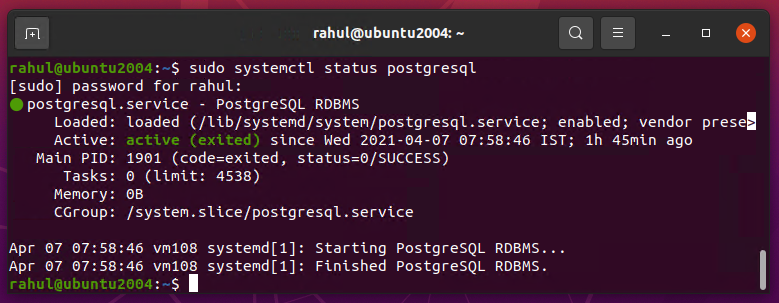
After successful installation verify the PostgreSQL service:
sudo systemctl status postgresql
Step 2 – Connection To PostgreSQL
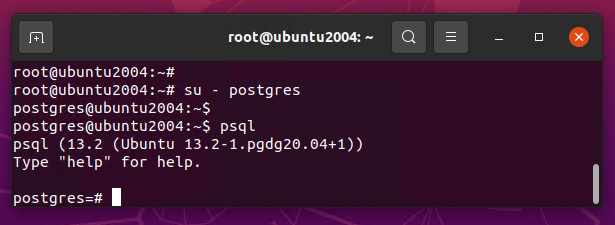
Now, establish a connection with the newly installed Postgres database server. First switch to the system’s Postgres user account:
sudo su - postgres
then type “psql” to get the postgress prompt:
psql

psql (13.2 (Ubuntu 13.2-1.pgdg20.04+1))
Type "help" for help.

postgres=#
Instead of switching users to connect to PostgreSQL, You can also combine both of the above commands as a single command.
sudo -u postgres psql

psql (13.2 (Ubuntu 13.2-1.pgdg20.04+1))
Type "help" for help.

postgres=#
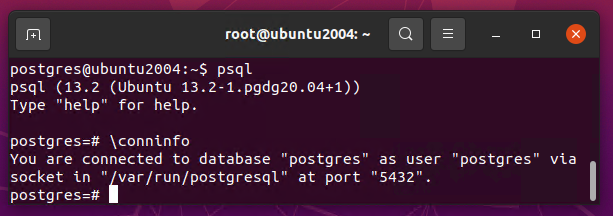
Once you are connected to PostgreSQL and you can see the connection information’s details, use the following command:
postgres=# \conninfo
The output displays information on the database name, the account you are logged in to, the socket path, and the port number.
Step 3 – Secure PostgreSQL
PostgreSQL installer creates a user “postgres” on your system. Default this user is not protected.
First, create a password for the “postgres” user account by running the following command.
sudo passwd postgres
Next, switch to the “postgres” account Then switch to the Postgres system account and create a secure and strong password for PostgreSQL administrative database user/role as follows.
su - postgrespsql -c "ALTER USER postgres WITH PASSWORD 'secure_password_here';"exit
Restart the service to apply security changes.
sudo systemctl restart postgresql
Step 4 – Install pgAdmin
We can use the official pgAdmin4 PPA to install the latest version of pgAdmin on your system.
First, import the repository signing GPG key and add the pgAdmin4 PPA to your system using the following commands.
curl https://www.pgadmin.org/static/packages_pgadmin_org.pub | sudo apt-key add -sudo sh -c 'echo "deb https://ftp.postgresql.org/pub/pgadmin/pgadmin4/apt/focal pgadmin4 main" > /etc/apt/sources.list.d/pgadmin4.list'
After adding the PPA, update the Apt cache and install the pgAdmin4 package on your system.
sudo apt updatesudo apt install pgadmin4
The pgadmin4 package contains both pgadmin4-web and pgadmin4-desktop versions, Here:
- pgadmin4-web – Provides the web interface accessible in a web browser
- pgadmin4-desktop – Provides desktop application for Ubuntu system, which required Ubuntu Desktop system.
You can install both or one of them of your choice. If you have installed both or pgadmin4-web, run the below command to configure it. This will add a login screen to the pgAdmin4 web dashboard.
sudo /usr/pgadmin4/bin/setup-web.sh
The above script will prompt you to create a user to access the web interface. Input an email address and password when prompted. Say “y” for other confirmation asked by the script.
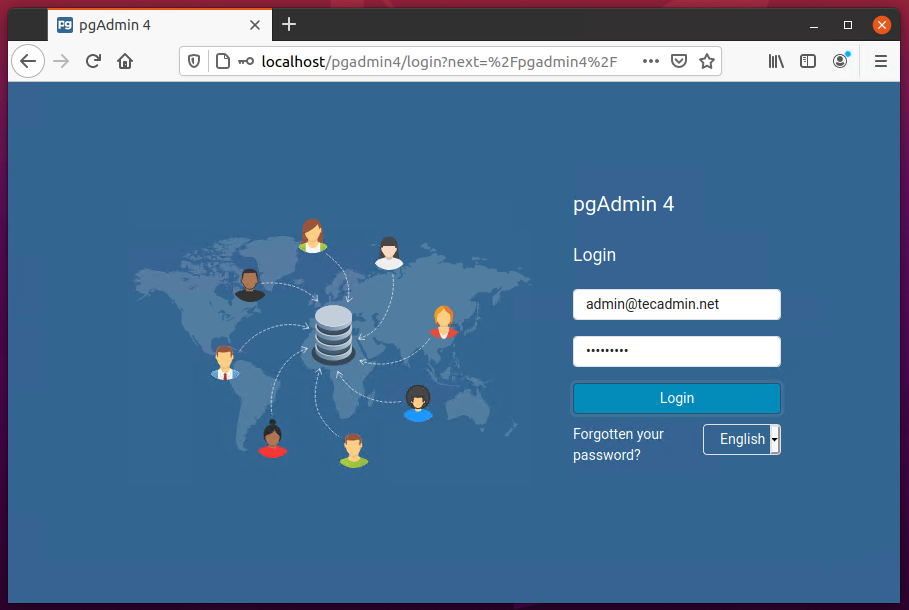
Once the script finished, you are good to access the pgAdmin web dashboard. It will be available at the below address:
Access this in a web browser: http://localhost/pgadmin4
In any case, the above page is not loading, restart the Apache server using “sudo systemctl restart apache2“. Again try to load the above URL
Now login with the email address and password configured with /usr/pgadmin4/bin/setup-web.sh script. After successful login to pgAdmin4, you will see the below screen.
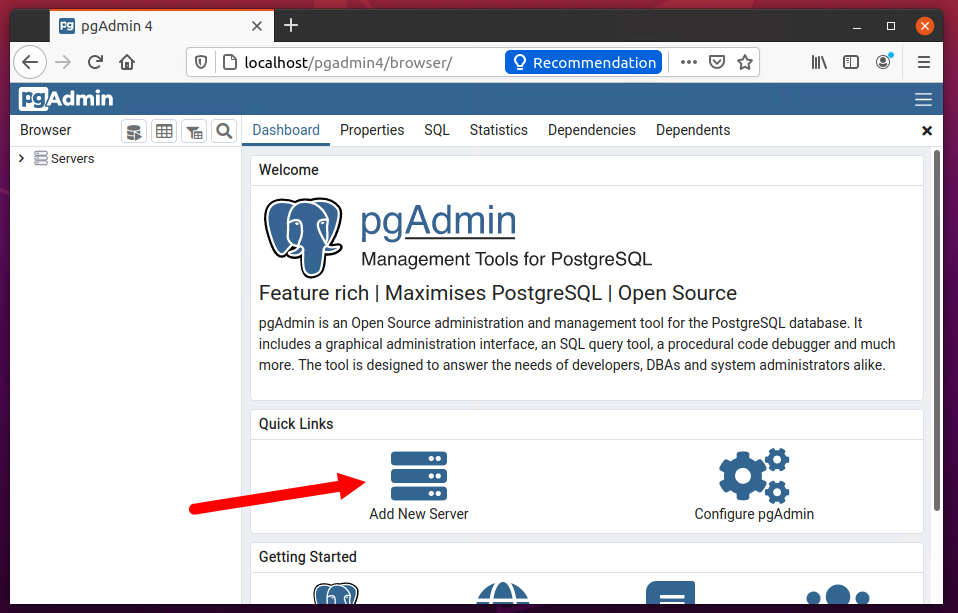
Here you need to add your Postgres server to pgAdmin4. Click on the “Add New Server” button. This will open a popup, Enter a friendly name, database host, and Postgres login credentials.
Click “Save” to complete the connection.
On successful authentication, you will see the databases in the sidebar as shown below screenshot.
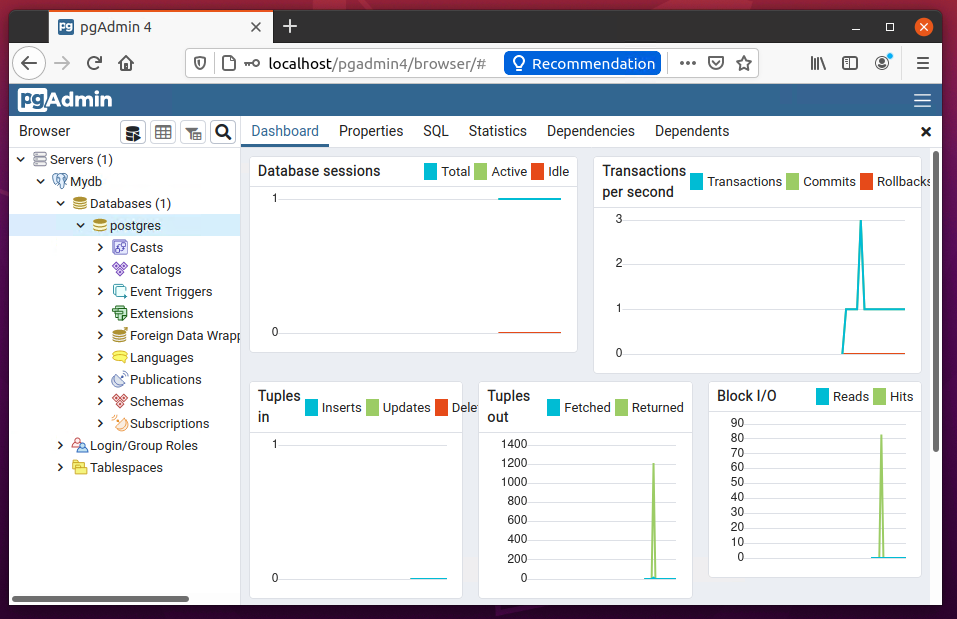
All done. You have successfully added the Postgres database server to pgAdmin4. You can also add more database instances to a single pgAdmin4 server.
Conclusion
In this tutorial, you have learned to install a PostgreSQL server on a Ubuntu 20.04 system. Additionally, you have learned to install and configure pgAdmin4 on your system.
Next, you can learn about backup and restore Postgres databases via command line.


6 Comments
Thank you ….
Very helpful content worked fine for me…Thanks for the content and keep up the good work
Hey man, this is awesome. Im new to Postgres and Ubuntu and I want to create a new user in order to work with some Databases in Django.
I created a user with
CREATE USER blog WITH PASSWORD ‘**********’;
and the Command line says:
CREATE ROLE
When I try to access Postgres with the user ‘blog’ it says:
~$ sudo -u blog psql blog
sudo: unknown user: blog
sudo: unable to initialize policy plugin
Could you help me?
Thank a lot man
CREATE USER blog WITH PASSWORD ‘**********’; creates a user for postgres, not a ubuntu-user which your command suggests (sudo -u blog psql blog). You should be able to see your user if typing: \du (display users) inside the psql shell.
First do:
sudo su postgres (this logs you in to the postgres ubuntu-user)
psql (to enter the postgres shell)
\du (to display users)
You should be able to see your blog user here.
Awesome, thanks for the info 🙂
Good work . I found helpful