Facebook Twitter Instagram
    TecAdmin
    • Home
    • Ubuntu 20.04
      • Upgrade Ubuntu
      • Install Java
      • Install Node.js
      • Install Docker
      • Install LAMP Stack
    • Tutorials
      • AWS
      • Shell Scripting
      • Docker
      • Git
      • MongoDB
    • FeedBack
    • Submit Article
    • About Us
    Facebook Twitter Instagram
    TecAdmin
    Home»Programming»Python»How to Install PyCharm on Ubuntu 20.04

    How to Install PyCharm on Ubuntu 20.04

    RahulBy RahulDecember 11, 20202 Mins Read

    PyCharm is an popular IDE between the Python developers. It is available with community edition as well as in professional edition. The community edition is available free for all and the professional version is available with 30 days evolution license. The community edition is generally used by the student or python learners but the professional edition is used by the pro Python developers.

    A PyCharm snap package is available for the Ubuntu users. Which is the preferred way for the packages installation on Ubuntu 20.04 systems recommended by the Ubuntu team.

    This tutorial describe you to how to install PyCharm in Ubuntu 20.04 LTS Linux systems.

    Prerequisites

    Login with a sudo privileged account on your Ubuntu system. Then, launch a terminal from all applications or use CTRL+ALT+T shortcut keys.

    Step 1 – Install PyCharm on Ubuntu 20.04

    You can choose between the community and professional edition of PyCharm IDE. Select one of the below edition to install PyCharm on Ubuntu 20.04 systems.

    • Install community edition – The community edition have large number of features to start working with the PyCharm IDE.
      sudo snap install pycharm-community --classic
      
    • Install professional edition – A 30 days evaluation version is available for the PyCharm professional edition. Then you need to buy a purchase from JetBrains official website.
      sudo snap install pycharm-professional --classic 
      
    • On successful installation, you will see the the output like below:

      snap install pycharm on ubuntu 20.04

    All done. The above instructions will install PyCharm on Ubuntu 20.04 LTS system.

    Step 2 – Launch PyCharm Application

    Click on show applications icon at lower left corner. Then type “pycharm” in search box, You will see a PyCharm launcher icon.

    Launch pycharm on Ubuntu 20.04

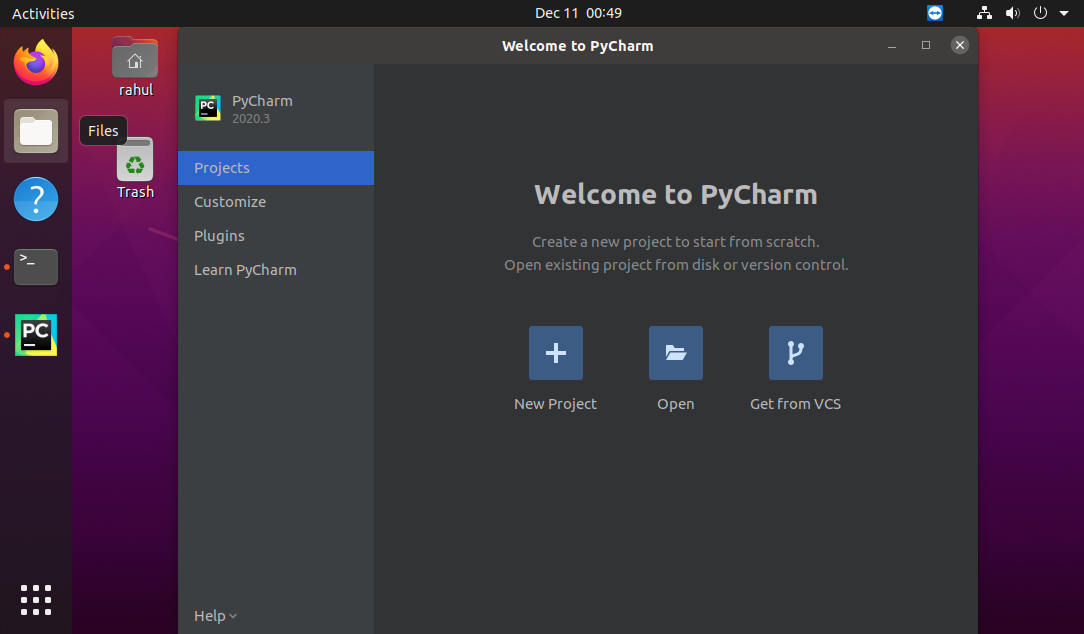
    Click on launcher icon to start the PyCharm IDE on your Ubuntu system.

    Running Pycharm application

    Conclusion

    This tutorial helped you to install PyCharm on Ubuntu 18.04 LTS systems. Enjoy the development with feature rich IDE for Python applications.

    Share. Facebook Twitter Pinterest LinkedIn Tumblr Email WhatsApp
    Previous Articlewhoami Command in Linux (Find Logged In User)
    Next Article du command in Linux with Useful Examples

    Related Posts

    How To Install Python 3.10 on Debian 11/10

    2 Mins Read

    How to Install Python 3.10 on CentOS/RHEL 8 & Fedora 35/34

    Updated:February 12, 20223 Mins Read

    How To Install Python 3.10 on Ubuntu, Debian & Linux Mint

    Updated:April 22, 20222 Mins Read

    How To Read, Write & Parse CSV in Python

    Updated:September 8, 20216 Mins Read

    How to Read, Write & Parse JSON in Python

    3 Mins Read

    Python while Loop with Examples

    Updated:June 29, 20212 Mins Read

    Leave A Reply Cancel Reply

    Recent Posts
    • How to Enable / disable Firewall in Windows
    • How to Install JAVA on Ubuntu 22.04
    • Switching Display Manager in Ubuntu – GDM, LightDM & SDDM
    • Changing the Login Screen Background in Ubuntu 22.04 & 20.04
    • How To Install PHP (8.1, 7.4 or 5.6) on Ubuntu 22.04
    Facebook Twitter Instagram Pinterest
    © 2022 Tecadmin.net. All Rights Reserved | Terms  | Privacy Policy

    Type above and press Enter to search. Press Esc to cancel.