Webmin is an free and open source control panel for the system administration for Unix-like systems. It allows you to configure a Linux server using a graphic web interface without editing configuration files manually. Webmin also allows you to control multiple machines through a single interface, or seamless login on other Webmin hosts on the same subnet or LAN.
This article will help you to install latest Webmin on Ubuntu 20.04 LTS system.
Prerequisites
First of all, login to your Ubuntu 20.04 system with sudo privileged account.
Then update the Apt cache and install required packages on your system.
sudo apt updatesudo apt install curl gpg apt-transport-https -y
Step 1 – Installing Webmin on Ubuntu
The Webmin official team provides Debian package of Webmin to install on Ubuntu systems. Also, they provides Apt repository for installing Webmin on Ubuntu systems.
In order to install Webin, follow the below steps:
- Import GPG Key – Import the GPG key to your system by which the Webmin packages are signed in.
curl https://download.webmin.com/jcameron-key.asc | sudo apt-key add - - Enable Webmin PPA – Create a webmin Apt configuration file by executing the following command.
echo "deb https://download.webmin.com/download/repository sarge contrib" | tee > /etc/apt/sources.list.d/webmin.list - Installing Webmin – Now, your system is ready to install Webmin from official Apt repositories. Execute the followign commands to install Webmin on Ubuntu systems.
sudo apt update
sudo apt install webmin
Press ‘y’ for any confirmation asked by the installer.
On successful installation, you will see the message like “Webmin install complete. You can now login to https://host-name:10000/” in installer logs.
Step 2 – Access Webmin Dashboard
By default Webmin is accessible on port 10000 with https protocol. Open a web browser in your system and access your server ip on this port.
To access Webmin remotely, replace server-ip with your system’s IP address or a domain name pointed to this server.
https://server-ip:10000/
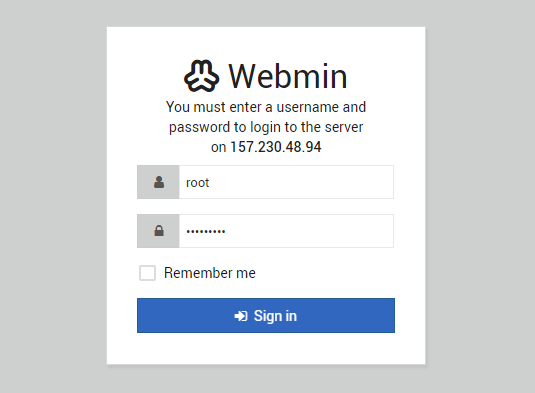
You need to provide valid username and password to complete authentication. You can use “root” user to login with its password, like below:

After successful login, you will get the Webmin control panel dashboard. Here you can manage your entire server from the web interface.