
Zabbix is a powerful open-source monitoring solution that allows you to monitor the performance of your servers, networks, and applications. In this article, we will guide you through the process of installing the Zabbix client (also known as Zabbix Agent) on Ubuntu 22.04. The Zabbix Agent is responsible for collecting system data and sending it to the Zabbix server for further analysis and storage.
Prerequisites
- Ubuntu 22.04 server or desktop instance
- A user account with sudo privileges
- Zabbix server up and running
Step 1: Update Your System
Before starting the installation process, it is always recommended to update your system. Open a terminal and execute the following commands:
sudo apt updatesudo apt upgrade -y
Step 2: Install Zabbix Agent
Now, we will install the Zabbix Agent from the official Zabbix repository. First, add the Zabbix repository to your system:
wget https://repo.zabbix.com/zabbix/6.0/ubuntu/pool/main/z/zabbix-release/zabbix-release_6.0-4+ubuntu22.04_all.debsudo dpkg -i zabbix-release_6.0-4+ubuntu22.04_all.debsudo apt update
Next, install the Zabbix Agent:
sudo apt install zabbix-agent
Step 3: Configure Zabbix Agent
After the installation is complete, you need to configure the Zabbix Agent to communicate with the Zabbix server. Edit the Zabbix Agent configuration file using your preferred text editor:
sudo nano /etc/zabbix/zabbix_agentd.conf
Find the following lines and replace them with the correct information:
1 2 3 | Server=<Zabbix_Server_IP> ServerActive=<Zabbix_Server_IP> Hostname=<Hostname_Of_Ubuntu_Client> |
Replace <Zabbix_Server_IP> with the IP address of your Zabbix server, and <Hostname_Of_Ubuntu_Client> with the hostname of your Ubuntu client. Save the changes and close the editor.
Step 4: Start and Enable Zabbix Agent Service
Now that the configuration is done, start the Zabbix Agent service and enable it to start automatically at boot:
sudo systemctl start zabbix-agentsudo systemctl enable zabbix-agent
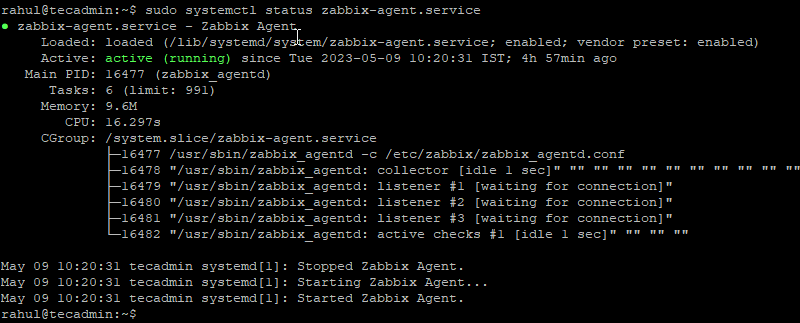
You can check the status of the Zabbix Agent service with the following command:
sudo systemctl status zabbix-agent

Step 5: Add the Zabbix Client to the Zabbix Server
Lastly, you need to add the newly installed Zabbix Agent to the Zabbix server. Log in to the Zabbix web interface, navigate to “Configuration” > “Hosts” > “Create Host”, and fill in the necessary details.

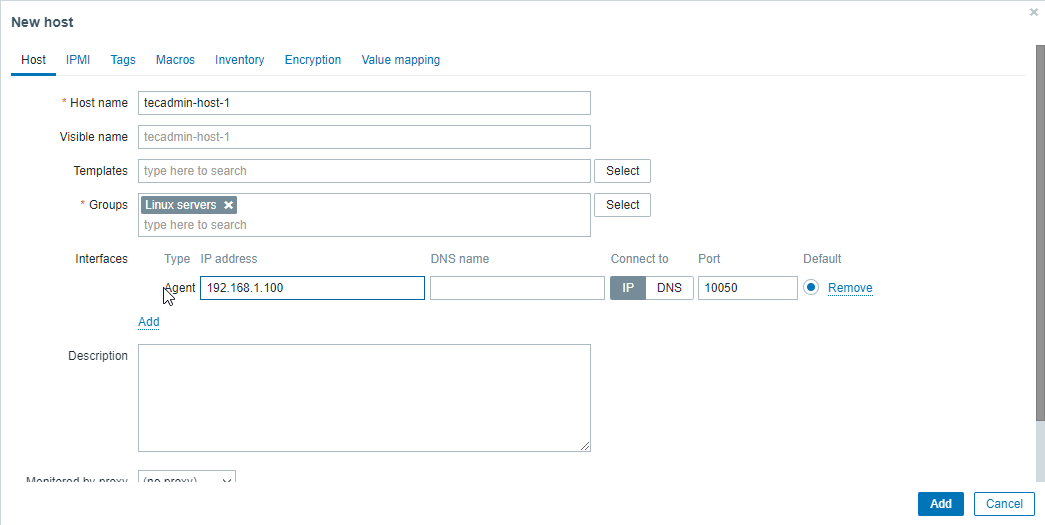
After adding the host, you should see the host status as “Enabled”. Within a few minutes, the Zabbix server will start receiving data from the Zabbix Agent installed on your Ubuntu 22.04 system.
Conclusion
In this article, we have provided a step-by-step guide on how to install and configure the Zabbix Agent on Ubuntu 22.04. With the Zabbix Agent installed, you can now monitor the performance and availability of your Ubuntu system from the Zabbix server. The Zabbix monitoring solution offers extensive features and capabilities, making it a powerful tool for managing your IT infrastructure.