SSH or Secure Shell is a protocol utilized to enable communication between two computers and share data. It provides a password-enabled or password-less (disabled) authentication and encrypts communication between two hosts. When working with CentOS servers most of the time is spent in the terminal linked to your server via SSH.
In this guide, we’ll be focusing on setting up SSH keys-based authentication for a CentOS 8 server. SSH keys offer a straightforward, steady technique of communicating with remote servers and are encouraged for all users.
Creating SSH Keys in Linux
To generate a new 2048-bit RSA key pair, open up the terminal and execute the below-given command:
ssh-keygen
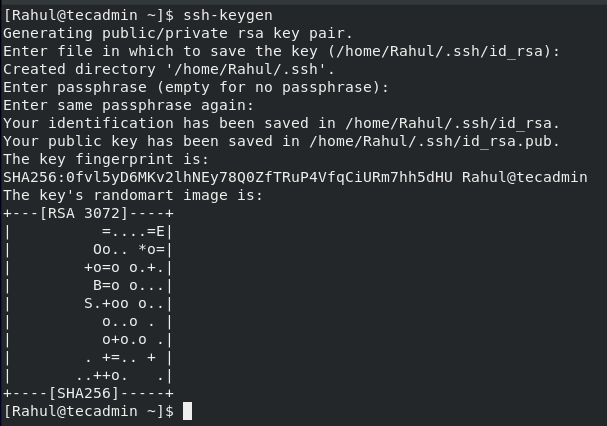
After pressing the enter, you will see the following output:

If you press Enter, by default, it will save the key pair in the .ssh subdirectory of your_home folder. You can also provide the alternate path of where you want to save the key pair but it is recommended to use the default directory to save the key pair:

If you have created a key pair before on your client machine then you will be prompted to overwrite it. It’s totally up to you to choose yes or no but be careful to choose the ‘y’ option. If you choose the ‘y’ option, you will not be able to use the previous key pair to log in to the server.

Now you will be asked to provide a passphrase to add an extra layer of security that prevents unauthorized users from accessing the server. Just press Enter if you do not want to provide any passphrase:
![]()
After providing the passphrase, you will see the following output:
Now you have successfully generated an SSH key pair, to verify this run the below-given command:
ls -l ~/.ssh/id_*.pub

The command given above will output the path to the file which contains the SSH key pair. If it outputs an error like “No such file or directory found” then that means that the key pair was not successfully created and you will have to repeat the process again.
Adding the SSH Key to Remote System
Once you have created the key pair you need to add the SSH key to the CentOS server. The fastest way is to use the ssh-copy-id method. In some cases, you might not have the ssh-copy-id method available on your local machine. In this case, you can use an alternate method to add the SSH key to the CentOS Server.
Adding SSH Key via ssh-copy-id Command
Your local machine will most probably have the ssh-copy-id method by default. This method will only work in case you have password-based SSH access to the server:
ssh-copy-id username@server_host
For my server I will use:
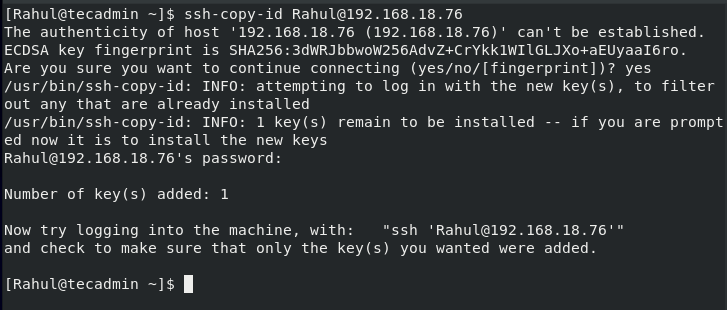
ssh-copy-id Rahul@192.168.18.76

The IP address is your system’s IP, type yes and press Enter, you will be prompted to enter the remote user’s password:

Once the user completes all steps, the public key will be copied to the server:
Adding the SSH Key Without ssh-copy-id
In case your local machine doesn’t have the ssh-copy-id method installed, which is highly unlikely, then you will have to run this command to add the ssh keys to the server.
For my local server I will use:
cat ~/.ssh/id_rsa.pub | ssh Rahul@192.168.18.76 "mkdir -p ~/.ssh && chmod 700 ~/.ssh && cat >> ~/.ssh/authorized_keys && chmod 600 ~/.ssh/authorized_keys"

How to Login to the Server using SSH keys
Now that you have successfully added the key to the server, you should be able to login into the server without the user’s password:
$ ssh username@server_ip_address
For my server I will use the following command:
ssh Rahul@192.168.18.76

If you didn’t set the passphrase then you can log in without authentication. It is the fastest way to log in to the server otherwise you have to pass through the authentication stage.
Step 3 – How to Disable SSH Password Authentication
You can add an extra security layer by disabling the password authentication for SSH. Before the beginning process, ensure that you are able to access your server without the password as a root user or as a non-root user with sudo privileges.
To disable SSH password Authentication, the first log in to the server:
ssh Rahul@192.168.18.76
Now we will open and modify the SSH configuration file located at /etc/ssh/sshd_config:
sudo nano /etc/ssh/sshd_config
After opening the configuration file make the following changes:
PasswordAuthentication no
Uncomment the above-given lines if they are commented by removing the # sign and set their value to no.

After modification of the SSH file you need to save and close the file by pressing Ctrl + X and restart SSH service using the following command:
sudo systemctl restart sshd
By doing all steps, password-based authentication is disabled successfully.
Conclusion
SSH is a secure network protocol that is used for communication between a remote server and a client; It is more secure than FTP for file transfers between a client and a server. In this article, we learned to generate SSH key pairs and set up SSH-based authentication for CentOS 8 based servers, we also learned to disable the SSH password authentication.