MongoDB is a free open-source, schema-free, NoSQL database which is getting more popular day by day among web developers. It is a document-oriented database and is known for its processing speed.
In order to use MongoDB for our projects, we will first need to install it on our system along with its dependencies and some other tools. In this post, we will learn to install and set up Apache, PHP, and MongoDB on Ubuntu and Debian operating systems.
Installing Apache
First of all, we will install Apache on our system. Apache is a web server software and a popular HTTP client; it helps in creating virtual hosts. To install Apache on our system we will use the below-given command:
sudo apt updatesudo apt install apache2 -y
Note: The commands given in this article will work on both Ubuntu and Debian as both of them use the same package manager.
Installing PHP
To install PHP along with its common modules on our system we just need to run a simple command:
sudo apt install -y php7.4 libapache2-mod-php7.4
We have installed PHP 7.4 on our system. You can install the version and the modules that you require for your project.
Installing MongoDB
Unfortunately, MongoDB is not available in the default repositories of Ubuntu and Debian. So we will have to first import the public key which will be used by the package management system:
wget -qO - https://www.mongodb.org/static/pgp/server-5.0.asc | sudo apt-key add -
If the terminal gives an error while executing the above-given command then you will have to install GnuPG on your system before executing this command again.
The next step is to create a list file for your version of the operating system. As I am running Ubuntu 20.04, I will run the following command:
echo "deb [ arch=amd64,arm64 ] https://repo.mongodb.org/apt/ubuntu focal/mongodb-org/5.0 multiverse" | sudo tee /etc/apt/sources.list.d/mongodb-org-5.0.list
For Debian 10:
echo "deb http://repo.mongodb.org/apt/debian buster/mongodb-org/5.0 main" | sudo tee /etc/apt/sources.list.d/mongodb-org-5.0.list
Next, we need to reload the local package database and then install the latest stable release of Mongodb:
sudo apt updatesudo apt install -y mongodb-org
This will install the MongoDB server on your system.
Installing MongoDB PHP Module
For the last step, we need to install the MongoDB PHP module which is required for connecting PHP with MongoDB.
sudo apt install php7.4-mongodb
Make sure to install the MongoDB module for the same version of PHP.
Run the following command to check the MongoDB module is enabled for the PHP CLI environment.
php -m | grep mongo
Outputmongodb
Next, restart the Apache server to apply changes.
sudo systemctl restart apache2
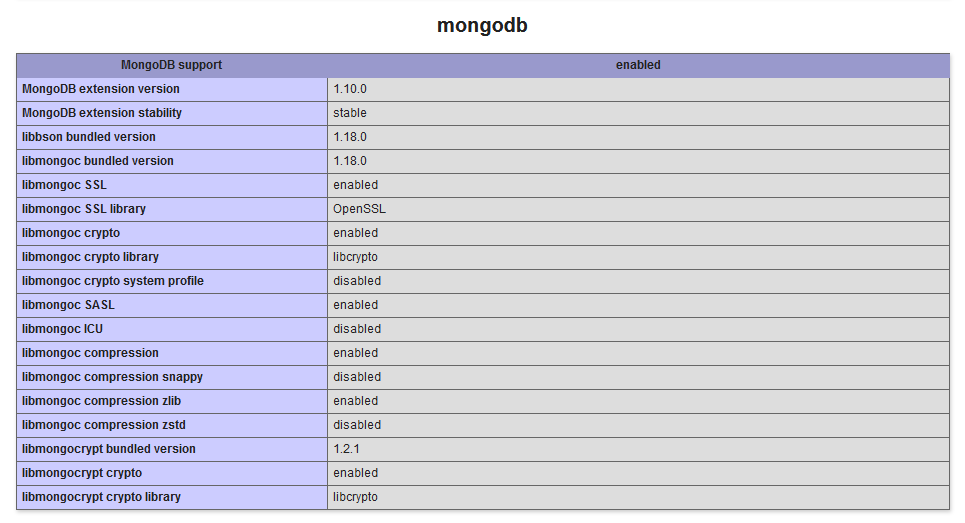
You can also create a phpinfo() file at the Apache document root. When you access this file in web broser,
Conclusion
MongoDB is a well-known, high-performance, NoSQL database. It is highly scalable and is different from Relational Database Systems such as MySQL and PostgreSQL. In this post, we learned how to install it along with its dependencies and other related tools.

