
Ubuntu is one of the most popular Linux distributions in the world, offering a reliable and user-friendly operating system for a variety of users. Whether you’re a developer, a student, or just someone who wants to use a free and open-source alternative to Windows or macOS, Ubuntu is a great choice.
One common task that users often need to perform on their Ubuntu machines is capturing screenshots. Whether you’re taking screenshots for documentation purposes, sharing information with colleagues or friends, or just capturing an interesting moment on your screen, there are several easy ways to capture screenshots in Ubuntu.
In this article, we’ll cover three different methods for capturing screenshots in Ubuntu: using the built-in screenshot utility, using the command line, and using a third-party application.
Method 1: Using the Built-in Screenshot Utility
Ubuntu comes with a built-in screenshot utility that allows you to capture your screen or a specific window with just a few clicks. To use the screenshot utility, follow these steps:
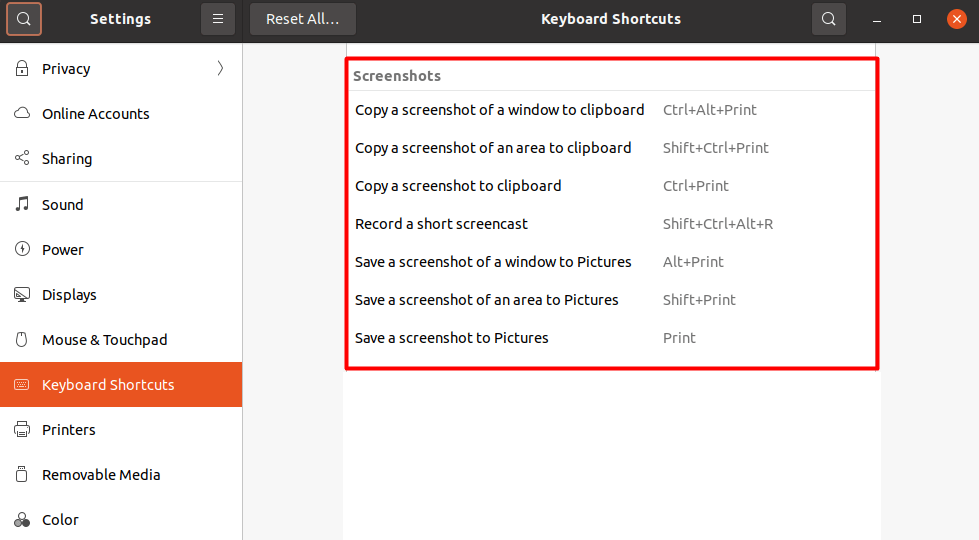
- Press the “Print Screen (PrtSc)” key on your keyboard. This will capture a screenshot of your entire screen.
- Alternatively, press “Alt + Print Screen” to capture a screenshot of the active window.
- The screenshot will be saved to your Pictures folder by default.
- You can also access the screenshot utility by clicking on the Activities menu in the top left corner of your screen and searching for “Screenshot”.
- In the Screenshot window, you can choose to capture a specific area of your screen, delay the screenshot capture, or even include the mouse pointer in the screenshot.

Method 2: Using the Command Line
If you prefer to use the command line, Ubuntu also provides a simple way to capture screenshots using the “scrot” command. To use scrot, follow these steps:
- Open a terminal window by pressing “Ctrl+Alt+T” on your keyboard.
- Install “scrot” by running the following command:
sudo apt-get install scrot - To capture a screenshot of your entire screen, type “scrot” and press Enter. The screenshot will be saved to your home directory.
- To capture a screenshot of the active window, type “scrot -u” and press Enter. The screenshot will also be saved to your home directory.
- You can also specify a filename and directory for the screenshot by typing “scrot /path/to/filename.png” and pressing Enter.
Method 3: Using a Third-Party Application
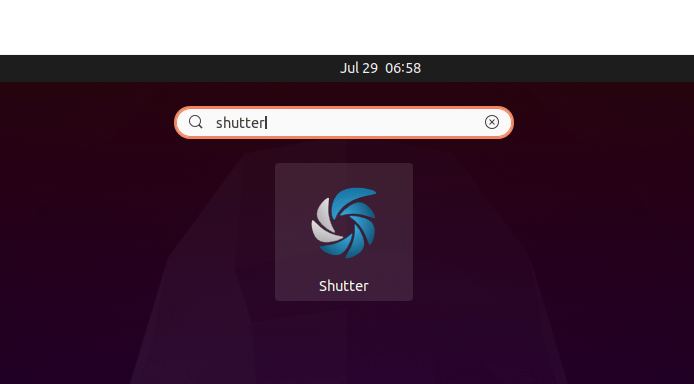
If you want more advanced screenshot capture options, there are several third-party applications available for Ubuntu. One popular option is “Shutter,” which allows you to capture screenshots of specific areas of your screen, edit the screenshots, and even upload them to online services.
To install Shutter, follow these steps:
- Open a terminal window by pressing “Ctrl+Alt+T” on your keyboard.
- Then execute the following commands to install the Shutter utility:
sudo add-apt-repository ppa:linuxuprising/shuttersudo apt-get updatesudo apt-get install shutter - Once Shutter is installed, you can launch it by searching for “Shutter” in the Applications menu.
- In Shutter, you can choose to capture a specific area of your screen, delay the screenshot capture, and even add annotations or highlights to the screenshot.
- You can also configure Shutter to upload screenshots to online services like Dropbox or Imgur, making it easy to share your screenshots with others.
Select the application and open it:
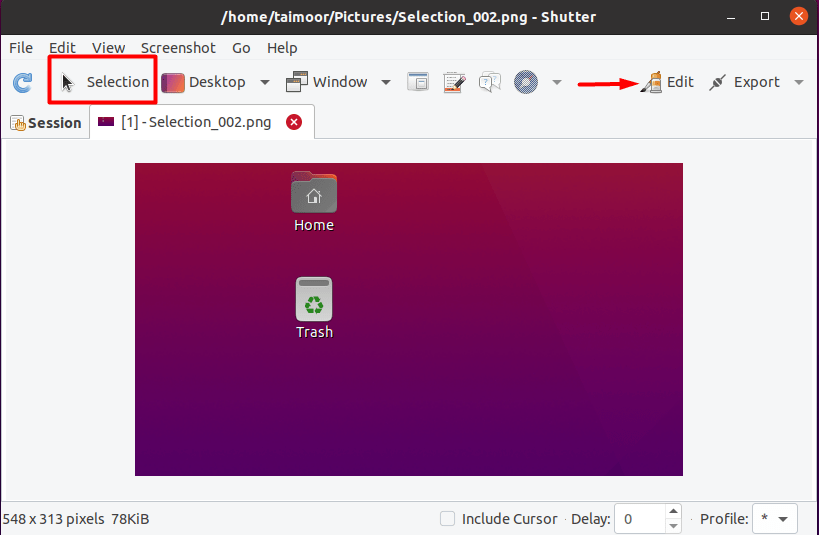
Here you can have the selection option, which can be used to capture any specific part of the screen, and after that, the captured screen will be displayed in its own window. You can select the edit option as well on the top right side. After that, a new window will open along with your captured image having lots of editing options, as shown below.

You can highlight, put arrows or lines, and can even add texts to your image. So this is a very handy tool and highly recommended for anyone who frequently takes screenshots.
Conclusion
Capturing screenshots in Ubuntu is a simple and straightforward process, thanks to the built-in screenshot utility, the command line, and third-party applications like Shutter. Whether you need to capture screenshots for documentation, share information with others, or just for fun, Ubuntu provides plenty of options to suit your needs.
1 Comment
For most x installed systems, maim comes preinstalled.
You can use import , if you have ImageMagick package install.