We have launched a new Debian Linux instance to run it as a production server for our new applications. This is a good practice to perform an initial server setup with the Debian Linux system. Which will enhance the primary server security and usability for your new server.
This guide includes the following steps:
- Update and Upgrade a Debian System
- Create A Sudo User in Debian
- Setup Hostname in a Debian System
- Secure SSH Server
- Configuring FirewallD
Let’s begin with the initial server setup on the Debian Linux system.
1. Upgrade Debian
After login into the Debian server, the first task is to upgrade the current packages of the Debian system. Because It may be the server is built with the old image file. The Debian team keeps working to enhance server security and provide updated packages regularly.
First, update the Apt cache on your system.
sudo apt update
Then, run the upgrade command to actually upgrade packages.
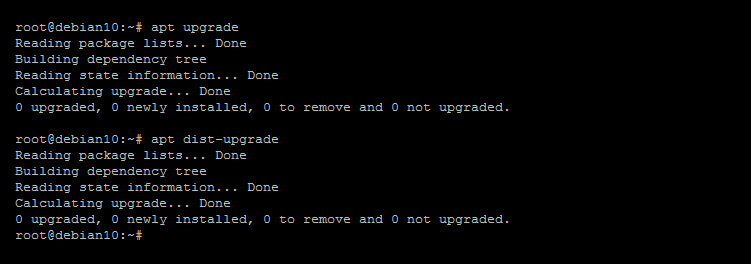
sudo apt upgrade
It’s also a good choice to run the dist-upgrade for a newly installed system.
sudo apt dist-upgrade
Press ‘Y’ for any confirmation prompted to complete the packages installation.
Also, execute the following command to remove packages no longer required. This is also helpful to remove files of the old kernel versions.
sudo apt autoremove
2. Create A Sudo User
Some of the hosting providers like DigitalOcean launches instances with root account only. This is not a good practice to keep using a production instance using the superuser account. We strongly recommend creating a new user with Sudo privileges and use that to accessing your Debian instance.
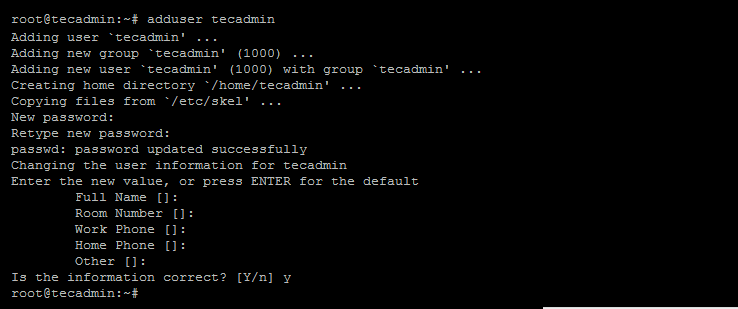
Assuming you are already logged in a root account. Run the following command to create a new User on Debian:
sudo adduser tecadmin
The newly created account is a regular user. You will require the administrative privileges to perform multiple tasks. Grant the administrative privileges to this user by adding them in sudo group. To add user to sudo group, type:
sudo usermod -a -G sudo tecadmin
Now, you can switch to a newly created account for further instructions.
sudo su - tecadmin
3. Configure System’s Hostname
A hostname of a system is the name of the instance used as an identity for computer networks. It helps users and network machine to easily recognize a machine within a network in a human-readable format.
Its an good practice to set a proper hostname for your instance. In the system terminal type hostnamectl and hit enter:
hostnamectl
This will give you details about system details including hostname. Even you can type hostname command to view systems hostname.
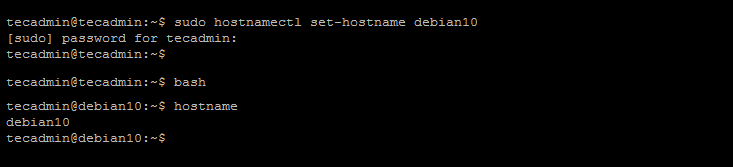
Next, change the system hostname to
sudo hostnamectl set-hostname debian10
Once you updated the Systems’ hostname, you need to change to a new shell to activate in the current session. After changing the current shell, the shell prompt will be changed to a new hostname.
hostname
4. Securing SSH
SSH (Secure Shell) is the protocol used to connect remote servers. We recommended configuring the OpenSSH server to listen on a non-standard port. Which provides you another layer of security from hackers.
To change the default port and disable root login, edit OpenSSH configuration file /etc/ssh/sshd_config and do the following changes.
- Change Default Port – It will be good to change default ssh port as default ports are always on attackers.
Port 2232
- Disable Root SSH Login – Also you would like to disable root login via ssh.
PermitRootLogin no
Save the configuration file and restart the OpenSSH service to apply changes.
sudo systemctl restart ssh
5. Configuring Firewall (FirewallD)
The Default Debian server edition does not have a firewall installed on it. You can simply run the following command to install required packages from default repositories.
sudo apt install firewalld -y
On successful installation, firewall service will to auto started and enabled on your system.
The default firewall allows SSH to the remote users. But if the SSH port is changed, you can add a rule to allow SSH access on another port.
sudo firewall-cmd --permanent --add-port=2232/tcp
You can directly provide a service name like “http” or “https” to allow. The firewalld reads /etc/services file to determine the corresponding port of the service.
sudo firewall-cmd --permanent --add-service=httpsudo firewall-cmd --permanent --add-service=https
After making any changes to your firewall, make sure to reload changes using the following command.
sudo firewall-cmd --reload
To view, all the allowed ports and services use the following command.
sudo firewall-cmd --permanent --list-all
Output:
public
  target: default
  icmp-block-inversion: no
  interfaces:
  sources:
  services: cockpit dhcpv6-client http https ssh
  ports:
  protocols:
  masquerade: no
  forward-ports:
  source-ports:
  icmp-blocks:
  rich rules:
Conclusion
In this guide, we have gone through the initial server setup of a Debian Linux system. Once you successfully finished all the initial server setup configurations, your system is ready to use.


3 Comments
Not that it is any faults. But I preferes to change the files directly (like /etc/hostname).
I also preferes to use ufw(8) as firewall, as it is easy to manage and support routing and tunneling and both IPv4 and IPv6 out of the box.
In the point 5.0 you are talking about Ubuntu not Debian
Thanks sedlav, We have corrected the mistake