
Monit is a powerful, open-source utility for managing and monitoring Unix systems. Widely appreciated for its simplicity and ease of use, Monit conducts automatic maintenance and repair of system services, offering peace of mind for system administrators. This article provides a comprehensive, step-by-step guide to installing, configuring, and utilizing Monit on a Linux system.
Step 1: Installing Monit
Monit is available in the repositories of most Linux distributions. To install Monit, use your distribution’s package manager.
- For Debian/Ubuntu systems, you can use:
sudo apt-get updatesudo apt-get install monit - For Red Hat/CentOS systems, use:
sudo yum install monit - For Arch Linux systems, use:
pacman -S monit
Step 2: Configuring Monit
After installation, the main configuration file for Monit is /etc/monit/monitrc. This file requires root privileges to edit. Some key configurations to consider:
- Set the Poll Time: Determine how often Monit checks services. A typical setting is 1-2 minutes.
- Configure Email Notifications: Set up mailserver settings to receive alerts. For example:
set mailserver mail.example.com with timeout 30 seconds - Control File Settings: Specify which services to monitor and the respective actions. For example, to monitor the Apache service:
check process apache with pidfile /var/run/apache2.pid
    start program = "/etc/init.d/apache2 start"
    stop program = "/etc/init.d/apache2 stop"
    if failed port 80 protocol http then restart
Step 3: Controlling Monit
- Enable and Start Monit: Enable Monit to start on boot and then start the service:
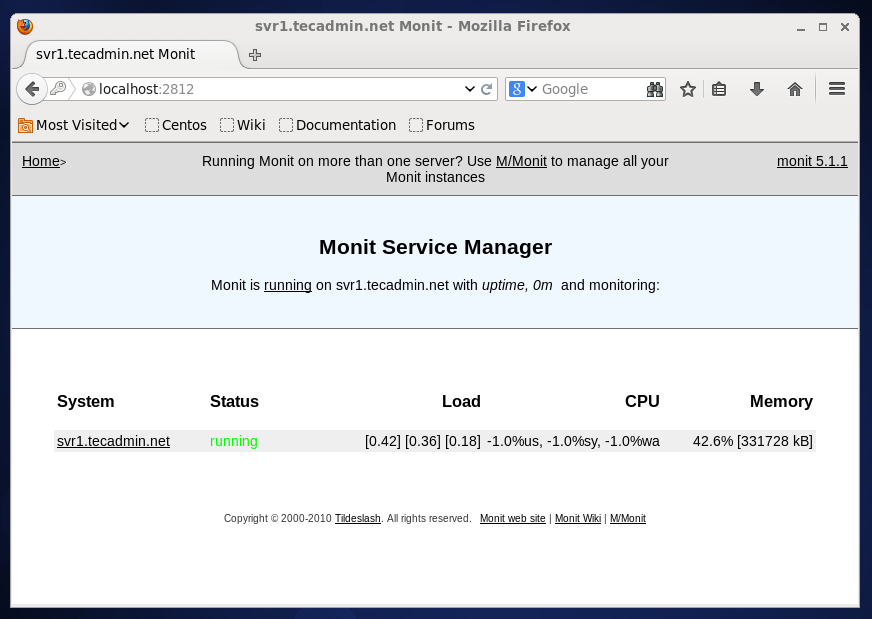
sudo systemctl enable monitsudo systemctl start monit - Accessing the Web Interface: Monit provides a web interface on port 2812. Ensure this is configured in
monitrc:set httpd port 2812 use address localhost # only accept connection from localhost allow localhost # allow localhost to connect to the serverAccess the web interface via http://localhost:2812.
Step 4: Monitoring System Resources
Monit can monitor system resources like CPU, memory, and disk usage. Add these settings to the monitrc file. For example, to monitor the system’s CPU usage:
check system your-hostname
    if loadavg (1min) > 4 then alert
    if loadavg (5min) > 2 then alert
Step 5: Customizing Monit
Monit is highly customizable. Explore additional settings like:
- Monitoring file checksums for unauthorized changes.
- Setting up alerts for specific conditions.
- Monitoring network connections.
Conclusion
Monit is an invaluable tool for Linux system administrators. By following this guide, you can set up a basic Monit configuration. However, Monit’s capabilities are extensive, and its configurations can be tailored to fit almost any requirement. Regularly reviewing and updating your Monit configurations is recommended to ensure your systems remain secure, efficient, and reliable.
3 Comments
Hi Team
i understand how to install, configure and monitor programs and processes in the local system. but i am unable to find the solution to monitor remote Virtual machines.
Can you please explain the process of monitoring the remote VM’s using monit tool.
Hey man, this one really helped me, thanks a lot!
Hi Rahul! Nice write up covering many distributions. If anyone is interested on getting the latest version of Monit without adding additional repositories on CentOS 6, here is a quick guide: http://www.getpagespeed.com/server-setup/monit-on-centos-6