
Angular is an frameworks, libraries, assets, and utilities. It keeps track of all the components and checks regularly for their updates. This tutorial will help you to install the Angular CLI tool on Ubuntu 19.10, 18.04 & 16.04 Linux operating systems.
Reference: Serve Node.js Application behind the Apache Server
Step 1 – Install Node.js
First of all, you need to install node.js on your system. If you don’t have node.js installed use the following set of commands to add node.js PPA in your Ubuntu system and install it.
sudo apt install python-software-propertiescurl -sL https://deb.nodesource.com/setup_14.x | sudo -E bash -sudo apt install nodejs
Make sure you have successfully installed node.js and NPM on your system
node --versionnpm --version
Step 2 – Install Angular/CLI
After installation of node.js and npm on your system, use following commands to install Angular cli tool on your system.
npm install -g @angular/cli
The latest version of Angular CLI will be installed on your Ubuntu Linux system. You may require older Angular version on your machine. To install specific Angular version run command as following with version number.
npm install -g @angular/cli@10 #Angular 10npm install -g @angular/cli@11 #Angular 11npm install -g @angular/cli@12 #Angular 12
Using the -g above command will install the Angular CLI tool globally. So it will be accessible to all users and applications on the system. Angular CLI provides a command ng used for command-line operations. Let’s check the installed version of ng on your system.
ng --version


     _                      _                 ____ _     ___
    / \   _ __   __ _ _   _| | __ _ _ __     / ___| |   |_ _|
   / △ \ | '_ \ / _` | | | | |/ _` | '__|   | |   | |    | |
  / ___ \| | | | (_| | |_| | | (_| | |      | |___| |___ | |
 /_/   \_\_| |_|\__, |\__,_|_|\__,_|_|       \____|_____|___|
                |___/


Angular CLI: 12.2.11
Node: 14.15.3
Package Manager: npm 6.14.9
OS: linux x64

Angular: undefined
...

Package                      Version
------------------------------------------------------
@angular-devkit/architect    0.1202.11 (cli-only)
@angular-devkit/core         12.2.11 (cli-only)
@angular-devkit/schematics   12.2.11 (cli-only)
@schematics/angular          12.2.11 (cli-only)
Step 3 – Create a New Angular Application
Now, create a new application named hello-angular4 using the Angular CLI tools. Execute the commands to do this:
ng new hello-angular
Output:
...
...
✔ Packages installed successfully.
    Successfully initialized git.
This will create a directory named hello-angular in your current directory, and create an application.
Step 4 – Serve Angular Application
Your basic Angular application is ready to serve. Change directory to hello-angular4 and run your Angular application using ng serve command.
cd hello-angularng serve
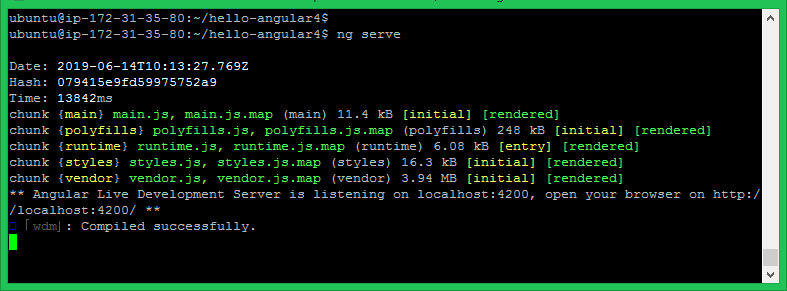
You can access your angular application on localhost port 4200, Which is the default host and port used by Angular application.
- http://localhost:4200
You can change the host and port for running the Angular applications by providing --host and --port command line arguments.
ng serve --host 0.0.0.0 --port 8080
The IP address 0.0.0.0 listens on all interfaces and is publically accessible.
Conclusion
You have successfully installed Angular CLI and created a sample application. The next tutorial will help you to configure the Angular application behind the Apache server to serve with a domain name.
9 Comments
hi;
when i install angular cli, i give response below:
changed 219 packages, and audited 220 packages in 11s
25 packages are looking for funding
run `npm fund` for details
found 0 vulnerabilities
How can i fix this?
If you are building a large project you may get out of memory, Use
NODE_OPTIONS=–max_old_space_size=8048
and the increased heap will fix this.
It doesn’t work for me
Hi Lokesh, What issue are you facing?
how do we know that whether is it angular or angularjs?
How do we know which angular version installed
check your packge.json file, you will see it there.
it’s very easy, tap this command:ng –version
it will you also node and angulaar cli version!!
Very good your post!