
Ansible is an automation tool for managing multiple remote hosts from the single machine. It provides you with an easy to configure for a large number of remote hosts. For example, you are performing the same tasks over multiple machines, Ansible provides you the option to automate these tasks.
This tutorial will help you to install Ansible on Ubuntu 16.04 (Xenial) LTS systems.
Step 1 – Configure SSH Access
You can configure key based ssh for the remote Linux Ansible hosts. So password will not be required for SSH. Ansible also allows you to use a password for ssh, but key-based ssh is more secure.
Generate a ssh key pair on your Ansible server:
ssh-keygen
Copy the public key to all your remote hosts you need to connect via this ssh key.
ssh-copy-id -i ~/.ssh/id_rsa.pub ssh_user@remote_host
Step 2 – Install Ansible on Ubuntu 16.04
Ansible provides its official PPA for the installation on Ubuntu systems. Run the following command to configure Ansible PPA to your Ubuntu 18.04 system.
sudo apt-add-repository ppa:ansible/ansible
Then run the following commands to install Ansible:
sudo apt update
sudo apt install ansible
Step 3 – Configure Ansible Hosts & Groups
Your server is ready with Ansible for remote host management and automation. You can have a number of hosts you need and manage them with single Ansible server.
Here you need to define your remote systems in Ansible hosts file (/etc/ansible/hosts). You can also make groups of hosts with similar types. Here you need to properly organize your hosts into groups. Groups are used for performing one task on all remote hosts defined under it.
Edit Ansible hosts configuration file. For exmaple:
sudo nano /etc/ansible/hosts
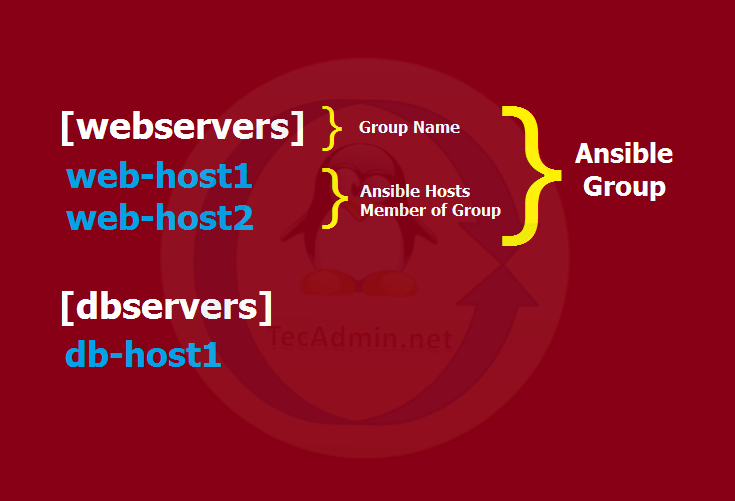
Add your hosts and organize them with groups. A host can be added under multiple groups.
[webservers]
web-host1
web-host2

[dbservers]
db-host1
The below image will help you to understand group and hosts under a group.
Single Host Vars Configuration
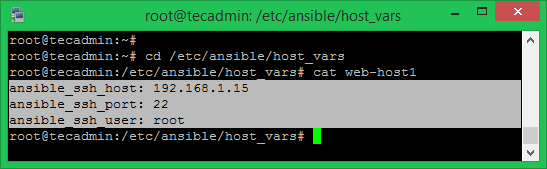
You need to define settings for your hosts. The host-specific file must be with the same name as host (eg: web-host1) under the host_vars directory.
sudo mkdir /etc/ansible/host_vars
sudo vi /etc/ansible/host_vars/web-host1
Add the SSH settings to this file for the web-host1.
ansible_ssh_host: 192.168.1.15
ansible_ssh_port: 22
ansible_ssh_user: root
In case you don’t have used Step 1 for the ssh connection for this host. You can also add one of the below methods to web-hosts1 configuration file for the authentication.
ansible_ssh_pass: secret_password
ansible_ssh_private_key_file: /home/rahul/.ssh/aws.pem
Group Vars Configuration
You can configure common variable settings of a Group under group configurations. The group file name must be same as the group name (eg: webservers) under group_vars directory.
sudo mkdir /etc/ansible/group_vars
sudo vi /etc/ansible/group_vars/webservers
Add the common variables to this file used by all the hosts added under this group.
ansible_ssh_port: 22
ansible_ssh_user: root
Step 4 – Test Ansible Setup
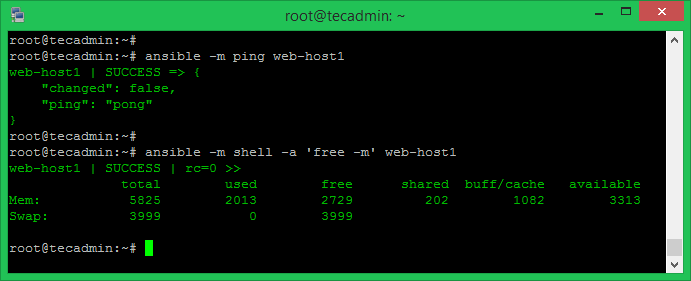
Your Ansible setup is ready for testing. To test all hosts connectivity using ping module like:
ansible -m ping all
To test connectivity for specific host or group of hosts
ansible -m ping web-host1        ## Specific host
ansible -m ping webservers       ## Specific group
You can also run a command using shell module. For example, test the free memory on web-host1. You can also perform the same task for a group. Just use group name instead of hostname.
ansible -m shell -a 'free -m' web-host1

 Cluster Using Ansible")