

Cloudflare is a content delivery network service that acts as a reverse proxy. It is widely used by websites to serve content through Cloudflare’s global network. When the website traffic is routed through Cloudflare, the backend servers logged the Cloudflare IP address instead of the original visitor IP address.
This tutorial will help you to enable Apache mod_cloudflare module on a Ubuntu system. Which will log the original visitor IP address to logs.
Install mod_cloudflare for Apache
Cloudflare provides an official module for the Apache server to capture real IP addresses. You need to enable the PPA of the Cloudflare module to your Ubuntu system.
- Firstly import the GPG key into your system:
curl -C - https://pkg.cloudflare.com/pubkey.gpg | sudo apt-key add - - Then create the PPA file with the below command:
echo "deb http://pkg.cloudflare.com/ `lsb_release -cs` main" | sudo tee /etc/apt/sources.list.d/cloudflare.list - Next, update Apt cache and install the libapache2-mod-cloudflare package on your Ubuntu system.
sudo apt updatesudo apt install libapache2-mod-cloudflare - Once the installation is completed, restart the Apache2 service and check the active modules using the following commands.
sudo service apache2 restart - Then list all the modules from the Apache web server.
sudo apache2ctl -M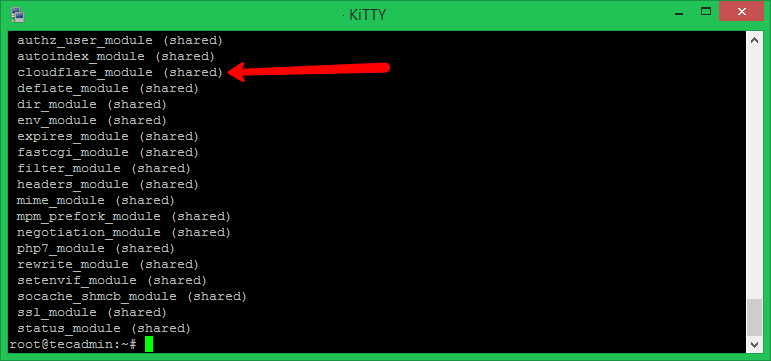
Conclusion
In this tutorial, you have learned to configure the Cloudflare module to Apache on the Ubuntu system.
How did it make you feel?




To save anyone else the time: 20.04 package is available now but not for ARM64 platform (Raspberry Pi).
not working…site not opening 502 gateway
This did not work.
Hi Mat,
What issue are you facing?
I guess you would need to update the instructions for Ubuntu 20.04
Here is the error which might help you to debug:
https://share.supremeopti.com/2020-09-30_15h32_34.jpg
Hi Rahul, It looks cloudflare has not build package for Ubuntu 20.04 yet. We have to wait for it.
Very helpful post. Thanks for sharing with us.