Prerequsities
You must have SSH with sudo privileges access to server for the Apache web server installation on Debian 10.
Install Apache on Debian 10
First of all, Login to your Debain 10 system via SSH and update the Apt cache. Then install Apache2 HTTP server packages as below:
sudo apt update
sudo apt install apache2
Manage Apache Service
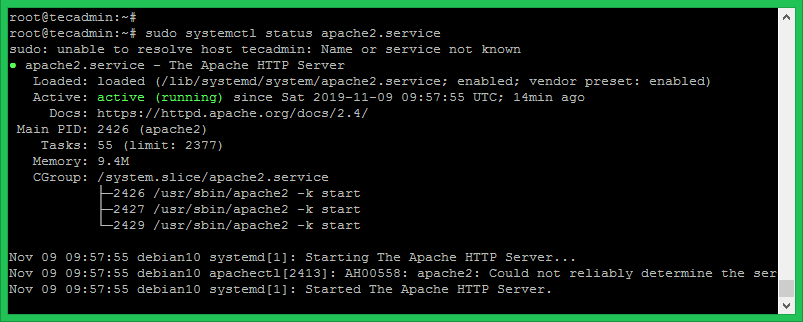
Apache service is managed with systemctl command line. After installation, use the following command to check the status of Apache service.
sudo systemctl status apache2.service
Here is the other commands to stop, start or restart Apache service via command line.
sudo systemctl stop apache2.service
sudo systemctl start apache2.service
sudo systemctl restart apache2.service
Test Apache Setup
You can view the installed Apache version details using the following command.
apache2 -v

Server version: Apache/2.4.38 (Debian)
Server built:   2019-10-15T19:53:42
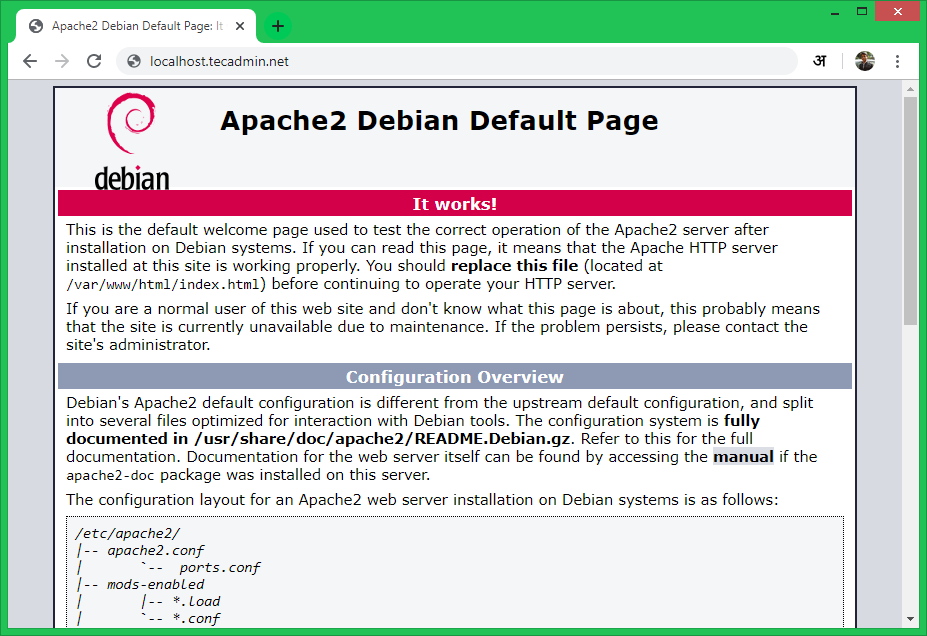
Now access your Apache server using the server’s IP address or a domain pointed to the server IP. You will see a default Apache page on web browser. It means Apache web server has successfully installed on your Debian 10 system.
Create Virtual Hosts
Let’s create the first virtual host on your Apache server. For the tutorial, we are using sample domain “example.com”. Here we will create a Virtual host for example.com on port 80.
Create a sample index file in a directory:
sudo mkdir -p /var/www/example.com
sudo echo "hello example.com" > /var/www/example.com/index.html
Then create Virtualhost configuration file and edit in editor:
sudo vim /etc/apache2/sites-available/example.com.conf
Add the following content in configuration file. You may change the domain name as per your domain.
1 2 3 4 5 6 7 8 9 10 11 12 | <VirtualHost *:80> ServerAdmin admin@example.com DocumentRoot /var/www/example.com ServerName example.com ServerAlias www.example.com <Directory /var/www/example.com> #Allowoverride all ###Uncomment if required </Directory> ErrorLog ${APACHE_LOG_DIR}/example.com_error.log CustomLog ${APACHE_LOG_DIR}/example.com_access.log combined </VirtualHost> |
Save the Virtualhost configuration file, then enable Virtualhost and reload the Apache service using the following commands:
sudo a2ensite example.com
sudo systemctl reload apache2.service
Configure SSL VirtualHost
You can skip this step if you don’t need SSL. But the security is always the primary concert for any website.
The default Apache https listen on port 443. Make sure no other services using the same port. Now, you need to enable Apache ssl module, which is disabled by default.
sudo a2enmod ssl
For the tutorial, I have followed these instructions to generate a self signed SSL certificate for our domain.
Then create a new Virtual host file and edit it:
sudo vim /etc/apache2/sites-available/example.com_ssl.conf
with the following content:
1 2 3 4 5 6 7 8 9 10 11 12 13 14 15 16 17 18 | <VirtualHost *:443> ServerAdmin admin@example.com DocumentRoot /var/www/example.com ServerName example.com ServerAlias www.example.com <Directory /var/www/example.com> #Allowoverride all ###Uncomment if required </Directory> SSLEngine on SSLCertificateFile /etc/pki/tls/certs/example.com.crt SSLCertificateKeyFile /etc/pki/tls/certs/example.com.key ErrorLog ${APACHE_LOG_DIR}/example.com_ssl-error.log CustomLog ${APACHE_LOG_DIR}/example.com_ssl-access.log combined </VirtualHost> |
Here is three terms used to configure SSL virtualhost:
- SSLEngine – Set this to “on”
- SSLCertificateFile – Set the path of your SSL certificate
- SSLCertificateKeyFile – This is the private key files used to generate SSL certificate
After that enable the Virtualhost and reload the Apache service using the following commands:
sudo a2ensite example.com_ssl
sudo systemctl reload apache2.service
Secure Apache Server
Edit the Apache security configuration file
sudo vim /etc/apache2/conf-enabled/security.conf
Here is the multiple security related settings. Add or Update the following settings. We are not going in detailed discriptions about it but these settings are very useful for the production servers.
1 2 3 4 5 6 7 8 | ServerTokens Prod ServerSignature Off TraceEnable Off Header always append X-Frame-Options SAMEORIGIN Header always set X-XSS-Protection: "1; mode=block" Header always set X-Content-Type-Options: "nosniff" Header always set Strict-Transport-Security "max-age=31536000; includeSubDomains" Header always edit Set-Cookie ^(.*)$ $1;HttpOnly;Secure |
Now edit SSL configuration file. Here you can set the server wide SSL protocol and SSLCipherSuite to use secure Cipers to serve your website.
sudo vim /etc/apache2/mods-enabled/ssl.conf
1 2 | SSLProtocol -all +TLSv1.2 SSLCipherSuite HIGH:!aNULL:!MD5 |
After making changes restart the Apache service to apply new configuration.
sudo systemctl reload apache2.service
Conclusion
All done, You have a secured Apache server running on your Debian 10 Linux system.


1 Comment
Good documentation and tips. thank’s.
I had just a mistake when I was configure the “Secure Apache Server”.
I had must to add a “headers” module :
a2enmod headers