
Apache Solr is a powerful, open-source search platform built on Apache Lucene. It’s widely used for enterprise search and analytics use cases and has a robust set of features like full-text search, real-time indexing, and more. In this guide, we will walk you through the steps to install Apache Solr 9 on Ubuntu 18.04 and 16.04 LTS systems.
Prerequisites
Before starting, ensure that you have:
- A system running Ubuntu 18.04
- Sudo privileges or access to the root user
- Basic knowledge of Linux terminal commands
Step 1: Update the System
First, update your system to ensure all existing packages are up to date:
sudo apt-get updatesudo apt-get upgrade
Step 2: Install Java
Apache Solr 9.4 requires Java to run. Check if Java is installed:
java -version
If Java is not installed, you can install the default JDK with the following command:
sudo apt install default-jdk
Step 3: Download Apache Solr
You can download the latest version of Solr from the Apache website. At the time of writing, the latest version is 9.4.
wget https://dlcdn.apache.org/solr/solr/9.4.1/solr-9.4.1.tgz
Step 4: Extract the Solr Installer
Once the download is complete, extract the Solr installation script:
tar xzf solr-9.4.1.tgz solr-9.4.1/bin/install_solr_service.sh --strip-components=2
Step 5: Install Solr
Now, install Solr using the script:
sudo bash ./install_solr_service.sh solr-9.4.1.tgz
This script will set up Solr as a service on Ubuntu.
Step 6: Start the Solr Service
After installation, you can start the Solr service:
sudo service solr start
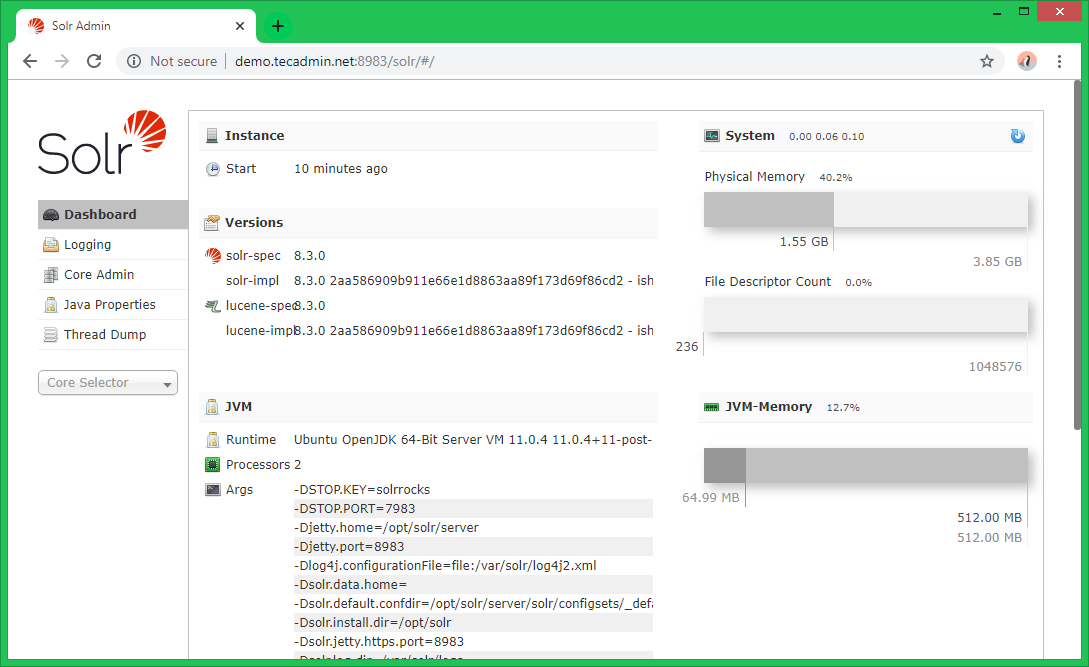
Step 7: Verify the Installation
To ensure Solr is running correctly, open your web browser and navigate to http://your_server_ip:8983/solr/. Replace your_server_ip with your actual server IP address. If Solr is running, you should see the Solr admin panel.
Step 8: Create a Solr Collection
Now, create your first Solr collection:
sudo su - solr -c "/opt/solr/bin/solr create -c mycol1 -n data_driven_schema_configs"

Step 9: Manage Solr Service
You can use the following commands to stop, start, and check the status of the Solr service:
- To stop Solr:
sudo service solr stop - To start Solr:
sudo service solr start - To check Solr status:
sudo service solr status
Conclusion
Congratulations! You have successfully installed Apache Solr 9.4 on Ubuntu 18.04. You can now start indexing your data and use Solr for your search applications. Remember to regularly check the official Apache Solr documentation for advanced configurations and best practices to get the most out of Solr.
Disclaimer: This guide is provided for informational and educational purposes only. Always test installations and configurations in a controlled environment before applying them to production systems.
16 Comments
Could u please tell how to run it in Cloud mode?
I run this code to create core:
sudo su – solr -c “/opt/solr-8.6.2/bin/solr create -c businesses -n data_driven_schema_configs”
It’s working fine but it stopped automatically after sometime, status for solr service is below please advice.
solr.service – LSB: Controls Apache Solr as a Service
Loaded: loaded (/etc/init.d/solr; bad; vendor preset: enabled)
Active: active (exited) since Tue 2020-01-21 16:38:58 UTC; 11h ago
Docs: man:systemd-sysv-generator(8)
Process: 22872 ExecStop=/etc/init.d/solr stop (code=exited, status=1/FAILURE)
Process: 22930 ExecStart=/etc/init.d/solr start (code=exited, status=0/SUCCESS)
Tasks: 0
Memory: 0B
CPU: 0
Jan 21 16:38:49 colab systemd[1]: solr.service: Unit entered failed state.
Jan 21 16:38:49 colab su[22935]: Successful su for solr by root
Jan 21 16:38:49 colab systemd[1]: solr.service: Failed with result ‘exit-code’.
Jan 21 16:38:49 colab su[22935]: + ??? root:solr
Jan 21 16:38:49 colab systemd[1]: Starting LSB: Controls Apache Solr as a Service…
Jan 21 16:38:49 colab su[22935]: pam_unix(su:session): session opened for user solr by (uid=0)
Jan 21 16:38:58 colab solr[22930]: [230B blob data]
Jan 21 16:38:58 colab solr[22930]: Started Solr server on port 8983 (pid=23000). Happy searching!
Jan 21 16:38:58 colab solr[22930]: [14B blob data]
Jan 21 16:38:58 colab systemd[1]: Started LSB: Controls Apache Solr as a Service.
In step 2 you have invalid url, I think you can use this url.
wget https://archive.apache.org/dist/lucene/solr/8.3.1/solr-8.3.1.tgz
Thanks Mykola, Tutorial has been updated
Thanks. I follow your steps and its Working fine
well, I could install it, until that point when I want to use SSL or login for admin as usually for a remote warehouse.. Could you explain that, too on newer Ubuntu and SolR.. 🙂
Great article, used to install solr 8.1.1 on ubuntu 16.04. But I cant open the examples provided.What should I follow?
Nice and clear. Thanks. Works fine with Solr 8.0.0 too.
Thank you for your article 🙂
Simple article but sweeTech at its best.
Thanks and Be blessed by the Divine.
Ganesh
Excellent guide! Thank you
Nice Article .. I have followed it working fine for me. now one doubt is after the creation of core will I have to create a schema.xml file .?? if yes then which location it will place.?? and how schema.xml will configure with solr .
I am very new in Solr if possible please let me know.
great 🙂
Nice article, Thank for the one.
I followed this guide and it worked. However, it didn’t say so directly in the text, but this will install Solr as a service that auto-starts when you (re)boot Ubuntu. I’m just saying, because I had a doubt and actually went and rebooted my Ubuntu server just to test if it would.