In today’s digital age, the demand for robust and secure web servers is at an all-time high. More and more businesses are shifting their operations online, and as such, the need for a secure, reliable, and efficient server is paramount. This comprehensive guide provides a detailed, step-by-step process of installing and securing one of the most widely used web servers in the world – Apache – on Ubuntu 20.04, a popular choice for many server environments due to its stability and strong community support.
The security of a web server is of utmost importance in this era of increasing cyber threats. That’s where Let’s Encrypt comes into play. Let’s Encrypt is a free, automated, and open certificate authority brought to you by the non-profit Internet Security Research Group (ISRG), which helps secure your website with HTTPS. This guide will not only walk you through the process of installing and configuring Apache but also show you how to strengthen your server security using Let’s Encrypt, ensuring a safer online presence.
Before We Start
Before begin your work:
- Running Ubuntu 20.04 system with sudo privileges shell access.
- Complete initial server setup instructions
- A domain name registered and pointed to your server’s public IP address. For this tutorial, we use webhost.tecadmin.net, which is pointed to our server.
Step 1 — Installing Apache
Apache packages are available under the default software repositories on Ubunts. You can easily install it using the conventional package management tool.
First of all, update the local package index to reflect the latest upstream changes. Then install Apache2 web server.
sudo apt update
sudo apt install apache2
After the confirmation, apt will install Apache and other required dependencies on your system.
Step 2 — Test Your Web Server
Once the installation finished, Apache service will automatically start on your Ubuntu system. You can find the Apache service status by running the following command:
sudo systemctl status apache2
Sample output:
● apache2.service - The Apache HTTP Server
     Loaded: loaded (/lib/systemd/system/apache2.service; enabled; vendor preset: enabled)
     Active: active (running) since Sun 2020-04-26 05:28:08 UTC; 10min ago
       Docs: https://httpd.apache.org/docs/2.4/
   Main PID: 15464 (apache2)
      Tasks: 55 (limit: 2283)
     Memory: 6.9M
     CGroup: /system.slice/apache2.service
             ├─15464 /usr/sbin/apache2 -k start
             ├─18646 /usr/sbin/apache2 -k start
             └─18647 /usr/sbin/apache2 -k start

Apr 26 05:28:08 tecadmin systemd[1]: Starting The Apache HTTP Server...
Apr 26 05:28:08 tecadmin systemd[1]: Started The Apache HTTP Server.
The result status like “Active: active (running)” means Apache service have started successfully. However, the best way to test web server, request a page from Apache in web browser.

You will see the default Apache landing page. It means the Apache web server is running properly on your system.
Step 3 — Create A Virtual Host
With the help of virtual hosts, you can host more than one domain from a single server. A virtual host encapsulate the configuration of a domain to it. We will set up a virtual host with a sub-domain called webhost.tecamin.net, but you should replace this with your own domain name.
Let’s start with a directory for our domain as follows:
sudo mkdir /var/www/webhost
sudo chmod -R 755 /var/www/webhost
sudo chown -R www-data:www-data /var/www/webhost
Next, create a sample index.html page to host on this subdomain. Edit this file in your favorite text editor like vim or nano:
nano /var/www/webroot/index.html
Add the following sample HTML content:
1 2 3 4 5 6 7 8 | <html> <head> <title>Welcome to TecAdmin.net!</title> </head> <body> <h1>Success!!!</h1> </body> </html> |
Save file and close it.
With the newly installed Apache server, you will see a default virtual host configuration file located at etc/apache2/sites-available/000-default.conf. But this is an good practice to create a separate configuration file for each virtual host. So create a new virtual host file as /etc/apache2/sites-available/webhost.tecadmin.net.conf:
sudo nano /etc/apache2/sites-available/webhost.tecadmin.net.conf
Add the following configuration to virtual host file. Make sure to change the proper ServerAdmin email address, Servername to your domain name. You can also include ServerAlias to add more domain or subdomains. Then set correct DocumentRoot as created above.
1 2 3 4 5 6 7 8 9 10 11 | <VirtualHost *:80> ServerAdmin webmaster@tecadmin.net ServerName webhost.tecadmin.net #ServerAlias www.webhost.tecadmin.net ##Uncomment it to use DocumentRoot /var/www/webhost <Directory /var/www/webhost> Allowoverride all </Directory> ErrorLog ${APACHE_LOG_DIR}/error.log CustomLog ${APACHE_LOG_DIR}/access.log combined </VirtualHost> |
Save file and close it.
By default Apache reads virtual host configuration files under /etc/apache2/sites-available directory. Use a2ensite tool to enable this virtual host:
sudo a2ensite webhost.tecadmin.net.conf
The above command will create a symbolic link webhost.tecadmin.net.conf file to sites-available directory.
Once done, run the below command to verify the configuration files:
sudo apache2ctl configtest
You should see the following output:
Syntax OK
Next, Restart Apache service to apply your changes:
sudo systemctl restart apache2
Apache is ready to serve your content on your configured domain name. You can test this by navigating to http://webhost.tecadmin.net,
Step 4 — Configure Let’s Encrypt SSL
We use Let’s encrypt SSL certificate to secure website on Apache web server. Certbot is the command line utility to work with Let’s encrypt certificates. Run the following command to install certbot binary:
sudo apt install python3-certbot-apache
This will install all the required packages for the certbot.
Once the installation process finished. Run the below command to request let’s encrypt certificate authority to issue certificate for our domain webhost.tecadmin.net. You can add multiple domains or subdomains using separate “-d” parameters.
certbot -d webhost.tecadmin.net
Wizard will ask your email address to send your updates. Then accept Terms of Service to continue. Below is the complete logs of command:
Saving debug log to /var/log/letsencrypt/letsencrypt.log
Plugins selected: Authenticator apache, Installer apache
Enter email address (used for urgent renewal and security notices) (Enter 'c' to
cancel): [email protected]

- - - - - - - - - - - - - - - - - - - - - - - - - - - - - - - - - - - - - - - -
Please read the Terms of Service at
https://letsencrypt.org/documents/LE-SA-v1.2-November-15-2017.pdf. You must
agree in order to register with the ACME server at
https://acme-v02.api.letsencrypt.org/directory
- - - - - - - - - - - - - - - - - - - - - - - - - - - - - - - - - - - - - - - -
(A)gree/(C)ancel: A

- - - - - - - - - - - - - - - - - - - - - - - - - - - - - - - - - - - - - - - -
Would you be willing to share your email address with the Electronic Frontier
Foundation, a founding partner of the Let's Encrypt project and the non-profit
organization that develops Certbot? We'd like to send you email about our work
encrypting the web, EFF news, campaigns, and ways to support digital freedom.
- - - - - - - - - - - - - - - - - - - - - - - - - - - - - - - - - - - - - - - -
(Y)es/(N)o: Y
Obtaining a new certificate
Performing the following challenges:
http-01 challenge for webhost.tecadmin.net
Enabled Apache rewrite module
Waiting for verification...
Cleaning up challenges
Created an SSL vhost at /etc/apache2/sites-available/webhost.tecadmin.net-le-ssl.conf
Enabled Apache socache_shmcb module
Enabled Apache ssl module
Deploying Certificate to VirtualHost /etc/apache2/sites-available/webhost.tecadmin.net-le-ssl.conf
Enabling available site: /etc/apache2/sites-available/webhost.tecadmin.net-le-ssl.conf

Please choose whether or not to redirect HTTP traffic to HTTPS, removing HTTP access.
- - - - - - - - - - - - - - - - - - - - - - - - - - - - - - - - - - - - - - - -
1: No redirect - Make no further changes to the webserver configuration.
2: Redirect - Make all requests redirect to secure HTTPS access. Choose this for
new sites, or if you're confident your site works on HTTPS. You can undo this
change by editing your web server's configuration.
- - - - - - - - - - - - - - - - - - - - - - - - - - - - - - - - - - - - - - - -
Select the appropriate number [1-2] then [enter] (press 'c' to cancel): 2
Enabled Apache rewrite module
Redirecting vhost in /etc/apache2/sites-enabled/webhost.tecadmin.net.conf to ssl vhost in /etc/ap                         ache2/sites-available/webhost.tecadmin.net-le-ssl.conf

- - - - - - - - - - - - - - - - - - - - - - - - - - - - - - - - - - - - - - - -
Congratulations! You have successfully enabled https://webhost.tecadmin.net

You should test your configuration at:
https://www.ssllabs.com/ssltest/analyze.html?d=webhost.tecadmin.net
- - - - - - - - - - - - - - - - - - - - - - - - - - - - - - - - - - - - - - - -

IMPORTANT NOTES:
 - Congratulations! Your certificate and chain have been saved at:
   /etc/letsencrypt/live/webhost.tecadmin.net/fullchain.pem
   Your key file has been saved at:
   /etc/letsencrypt/live/webhost.tecadmin.net/privkey.pem
   Your cert will expire on 2020-07-25. To obtain a new or tweaked
   version of this certificate in the future, simply run certbot again
   with the "certonly" option. To non-interactively renew *all* of
   your certificates, run "certbot renew"
 - Your account credentials have been saved in your Certbot
   configuration directory at /etc/letsencrypt. You should make a
   secure backup of this folder now. This configuration directory will
   also contain certificates and private keys obtained by Certbot so
   making regular backups of this folder is ideal.
 - If you like Certbot, please consider supporting our work by:

   Donating to ISRG / Let's Encrypt:   https://letsencrypt.org/donate
   Donating to EFF:                    https://eff.org/donate-le
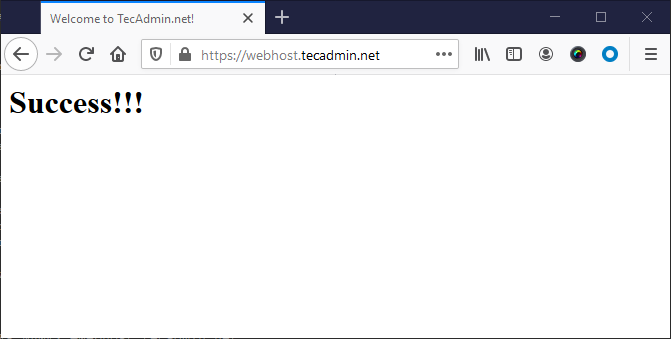
You have successfully configured you domain with SSL certificate. Now, you can access your domain over https protocol as shown in the screenshot below:
Step 5 — Adjust Firewall Rules
You can use the service name like “http” or “https” to allow in UFW. To open HTTP and HTTPS port in FirewallD run the below commands:
sudo ufw allow https
Step 6 — Manage Apache Service
Now, you have your Apache web server up and running, let’s go with the Apache service management commands.
To stop Apache web server, type:
sudo systemctl stop apache2
To start Apache web server (if stopped), type:
sudo systemctl start apache2
To restart (stop and then start) Apache service, type:
sudo systemctl restart apache2
Instead of stop then start a running server, use reload option to apply configuration file changes without dropping current connections. But this will not read any new configuration file:
sudo systemctl reload apache2
To disable Apache service to auto start on system boot, type:
sudo systemctl disable apache2
To enable Apache service to auto start on system boot, type:
sudo systemctl enable apache2
Conclusion
In conclusion, setting up a web server is no longer a task solely for the IT department or tech-savvy individuals. With this step-by-step guide, you can install Apache on Ubuntu 20.04 and secure it with Let’s Encrypt, irrespective of your tech background. We have dissected each step, making the process easy to understand and follow.
Remember, a secure and efficient web server is crucial for any online operation. Apache, combined with the security enhancement of Let’s Encrypt, offers a powerful, reliable, and secure solution for your online needs. So whether you’re launching your first website, looking to enhance your current site’s security, or simply wish to learn more about server setup and management, this guide serves as an invaluable tool. With the knowledge you have gained from this guide, you can ensure your online presence is both strong and secure.

2 Comments
How would I add proftpd so I can upload my website and upload data files
Well, I know it is late, but.
You should not use ftp protocol for anything where you enter your login and password, and then send it is clear on the net. Just start wireshark if you want to know why.
Use ssh, scp or sftp, which is all based on ssh-protocol, which encrypt passwords, and also check against man-in-the-middle attacks (some one fake your server, and forward everything you write to the server, while it log your login and password, which is easy with ftp, and really hard with sftp, scp or ssh).
You can even set up ssh keys in ~/.ssh so you don’t need to re enter passwords/credentials on each connection after the first (if you run ssh-agent that handles user certificates you have added with ssh-add command).